Sony MCC-1000MD Operating Instructions - Page 53
Using Two Cameras to Shoot 3D Images, Locking CCU Operations
 |
View all Sony MCC-1000MD manuals
Add to My Manuals
Save this manual to your list of manuals |
Page 53 highlights
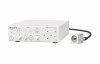
Using Two Cameras to Shoot 3D Images Locking CCU Operations You can shoot 3D images by using two units connected as described below. To connect two units, use a commerciallyavailable 75 Ω coaxial cable. Recommended cable: 5CFB, length of 1 m (3.3 ft) or less 1 Using a commercially-available 75 Ω coaxial cable, connect the first unit's 3D-SYNC OUT connector on the CCU to the second unit's 3D-SYNC IN connector on the CCU. Unit 1 You can lock button and knob operations on the front panel of the CCU by pressing the LOCK button on the front panel. The LOCK button lights while operations are locked. When a button or knob other than the 1 (on/standby) switch or LOCK button is operated while operations are locked, the LOCK button blinks and a warning message is displayed on the connected video monitor. Note Operations for the 1 (on/standby) switch and LOCK button will not be locked. LOCK button Unit 2 Releasing the lock Press the LOCK button again. 2 Set the video format and image quality settings so that they match on both units. Notes • When adjusting the installation of two camera heads, be sure to keep 3D standards in mind so as not to adversely effect human subjects. • Use camera cables of equal length for both of the cameras. 53
-
 1
1 -
2
-
3
-
4
-
5
-
6
-
7
-
8
-
9
-
10
-
11
-
12
-
13
-
14
-
15
-
16
-
17
-
18
-
19
-
20
-
21
-
22
-
23
-
24
-
25
-
26
-
27
-
28
-
29
-
30
-
31
-
32
-
33
-
34
-
35
-
36
-
37
-
38
-
39
-
40
-
41
-
42
-
43
-
44
-
45
-
46
-
47
-
 48
48 -
 49
49 -
 50
50 -
 51
51 -
 52
52 -
 53
53 -
 54
54 -
 55
55 -
 56
56 -
 57
57 -
 58
58 -
59
-
60
-
61
 |
 |
