Sony MHS-CM1/D Instruction Manual - Page 20
Connecting to a non-high-definition 16:9 wide or 4:3 TV
 |
UPC - 027242762992
View all Sony MHS-CM1/D manuals
Add to My Manuals
Save this manual to your list of manuals |
Page 20 highlights
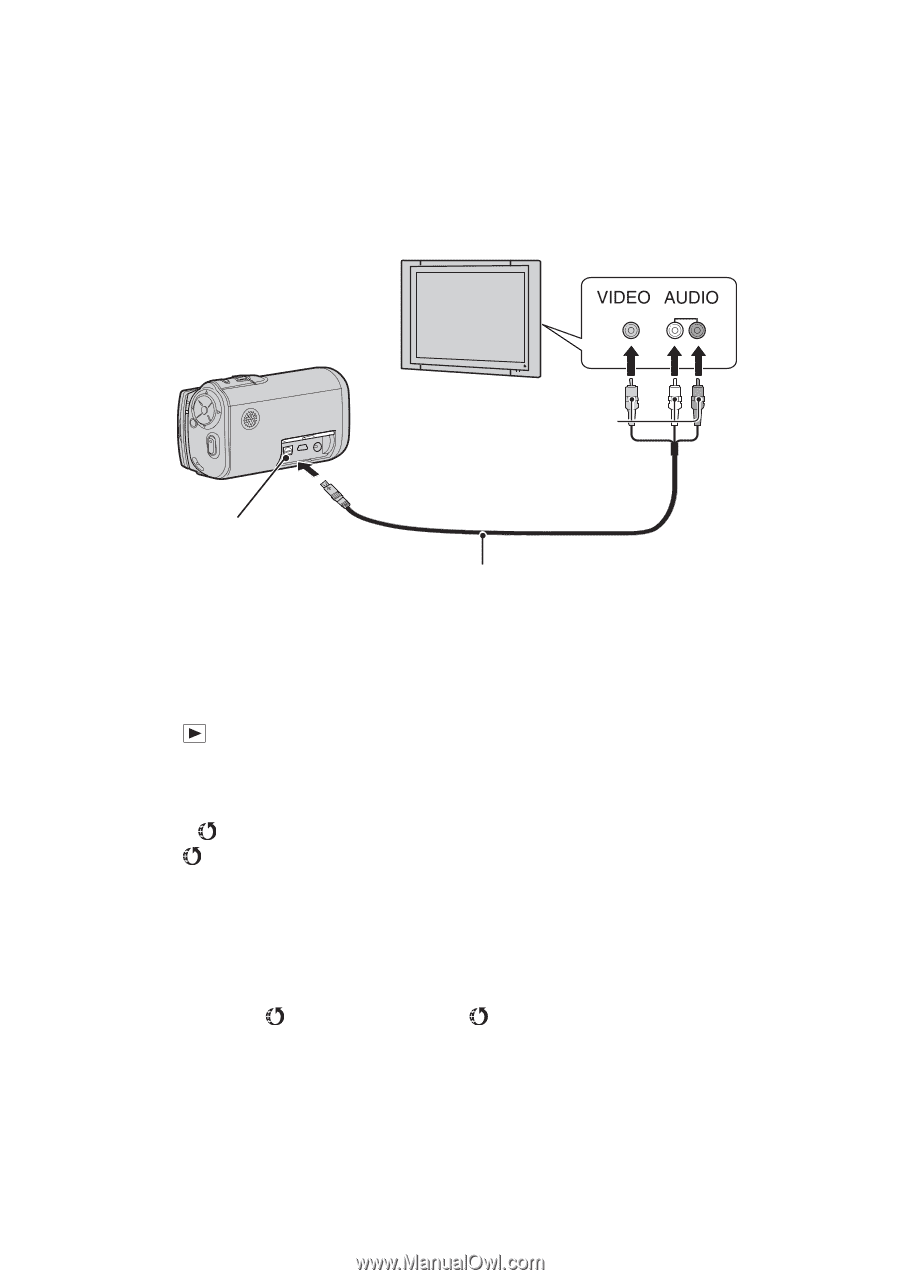
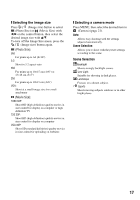
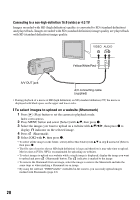
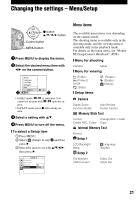
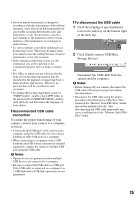
Connecting to a non-high-definition 16:9 (wide) or 4:3 TV Images recorded with HD (high definition) quality is converted to SD (standard definition) and played back. Images recorded with SD (standard definition) image quality are played back with SD (standard definition) image quality. Yellow/White/Red A/V OUT jack A/V connecting cable (supplied) • During playback of a movie at HD (high definition) on SD (standard definition) TV, the movie is displayed with black space on the upper and lower sides. [ To select images to upload on a website (Sharemark) 1 Press (Play) button to set the camera to playback mode. Index screen appears. 2 Press MENU button and select [Select] with v/V, then press z. 3 Select the images you want to upload on a website with v/V/b/B, then press z to display indicator on the selected image. 4 Press (Sharemark). 5 Select [OK] with B, then press z. • To select all the images in the folder, select [All In This Folder] with v/V in step 2 instead of [Select], then press z. • The file size of movies shot at HD (high definition) is large and therefore it may take time to upload. Movies shot at [VGA 30P] is recommended for uploading on websites. • To select images to upload on a website while a single image is displayed, display the image you want to upload and press (Sharemark) button. The indicator is marked to the image. • To remove the Sharemark from an image, select the image to remove the Sharemark and take the same steps as when marking a Sharemark on an image. • By using the software "PMB Portable" embedded in the camera, you can easily upload images marked with Sharemarks (page 24). 20
-
 1
1 -
2
-
3
-
4
-
5
-
6
-
7
-
8
-
9
-
10
-
11
-
12
-
13
-
14
-
 15
15 -
 16
16 -
 17
17 -
 18
18 -
 19
19 -
 20
20 -
 21
21 -
 22
22 -
 23
23 -
 24
24 -
 25
25 -
26
-
27
-
28
-
29
-
30
-
31
-
32
-
33
-
34
-
35
-
36
-
37
-
38
-
39
-
40
 |
 |