Sony PCWA-A200 Access Point Help File - Page 30
LAN mode, Re-install the Wireless LAN PC Card.
 |
View all Sony PCWA-A200 manuals
Add to My Manuals
Save this manual to your list of manuals |
Page 30 highlights
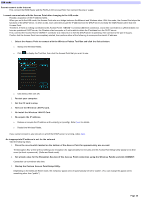
LAN mode Cannot connect to the Internet First, connect the ISDN Router and the PCWA-A100 Access Point, then connect the pow er supply. I cannot com m unicate w ith the Access Point after changing to the LAN m ode. Possibly, acquisition of the IP address failed. When you set to the LAN mode, the Access Point acts as a bridge betw een the Ethernet and Wireless sides. With this mode, the Access Point stops the functions of the DHCP server. In other w ords, each client tries to get the IP address from the DHCP server (normally the ISDN Router) other than the Access Point. Therefore, if there is nothing connected to the Access Point's 10BASE-T connector (Ethernet connector), and w hen connected to a LAN that does not have an operational DHCP server, the Wireless client computer w ill not be able to obtain the IP address from the DHCP server. First, connect the Access Point's 10BASE-T connector to a netw ork on w hich the DHCP server is operating, then connect to the pow er supply. Confirm that the Access Point has completely started, then perform either of the follow ing to re-acquire the client's IP address. 1. Se le ct the Acce s s Point to conne ct w ith the Wire le s s Pale tte Tool Box and click the Se le ct button. o Startup the Wireless Palette. o Click to display the Tool Box, then click the Access Point that you w ant to use. o Click Select, then click OK. 2. Re s tart your com pute r. 3. Se t the PC card to s top. 4. Re m ove the Wire le s s LAN PC Card. 5. Re -ins tall the Wire le s s LAN PC Card. 6. Re -acquire the IP addres s . o Release or acquire the IP address w ith w inipcfg (or ipconfig). Refer here for details. o Restart the Wireless Palette. If you cannot connect to any netw ork on w hich the DHCP server is running, refere here. An inappropriate IP address is set for the netw ork Take the follow ing steps. 1. Press the reset sw itch located on the bottom of the Access Point for approxim ately one second. The Encryption Key w ill be w ithout settings (no encryption) for approximately five minutes and the Access Point Setup Utility passw ord w ill be unset (w ithout a passw ord). (Softw are Reset mode) 2. Se t a blank value for the Encryption Ke y box of this Acce s s Point conne ction using the Wire le s s Pale tte and click CONNECT. Connection can sometimes take time. 3. Startup the Custom Access Point Setup Utility. Depending on the Softw are Reset mode, the ex-factory passw ord w ill automatically be set to "public". (You can change this passw ord to something other than "public".) Page 30
-
 1
1 -
2
-
3
-
4
-
5
-
6
-
7
-
8
-
9
-
10
-
11
-
12
-
13
-
14
-
15
-
16
-
17
-
18
-
19
-
20
-
21
-
22
-
23
-
24
-
 25
25 -
 26
26 -
 27
27 -
 28
28 -
 29
29 -
 30
30 -
 31
31 -
 32
32 -
 33
33 -
 34
34 -
 35
35 -
36
-
37
-
38
-
39
-
40
-
41
-
42
-
43
-
44
-
45
-
46
-
47
-
48
-
49
-
50
-
51
-
52
-
53
-
54
-
55
-
56
-
57
-
58
-
59
-
60
-
61
 |
 |
