Sony RCD-W2000ES Operating Instructions (primary manual) - Page 26
Recording on a CD-R or, CD-RW Manually
 |
View all Sony RCD-W2000ES manuals
Add to My Manuals
Save this manual to your list of manuals |
Page 26 highlights
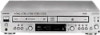
To stop recording Press x. To record only your favorite CD tracks You can record only your favorite CD tracks using Program Play. Between steps 1 and 2, perform steps 1 to 4 of "Creating Your own Program (Program Play)" (page 19). Note When Program Play is selected, you cannot perform Make-Disc Synchro-Recording. To record from several discs In step 1, set the play mode to "ALL DISCS" or "PGM" and program the discs you want to record, then proceed to step 2. Notes • When the play mode is set to "ALL DISCS", the recording starts from the disc whose indicator lights in green. Then the following discs are recorded. (After Disc 5, Disc 1 is selected). • If you select "ALL DISCS" even though you want to record only one disc, discs you did not intend to record may be recorded. Recording on a CD-R or CD-RW Manually You can start recording from the end of the existing material. Before recording, see page 21. When using the remote, set DECK A/DECK B to DECK B. • After recording, you must finalize the disc. Until the disc is properly finalized, it cannot be played on any CD players. See "Finalizing a CD-R or CD-RW" on page 30. OPEN/CLOSE INPUT DECK A/DECK B Nx X REC z INPUT H X REC z x 1 Turn on the amplifier and the sound source, and then select the sound source on the amplifier. 2 Press OPEN/CLOSE of DECK B and place a recordable CD-R or CD-RW on DECK B. Press OPEN/CLOSE again to close the disc tray. With the label side up 26
-
 1
1 -
2
-
3
-
4
-
5
-
6
-
7
-
8
-
9
-
10
-
11
-
12
-
13
-
14
-
15
-
16
-
17
-
18
-
19
-
20
-
 21
21 -
 22
22 -
 23
23 -
 24
24 -
 25
25 -
 26
26 -
 27
27 -
 28
28 -
 29
29 -
 30
30 -
 31
31 -
32
-
33
-
34
-
35
-
36
-
37
-
38
-
39
-
40
-
41
-
42
-
43
-
44
 |
 |
