Sony STR-DA3400ES Operating Instructions (Large File - 15.18 MB) - Page 119
Selecting a preset channel, Press PRESET + or PRESET
 |
View all Sony STR-DA3400ES manuals
Add to My Manuals
Save this manual to your list of manuals |
Page 119 highlights
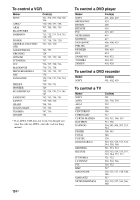
Presetting satellite tuner channels 1 Select a channel you want to preset. For details on this operation, see "Selecting channels from a category (CATEGORY TUNING)". 2 Press SHIFT and then press ENT/MEM. "MEM" lights up on the display window. 3 Press PRESET + or PRESET - to select a preset number. You can also select the number by pressing the numeric buttons. Preset numbers from 1 to 30 are available. Channel 1 is preset for the preset numbers when you purchase the receiver. 4 Press ENT/MEM. 5 Repeat steps 1 to 4 to preset another station. Selecting a preset channel 1 Press XM to select "XM RADIO" or press SIRIUS to select "SIRIUS". 2 Press PRESET+ or PRESET - repeatedly to select the preset channel you want. You can also press SHIFT and then press the numeric buttons to select the preset channel you want. Then, press to enter the selection. You can also press TUNING MODE on the receiver repeatedly to select "PRESET", then turn TUNING +/- to select the preset channel you want. Operating the output to zone 2 For details on the connections and settings of zone 2, see "Using multi-zone features" (page 103). The following operations are described for connecting an IR repeater and operating the receiver in zone 2. When an IR repeater is not connected, use this receiver in the main zone. THEATER SHIFT TV ZONE AMP 1 2 3 TV INPUT VIDEO1 VIDEO2 BD DVD 4 SAT 7 TUNER -/-- 5 TV 8 PHONO 0/10 6 WIDE MD/ TAPE SA-CD/ CD 9 D.TUNING MULTI IN DMPORT ENT/MEM CLEAR HDMI1 HDMI2 HDMI3 HDMI4 XM SIRIUS 2CH/ A.DIRECT A.F.D. SOURCE MOVIE MUSIC INPUT NIGHT RESOLUTION MODE SLEEP MODE GUI MODE 1 2 4 HOME CATEGORY TUNING CATEGORY MODE TUNING DISC SKIP 5 BD/DVD TOP MENU MENU F1 F2 MACRO 1 MACRO 2 1 Turn on the main receiver (this receiver). 2 Press ZONE. The remote switches to zone 2 mode. Other Operations continued 119US
-
 1
1 -
2
-
3
-
4
-
5
-
6
-
7
-
8
-
9
-
10
-
11
-
12
-
13
-
14
-
15
-
16
-
17
-
18
-
19
-
20
-
21
-
22
-
23
-
24
-
25
-
26
-
27
-
28
-
29
-
30
-
31
-
32
-
33
-
34
-
35
-
36
-
37
-
38
-
39
-
40
-
41
-
42
-
43
-
44
-
45
-
46
-
47
-
48
-
49
-
50
-
51
-
52
-
53
-
54
-
55
-
56
-
57
-
58
-
59
-
60
-
61
-
62
-
63
-
64
-
65
-
66
-
67
-
68
-
69
-
70
-
71
-
72
-
73
-
74
-
75
-
76
-
77
-
78
-
79
-
80
-
81
-
82
-
83
-
84
-
85
-
86
-
87
-
88
-
89
-
90
-
91
-
92
-
93
-
94
-
95
-
96
-
97
-
98
-
99
-
100
-
101
-
102
-
103
-
104
-
105
-
106
-
107
-
108
-
109
-
110
-
111
-
112
-
113
-
 114
114 -
 115
115 -
 116
116 -
 117
117 -
 118
118 -
 119
119 -
 120
120 -
 121
121 -
 122
122 -
 123
123 -
 124
124 -
125
-
126
-
127
-
128
-
129
-
130
-
131
-
132
-
133
-
134
-
135
-
136
-
137
-
138
-
139
-
140
-
141
-
142
-
143
-
144
 |
 |
