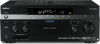
Sony STR-DA4300ES Operating Instructions (Large File - 20.21 MB) - Page 138
Video, Tuner, The MULTI CHANNEL DECODING lamp
 |
UPC - 027242715127
View all Sony STR-DA4300ES manuals
Add to My Manuals
Save this manual to your list of manuals |
Page 138 highlights
Recording cannot be carried out. • Check that the components are connected correctly (page 21). • Select the source component using INPUT SELECTOR (page 51). The MULTI CHANNEL DECODING lamp does not light up in blue. • Check that the playback component is connected on a digital jack and the input is selected properly on this receiver. • Check whether the input source of the software being played back corresponds to the multi-channel format. • Check whether the setup on the playback component is set to multi-channel sound. • Check to make sure the selected audio (digital) input jack is not assigned to other inputs in "Input Assign" in the Input menu (page 98). There is no sound from the component connected to the DIGITAL MEDIA PORT adapter. • Adjust the volume of this receiver. • The DIGITAL MEDIA PORT adapter and/or component is not connected correctly. Turn off the receiver, then reconnect the DIGITAL MEDIA PORT adapter and/or component. • Check the DIGITAL MEDIA PORT adapter and/or component device to make sure it supports this receiver. Video There is no picture or an unclear picture appears on the TV screen or monitor. • Select the appropriate input on the receiver (page 51). • Set your TV to the appropriate input mode. • Move your TV away from the audio components. • Assign the component video input correctly. • The input signal should be same as input when you are up-converting an input signal with this receiver (page 33). The image of the COMPONENT VIDEO OUT is corrupted. • Video input signals other than 480p component are not received when signals are output from the VIDEO jack. Input 480i component video signals. • When component input signals other than 480p are output, use the COMPONENT VIDEO OUT jack and set "Resolution" to "DIRECT." Images of the source with HDMI connection is not output to the TV. • Make sure that cables are correctly and securely connected to components. • Depending on the playback component, component may need to be set up. Refer to the operating instructions supplied with the each component. • Be sure to use a connecting cable for the HDMI jack corresponding to high speed (an HDMI version1.3a, category 2 cable) when you view images or listen to sound during a DeepColor transmission. Recording cannot be carried out. • Check that the components are connected correctly (page 26). • Select the source component using INPUT SELECTOR (page 51). The GUI does not appear on the TV screen. • Press SHIFT, then press MENU to show "GUI MODE" on the display. • Check the TV is connected correctly. Tuner The FM reception is poor. • Use a 75-ohm coaxial cable (not supplied) to connect the receiver to an outdoor FM antenna (aerial) as shown below. If you connect the receiver to an outdoor antenna 138GB
-
 1
1 -
2
-
3
-
4
-
5
-
6
-
7
-
8
-
9
-
10
-
11
-
12
-
13
-
14
-
15
-
16
-
17
-
18
-
19
-
20
-
21
-
22
-
23
-
24
-
25
-
26
-
27
-
28
-
29
-
30
-
31
-
32
-
33
-
34
-
35
-
36
-
37
-
38
-
39
-
40
-
41
-
42
-
43
-
44
-
45
-
46
-
47
-
48
-
49
-
50
-
51
-
52
-
53
-
54
-
55
-
56
-
57
-
58
-
59
-
60
-
61
-
62
-
63
-
64
-
65
-
66
-
67
-
68
-
69
-
70
-
71
-
72
-
73
-
74
-
75
-
76
-
77
-
78
-
79
-
80
-
81
-
82
-
83
-
84
-
85
-
86
-
87
-
88
-
89
-
90
-
91
-
92
-
93
-
94
-
95
-
96
-
97
-
98
-
99
-
100
-
101
-
102
-
103
-
104
-
105
-
106
-
107
-
108
-
109
-
110
-
111
-
112
-
113
-
114
-
115
-
116
-
117
-
118
-
119
-
120
-
121
-
122
-
123
-
124
-
125
-
126
-
127
-
128
-
129
-
130
-
131
-
132
-
 133
133 -
 134
134 -
 135
135 -
 136
136 -
 137
137 -
 138
138 -
 139
139 -
 140
140 -
 141
141 -
 142
142 -
 143
143 -
144
-
145
-
146
-
147
-
148
-
149
-
150
-
151
-
152
-
153
-
154
-
155
-
156
-
157
-
158
-
159
-
160
-
161
-
162
-
163
-
164
-
165
-
166
-
167
-
168
-
169
-
170
-
171
-
172
-
173
-
174
-
175
-
176
-
177
-
178
-
179
-
180
-
181
-
182
-
183
-
184
-
185
-
186
-
187
-
188
-
189
-
190
-
191
-
192
-
193
-
194
-
195
-
196
-
197
-
198
-
199
-
200
-
201
-
202
-
203
-
204
-
205
-
206
-
207
-
208
-
209
-
210
-
211
-
212
-
213
-
214
-
215
-
216
-
217
-
218
-
219
-
220
-
221
-
222
-
223
-
224
-
225
-
226
-
227
-
228
-
229
-
230
-
231
-
232
-
233
-
234
-
235
-
236
-
237
-
238
-
239
-
240
-
241
-
242
-
243
-
244
-
245
-
246
-
247
-
248
-
249
-
250
-
251
-
252
-
253
-
254
-
255
-
256
-
257
-
258
-
259
-
260
-
261
-
262
-
263
-
264
-
265
-
266
-
267
-
268
-
269
-
270
-
271
-
272
-
273
-
274
-
275
-
276
-
277
-
278
-
279
-
280
-
281
-
282
-
283
-
284
-
285
-
286
-
287
-
288
-
289
-
290
-
291
-
292
-
293
-
294
-
295
-
296
-
297
-
298
-
299
-
300
-
301
-
302
 |
 |
