Sony VRDMC6 Operating Instructions - Page 37
About operation of DVDirect - dvdirect dvd recorder manual
 |
UPC - 027242767805
View all Sony VRDMC6 manuals
Add to My Manuals
Save this manual to your list of manuals |
Page 37 highlights
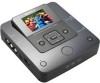
About operation of DVDirect After the power is turned on, the DVDirect automatically detects inserted memory cards, discs, and input signals from connected devices. A message indicating how to prepare for recording then appears in the display window. By this message, you can automatically move on to the recording procedure you intended without complicated button operations. The [Menu] display appears when the RETURN button is pressed after the power is turned on. You can perform recording procedures manually by selecting options from the menu. The menu items are as follows. , Preparations for Recording Menu Video b DVD Photo b DVD DVD Preview AVCHD Dubbing Setup Function Copy a SD (Standard Definition) video to a disc. Copy photos to a disc. Playback a created disc. Record HD (High Definition) video to a disc. Configure various settings. Notes on copying multiple types of image When multiple image types are recorded in a camera or memory card the image is copied as follows in this manual. (Images are copied in the following order: HD (High Definition) video - SD (Standard Definition) video - photo.) Types of image recorded in camera/memory card HD (High SD (Standard Definition) video Definition) video Photo a a a a a a a a a Type of image to be copied HD (High Definition) video HD (High Definition) video HD (High Definition) video SD (Standard Definition) video To copy SD (Standard Definition) video, use [Video b DVD] in the [Menu] screen. To copy a photo, use [Photo b DVD] in the [Menu] screen. 37
-
 1
1 -
2
-
3
-
4
-
5
-
6
-
7
-
8
-
9
-
10
-
11
-
12
-
13
-
14
-
15
-
16
-
17
-
18
-
19
-
20
-
21
-
22
-
23
-
24
-
25
-
26
-
27
-
28
-
29
-
30
-
31
-
 32
32 -
 33
33 -
 34
34 -
 35
35 -
 36
36 -
 37
37 -
 38
38 -
 39
39 -
 40
40 -
 41
41 -
 42
42 -
43
-
44
-
45
-
46
-
47
-
48
-
49
-
50
-
51
-
52
-
53
-
54
-
55
-
56
-
57
-
58
-
59
-
60
-
61
-
62
-
63
-
64
-
65
-
66
-
67
-
68
-
69
-
70
-
71
-
72
-
73
-
74
-
75
-
76
-
77
-
78
-
79
-
80
-
81
-
82
-
83
-
84
-
85
-
86
-
87
-
88
-
89
-
90
-
91
-
92
 |
 |
