Sony VRDVC20 Operating Instructions - Page 23
and set it in the playback pause mode., On the video device, search the start point you want to record
 |
View all Sony VRDVC20 manuals
Add to My Manuals
Save this manual to your list of manuals |
Page 23 highlights
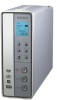
Stand-alone Operation - Using the Drive as a DVD Recorder 4 Select the recording conditions. Display a desired signal by pressing INPUT SELECT. Each time you press the button, [VIDEO], [S-VIDEO], or [DV] appears in sequence. If you have connected an S video cable, display [S-VIDEO]. If you have connected an i.LINK cable, display [DV]. Turn off [SYNC] by pressing SYNC. SYNC INPUT SELECT To select a recording mode, see "Selecting a recording mode" on page 25. To select a chapter interval, see "Selecting a chapter interval" on page 25. To select how to start playback, see "Selecting automatic playback mode" on page 26. 5 On the video device, search the start point you want to record and set it in the playback pause mode. 6 Press REC on the drive, and start playback on the connected device. [Recording] appears on the display window and the REC button lights up during recording. [SIG] on the display window indicates that the drive is receiving signals from the connected device. REC . Continued 23
-
 1
1 -
2
-
3
-
4
-
5
-
6
-
7
-
8
-
9
-
10
-
11
-
12
-
13
-
14
-
15
-
16
-
17
-
 18
18 -
 19
19 -
 20
20 -
 21
21 -
 22
22 -
 23
23 -
 24
24 -
 25
25 -
 26
26 -
 27
27 -
 28
28 -
29
-
30
-
31
-
32
-
33
-
34
-
35
-
36
-
37
-
38
-
39
-
40
-
41
-
42
-
43
-
44
-
45
-
46
-
47
-
48
-
49
-
50
-
51
-
52
-
53
-
54
-
55
-
56
 |
 |
