Stihl FC 70 Product Instruction Manual - Page 17
Mounting the Cutting Blade
 |
View all Stihl FC 70 manuals
Add to My Manuals
Save this manual to your list of manuals |
Page 17 highlights
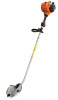
Mounting the Cutting Blade 1 forth together with the thrust washer (4) until the pin slips into position and blocks the shaft. N Fit the combination wrench (5) on the nut (6). N Loosen and unscrew the nut clockwise (left-hand thread). N Remove the thrust washer. English If the cup spring (10) on the nut (6) has lost its tension, fit a new nut. 241BA006 KN N Lay the power edger on its back so 7 that the blade mounting (1) faces up. 5 10 6 47 9 8 241BA012 KN 6 2 4 3 N Place the blade (7) on the thrust plate (8). 241BA011 KN N Insert the stop pin (2) or screwdriver - see "Special Accessories" - into the hole (3) as far as stop - apply slight pressure and turn back and Collar (see arrow) must engage the blade's mounting hole. N Fit the thrust washer (4) on the shaft (9) and block the shaft. N Screw the mounting nut (6) on to the shaft counterclockwise and tighten it down firmly. FC 70 C 15
-
 1
1 -
2
-
3
-
4
-
5
-
6
-
7
-
8
-
9
-
10
-
11
-
 12
12 -
 13
13 -
 14
14 -
 15
15 -
 16
16 -
 17
17 -
 18
18 -
 19
19 -
 20
20 -
 21
21 -
 22
22 -
23
-
24
-
25
-
26
-
27
-
28
-
29
-
30
-
31
-
32
-
33
-
34
-
35
-
36
-
37
-
38
-
39
-
40
-
41
-
42
-
43
-
44
-
45
-
46
-
47
-
48
-
49
-
50
-
51
-
52
-
53
-
54
-
55
-
56
-
57
-
58
-
59
-
60
-
61
-
62
-
63
-
64
-
65
-
66
-
67
-
68
-
69
-
70
-
71
-
72
-
73
-
74
-
75
-
76
-
77
-
78
-
79
-
80
-
81
-
82
-
83
-
84
 |
 |
