Stihl FS 55 R Product Instruction Manual
Stihl FS 55 R Manual
 |
View all Stihl FS 55 R manuals
Add to My Manuals
Save this manual to your list of manuals |
Stihl FS 55 R manual content summary:
- Stihl FS 55 R | Product Instruction Manual - Page 1
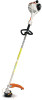
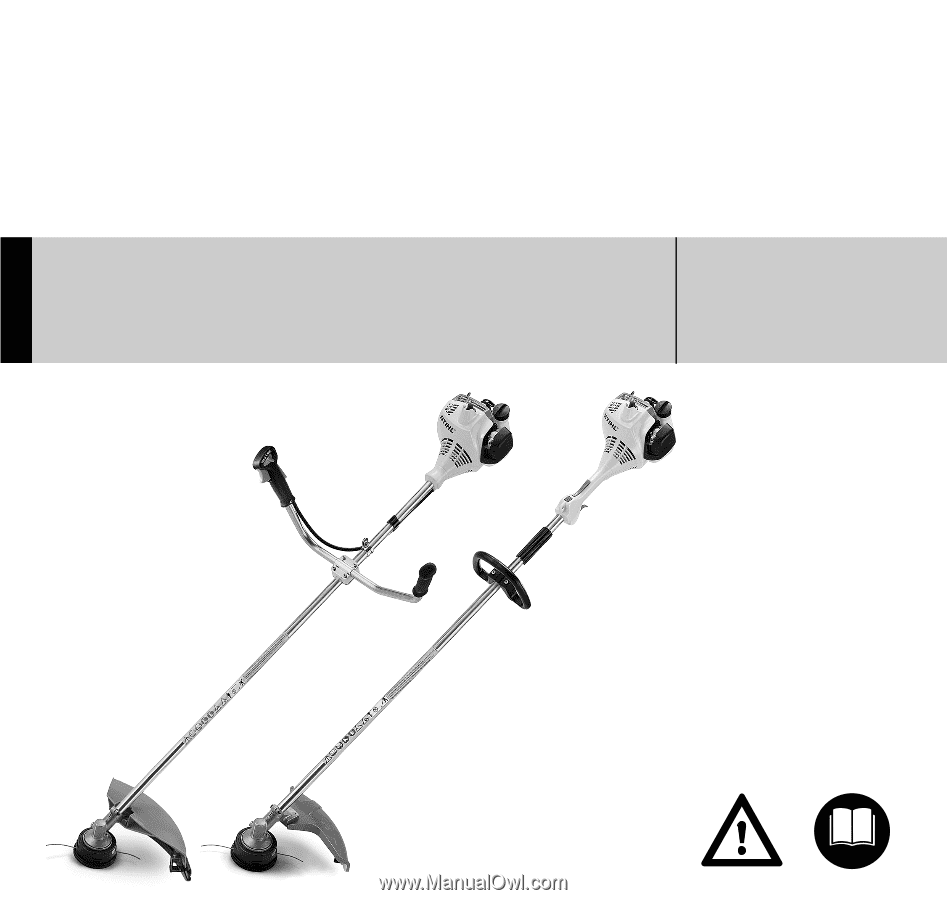
STIHL FS 55 { Instruction Manual Manual de instrucciones Warning! Read and follow all safety precautions in Instruction Manual - improper use can cause serious or fatal injury. Advertencia! Lea y siga todas las precauciones de seguridad dadas en el manual de instrucciones - el uso incorrecto puede - Stihl FS 55 R | Product Instruction Manual - Page 2
Instruction Manual 1 - 47 Manual de instrucciones 49 - 99 - Stihl FS 55 R | Product Instruction Manual - Page 3
the Cutting Attachment 21 Fuel 24 Fueling 25 Fitting the Harness 25 Balancing the Trimmer/Brushcutter 26 Starting / Stopping the Engine 27 Operating Instructions 30 Cleaning the Air Filter 31 Engine Management 31 Adjusting the Carburetor 32 Spark Plug 33 Engine Running Behavior - Stihl FS 55 R | Product Instruction Manual - Page 4
Guide to Using this Manual Pictograms The meanings of the pictograms attached to or embossed on the machine are explained in this manual. Depending on the model concerned, the following pictograms may be on your machine. Fuel tank for gasoline and engine oil mixture FS 55, FS 55 C, FS 55 R, FS 55 RC - Stihl FS 55 R | Product Instruction Manual - Page 5
STIHL trimmer / brushcutters. Different models may have different parts and controls. See the appropriate section of your instruction manual for a description of the controls and the function of the parts of your model. Safe use of a trimmer / brushcutter involves FS 55, FS 55 C, FS 55 R, FS 55 RC - Stihl FS 55 R | Product Instruction Manual - Page 6
protective apparel. Warning! The deflector provided with your power tool will not protect the operator from all foreign objects (gravel, glass, wire, etc.) thrown back by the rotating cutting attachment. Thrown objects may also ricochet and strike the operator. 4 FS 55, FS 55 C, FS 55 R, FS 55 RC - Stihl FS 55 R | Product Instruction Manual - Page 7
it checked by your STIHL servicing dealer. THE USE OF THE POWER TOOL Transporting the Power Tool Warning! To reduce the risk of injury from loss of control and blade or line contact, never carry or transport your power tool with the cutting attachment moving. FS 55, FS 55 C, FS 55 R, FS 55 RC 5 - Stihl FS 55 R | Product Instruction Manual - Page 8
blades covered with the transport guard (optional accessory). Fuel Your STIHL power tool uses an oilgasoline mixture for fuel (see the chapter on "Fuel" of your instruction manual). Warning! Gasoline is an extremely flammable fuel. If spilled and ignited by a spark or other ignition source, it can - Stihl FS 55 R | Product Instruction Manual - Page 9
See also the "Fueling" chapter in your Instruction Manual for additional information. Before Starting Warning! Always check your power tool for proper condition and operation before starting, particularly the throttle trigger, throttle trigger lockout, stop switch, cutting attachment, deflector and - Stihl FS 55 R | Product Instruction Manual - Page 10
immediately blip the throttle trigger, which should release the starting throttle and allow the engine to slow down to idle. With the engine running only at idle, attach the power tool to the spring hook of your harness (see appropriate chapter of this manual). 8 FS 55, FS 55 C, FS 55 R, FS 55 RC - Stihl FS 55 R | Product Instruction Manual - Page 11
or contact with the running cutting attachment, do not use your unit with incorrect idle adjustment. At correct idle speed, the cutting attachment should not move. For directions on how to adjust idle speed, see the appropriate section of your instruction manual. If you cannot set the correct idle - Stihl FS 55 R | Product Instruction Manual - Page 12
encountered. Operating Instructions Warning! Do not operate your power tool using the starting throttle lock start work, examine the area for stones, glass, fence wire, metal, trash or other solid objects. The cutting attachment could throw objects of this kind. 10 FS 55, FS 55 C, FS 55 R, FS 55 RC - Stihl FS 55 R | Product Instruction Manual - Page 13
always shut off the engine and remove the spark plug boot before replacing the cutting attachment. To reduce the risk of injury, always shut off the engine before adjusting the length of the nylon line on manually adjustable mowing heads. Warning! The gearbox becomes hot during operation. To reduce - Stihl FS 55 R | Product Instruction Manual - Page 14
among other things, cause the cutting attachment to rotate at idle. Mowing heads are to be used only on trimmer / brushcutters equipped with a line-limiting blade in the deflector in order to keep the line at the proper length (see "Main Parts" chapter in your instruction manual). If the lawn edges - Stihl FS 55 R | Product Instruction Manual - Page 15
with mowing head). STIHL AutoCut mowing head Nylon cutting line advances automatically when tapped against the ground (TapAction). STIHL TrimCut mowing head Frayed line is replaced by a simple adjustment (see instruction sheet supplied with mowing head). STIHL PolyCut mowing head Uses either nylon - Stihl FS 55 R | Product Instruction Manual - Page 16
STIHL replacement parts for maintenance and repair. Use of non-STIHL parts may cause serious or fatal injury. Strictly follow the maintenance and repair instructions in the appropriate sections of your instruction manual. Warning! Always stop the engine and make sure that the cutting attachment - Stihl FS 55 R | Product Instruction Manual - Page 17
may damage parts of the machine. Store the power tool in a dry and high or locked location out of reach of children. Before storing for longer than a few days, always empty the fuel tank. See chapter "Storing the Machine" in the instruction manual. English FS 55, FS 55 C, FS 55 R, FS 55 RC 15 - Stihl FS 55 R | Product Instruction Manual - Page 18
shown in each row of the table may be used together. No other combinations are permitted because of the risk of accidents. Cutting attachments Mowing heads 1 STIHL SuperCut 20-2 2 STIHL AutoCut C 25--2 3 STIHL AutoCut 25-2 4 STIHL TrimCut 31-2 5 STIHL FixCut 25-2 FS 55, FS 55 C, FS 55 R, FS 55 RC - Stihl FS 55 R | Product Instruction Manual - Page 19
(4) in the handle support - the rubber handle (5) must be on the left (viewed from the engine). N Place the clamp (6) on the handle support. N Insert the screws (7) through the holes in the parts and screw them into the clamp (6) as far as stop. 233BA025 KN FS 55, FS 55 C, FS 55 R, FS 55 RC 17 - Stihl FS 55 R | Product Instruction Manual - Page 20
holes (12) line up - the throttle trigger (11) must point towards the gearbox. N Insert the screw (8) and tighten it down firmly. Fitting the throttle cable Do not kink the throttle cable or lay it in tight radii - make sure the throttle trigger moves freely. 18 FS 55, FS 55 C, FS 55 R, FS 55 RC - Stihl FS 55 R | Product Instruction Manual - Page 21
barrier bar (2) in position as shown. N Line up the holes. N Insert the screws Line up the holes. N Fit washers (7) on the screws (8) and insert the screws in the holes. Fit the square nuts (1) and screw them down as far as stop. N Go to "Securing the Loop Handle". FS 55, FS 55 C, FS 55 R, FS 55 RC - Stihl FS 55 R | Product Instruction Manual - Page 22
for mowing attachments 2 Deflector for mowing heads Deflectors (1) and (2) are both mounted to the gearbox in the same way. N Place the deflector on the gearbox flange. N Insert the screws (3) and tighten them down firmly. 002BA147 KN 002BA142 KN 002BA380 KN 20 FS 55, FS 55 C, FS 55 R, FS 55 RC - Stihl FS 55 R | Product Instruction Manual - Page 23
Mowing heads and metal cutting attachments may be mounted. If the parts are packed with the machine N Pull the hose (1) (protector for shipping) off the shaft (2). The nut (3), rider plate (4) and thrust wsher (5) are in the parts kit supplied with the machine. FS 55, FS 55 C, FS 55 R, FS 55 RC 21 - Stihl FS 55 R | Product Instruction Manual - Page 24
mowing head counterclockwise until it is flush against the shaft (1) N Block the shaft N Tighten the mowing head Remove the tool used to block the shaft. Removing the mowing head N Block the shaft STIHL SuperCut 20-2, STIHL AutoCut 25-2, STIHL AutoCut C 25-2, 22 FS 55, FS 55 C, FS 55 R, FS 55 RC - Stihl FS 55 R | Product Instruction Manual - Page 25
Mounting the Deflector". Use the optional special thrust plate (5, next illustration) for metal cutting attachments - have your servicing dealer check the machine if necessary. If your new brushcutter came equipped with a metal cutting attachment, the correct thrust plate (5) will already be mounted - Stihl FS 55 R | Product Instruction Manual - Page 26
of more than 10% can cause running problems and major damage in engines with a manually adjustable carburetor and should not be used in such engines. Engines equipped with M-Tronic can be run on gasoline with an ethanol content of up to 25% (E25). Use only STIHL two-stroke engine oil or equivalent - Stihl FS 55 R | Product Instruction Manual - Page 27
to release slowly. After fueling, tighten fuel cap as securely as possible by hand. N Put on the shoulder strap (1). N Adjust the length of the strap so that the spring hook (2) is about a hand's width below your right hip. N Balance the trimmer/brushcutter. FS 55, FS 55 C, FS 55 R, FS 55 RC 25 - Stihl FS 55 R | Product Instruction Manual - Page 28
heads and grass cutting blades should just touch the ground. Proceed as follows to adjust the floating position: N Move the carrying ring up or down the drive tube - tighten the screw moderately - let the unit go and wait until is its balanced - then check the floating position. 26 FS 55, FS 55 - Stihl FS 55 R | Product Instruction Manual - Page 29
trigger lockout 2 Throttle trigger 3 Slide control Positions of slide control 4 START - the ignition is switched on - the engine can start 5 F - normal run position - the engine is running or can start 6 STOP-0 - engine off - the ignition is switched off FS 55, FS 55 C, FS 55 R, FS 55 RC 27 - Stihl FS 55 R | Product Instruction Manual - Page 30
All versions". N Set the choke lever (8) to g if the engine is cold e for warm start - also use this posi- tion if the engine has been running but is still cold. N Press the fuel pump bulb (9) at least five times - even if the bulb is already filled with fuel. 28 FS 55, FS 55 C, FS 55 R, FS 55 RC - Stihl FS 55 R | Product Instruction Manual - Page 31
handle N Squeeze the throttle trigger to disengage the tongue - the engine will settle down to idle speed. Your machine is now ready for operation. Make sure the carburetor is correctly adjusted. The cutting attachment must not rotate when the engine is idling. FS 55, FS 55 C, FS 55 R, FS 55 RC 29 - Stihl FS 55 R | Product Instruction Manual - Page 32
combustion chamber. N Refit the spark plug - see "Spark Plug". N Move the slide control or stop switch to F / I. N Set the choke lever to e - even if the engine is cold. N Now start the engine. Fuel tank run until completely dry N After refueling, press the fuel pump bulb at least five times - even - Stihl FS 55 R | Product Instruction Manual - Page 33
the felt element (3) from the filter housing (4) and replace it - knock out or blow out as a temporary measure - do not wash. N Replace damaged parts. N Fit the felt element (3) in the filter housing (4). N Close the filter cover so that it snaps into position. FS 55, FS 55 C, FS 55 R, FS 55 RC 31 - Stihl FS 55 R | Product Instruction Manual - Page 34
optimum fuel-air mixture under most operating conditions. With this carburetor it is only possible to adjust the high speed screw within fine limits. Standard Setting N Stopping the Engine N Mounting the cutting attachment N Check the air filter and replace it if necessary. N Have the spark arrestor - Stihl FS 55 R | Product Instruction Manual - Page 35
condition of the spark plug. These factors cause deposits to form on the insulator nose which may result in trouble in operation. Removing the Spark Plug N Move the stop switch to 0. 1 232BA081 KN N Pull off the spark plug boot (1). N Unscrew the spark plug. FS 55, FS 55 C, FS 55 R, FS 55 RC 33 - Stihl FS 55 R | Product Instruction Manual - Page 36
Rectify problems which have caused fouling of spark plug: - Too much oil in fuel mix. - Dirty air filter. - Unfavorable running conditions, e.g. operating at part load. 000BA039 KN 000BA071 KN 1 2 Warning! To reduce the risk of fire and burn injury, use only spark plugs authorized by STIHL. Always - Stihl FS 55 R | Product Instruction Manual - Page 37
. N Remove, clean and inspect the cutting attachment. N Thoroughly clean the machine - pay special attention to the cylinder fins and air filter. N Store the machine in a dry and secure location - out of the reach of children and other unauthorized persons. FS 55, FS 55 C, FS 55 R, FS 55 RC 35 - Stihl FS 55 R | Product Instruction Manual - Page 38
sharpening instructions. Balancing N After resharpening about 5 times, check the cutting tool for out-ofbalance on a STIHL balancer (special accessory) or have it checked by a dealer and rebalanced as necessary - STIHL recommends a STIHL servicing dealer. 36 FS 55, FS 55 C, FS 55 R, FS 55 RC - Stihl FS 55 R | Product Instruction Manual - Page 39
Pickup body in fuel tank Check Have replaced by dealer1) Fuel tank Clean Carburetor Check idle adjustment - the cutting attachment must not turn X X Readjust idle speed Spark plug Readjust electrode gap Replace after every 100 operating hours Cooling inlets Spark Arrestor in Muffler - Stihl FS 55 R | Product Instruction Manual - Page 40
attachment Sharpen Safety labels Replace 1) STIHL recommends a STIHL servicing dealer. X X X X X before starting work after finishing work or daily after each refueling stop weekly monthly every 12 months if problem if damaged if required X X X 38 FS 55, FS 55 C, FS 55 R, FS 55 RC - Stihl FS 55 R | Product Instruction Manual - Page 41
16 # 17 18 20 19 11 21 8 6 English 1 Fuel Pump 2 Carburetor Adjusting Screws 3 Spark Plug Boot 4 Starter Grip 5 Muffler with Spark Arresting Screen 6 Throttle Trigger 7 Slide Control 8 Throttle Trigger Lockout 9 Bike Handle 10 Handle Support 11 Carrying Ring 12 Throttle Cable Retainer 13 Choke - Stihl FS 55 R | Product Instruction Manual - Page 42
. 21 Stop Switch Switches the engine's ignition off and stops the engine. 2 1 3 45 1 3 6 4 1 Mowing Head 2 Deflector for Mowing Heads 3 Line Limiting Blade 4 Deflector with Skirt for all Mowing Attachments 5 Skirt 6 Metal Mowing Tool 002BA114 KN 40 FS 55, FS 55 C, FS 55 R, FS 55 RC - Stihl FS 55 R | Product Instruction Manual - Page 43
7,700 rpm Ignition System Electronic magneto ignition Spark plug (resistor Bosch WSR 6 F, type): NGK BPMR 7 A Electrode gap: 0.02 in (0.5 mm) Fuel System All position diaphragm carburetor with integral fuel pump Fuel tank capacity: 11.2 fl.oz (0.33 L) FS 55, FS 55 C, FS 55 R, FS 55 RC 41 - Stihl FS 55 R | Product Instruction Manual - Page 44
performed by an authorized STIHL servicing dealer using original STIHL replacement parts. Original STIHL parts can be identified by the STIHL part number, the { logo and, in some cases, by the STIHL parts symbol K. The symbol may appear alone on small parts. 42 FS 55, FS 55 C, FS 55 R, FS 55 RC - Stihl FS 55 R | Product Instruction Manual - Page 45
emission-related part on your engine is defective, the part will be replaced by STIHL Incorporated at no cost to the owner. Any warranted part which is not scheduled for replacement as required maintenance, or which is scheduled only for regular inspection to FS 55, FS 55 C, FS 55 R, FS 55 RC 43 - Stihl FS 55 R | Product Instruction Manual - Page 46
/or durability, and alterations or modifications not recommended or approved in writing by STIHL Incorporated, and N replacement of parts and other services and adjustments necessary for required maintenance at and after the first scheduled replacement point. 44 FS 55, FS 55 C, FS 55 R, FS 55 RC - Stihl FS 55 R | Product Instruction Manual - Page 47
by CARB may not be used. The use of any non exempted add-on or modified parts will be grounds for disallowing a warranty claim. STIHL Incorporated will not be liable to warrant failures of warranted parts caused by the use of a non exempted add-on or modified part. FS 55, FS 55 C, FS 55 R, FS 55 RC - Stihl FS 55 R | Product Instruction Manual - Page 48
. Emission Warranty Parts List Air Filter, Carburetor, Fuel Pump, Choke (Cold Start Enrichment System), Control Linkages, Intake Manifold, Magneto or Electronic Ignition System (Ignition Module), Spark Plug, Catalytic Converter (if applicable), Fuel Tank, Fuel Cap, Fuel Line, Fuel Line Fittings - Stihl FS 55 R | Product Instruction Manual - Page 49
® FS 55, FS 55 C, FS 55 R, FS 55 RC Some of STIHL's Common Law Trademarks BioPlus™ Easy2Start™ EasySpool™ ElastoStart™ Ematic™ FixCut™ HT Plus™ IntelliCarb™ Master Control Lever™ Micro™ Pro Mark™ Quad Power™ Quiet Line™ STIHL Compact™ STIHL HomeScaper Series™ STIHL Interchangeable Attachment Series - Stihl FS 55 R | Product Instruction Manual - Page 50
English 48 FS 55, FS 55 C, FS 55 R, FS 55 RC - Stihl FS 55 R | Product Instruction Manual - Page 51
es reciclable. Impreso en papel libre de cloro. Acerca de este manual de instrucciones 50 Medidas de seguridad y técnicas de manejo 51 . Siempre protéjase adecuadamente los ojos. FS 55, FS 55 C, FS 55 R, FS 55 RC 49 © ANDREAS STIHL AG & Co. KG, 2011 0458-233-8621-C. M23-8.A11.CP - Stihl FS 55 R | Product Instruction Manual - Page 52
y mejoras no se describen en este manual. Si las características de funcionamiento o la apariencia de su máquina difieren de las descritas en este manual, comuníquese con el concesionario STIHL para obtener la ayuda que requiera. Calentador de manillar 50 FS 55, FS 55 C, FS 55 R, FS 55 RC - Stihl FS 55 R | Product Instruction Manual - Page 53
graves o incluso mortales. Los términos empleados en este manual para designar la herramienta motorizada variarán de acuerdo con encuentren en su proximidad. STIHL no recomienda el uso de cuchillas rígidas en zonas pedregosas. Use la orilladora / cortadora quina. FS 55, FS 55 C, FS 55 R, FS 55 RC 51 - Stihl FS 55 R | Product Instruction Manual - Page 54
contenidos en este manual se refieren al uso de todas las orilladoras / cortadoras de matorrales de STIHL. Los distintos , sírvase notar lo siguiente: - La mayor parte de las herramientas motorizadas de STIHL se ofrecen con un sistema antivibración ("AV") 52 FS 55, FS 55 C, FS 55 R, FS 55 RC - Stihl FS 55 R | Product Instruction Manual - Page 55
con una protección adecuada en las partes superior y laterales que satisfagan la norma el riesgo de lesionarse la cara, STIHL recomienda usar también una careta o motorizada puede dañar los oídos. Siempre use amortiguadores del ruido (tapones u orejeras) para FS 55, FS 55 C, FS 55 R, FS 55 RC 53 - Stihl FS 55 R | Product Instruction Manual - Page 56
aprobadas de accesorio de corte, deflector, mango y arnés", en el manual de instrucciones o en el catálogo STIHL "Accesorios de corte, piezas y accesorios". Si la máquina experimenta cargas a ellos. Puede escapar vapor inflamable del sistema de combustible. 54 FS 55, FS 55 C, FS 55 R, FS 55 RC - Stihl FS 55 R | Product Instruction Manual - Page 57
. Para hacer esto con esta tapa STIHL, levante la empuñadura en la parte superior de la tapa hasta dejarla vertical parte superior) hasta la posición cerrada. Tal desalineación puede ser resultado de la manipulación, limpieza o un intento incorrecto de apriete. FS 55, FS 55 C, FS 55 R, FS 55 RC 55 - Stihl FS 55 R | Product Instruction Manual - Page 58
001BA226 KN 001BA227 KN inmediato y llévela a un concesionario STIHL autorizado para repararla. Tapa roscada Advertencia! Las vibraciones de la Consulte también el capítulo "Combustible" del Manual de instrucciones para obtener información adicional. Antes de 56 FS 55, FS 55 C, FS 55 R, FS 55 RC - Stihl FS 55 R | Product Instruction Manual - Page 59
motorizada al gancho de resorte de su arnés (vea el capítulo correspondiente en este manual). Advertencia! Su herramienta motorizada es una máquina que debe ser manejada por solamente una persona intente arrancar el motor de la herramienta "por lanzamiento". FS 55, FS 55 C, FS 55 R, FS 55 RC 57 - Stihl FS 55 R | Product Instruction Manual - Page 60
con el accesorio de corte en movimiento, no use una máquina cuyo régimen de marcha en manual de instrucciones. Si no puede regular correctamente el ralentí, pida a su concesionario STIHL nunca con las manos ni con cualquier parte del cuerpo un accesorio de corte en FS 55, FS 55 C, FS 55 R, FS 55 RC - Stihl FS 55 R | Product Instruction Manual - Page 61
directa o indirectamente. 15m (50ft) Para reducir el riesgo de ocasionar lesiones a los ojos u otras partes del cuerpo (vea el capítulo "Vestimenta adecuada"), asegúrese que las personas estén a por el motor inmediatamente si se le aproxima alguna persona. FS 55, FS 55 C, FS 55 R, FS 55 RC 59 - Stihl FS 55 R | Product Instruction Manual - Page 62
ser sustituida. Si la cuchilla o el cabezal continúa aflojándose, consulte al concesionario STIHL. No use nunca una orilladora / cortadora de matorrales con un accesorio de corte suelto. Advertencia! del hilo de nilón en las cabezas segadoras de ajuste manual. 60 FS 55, FS 55 C, FS 55 R, FS 55 RC - Stihl FS 55 R | Product Instruction Manual - Page 63
de rejillas diseñadas para reducir el riesgo de incendio debido a la emisión de partículas calientes. Debido al calor de la reacción catalítica, estas rejillas normalmente permanecen , haga reparar el silenciador por un concesionario de servicio STIHL. FS 55, FS 55 C, FS 55 R, FS 55 RC 61 - Stihl FS 55 R | Product Instruction Manual - Page 64
use STIHL Los hilos deshilachados se reemplazan con un ajuste sencillo (consulte la hoja de instrucciones provista con la cabeza segadora). Cabeza segadora PolyCut de STIHL Utiliza ya sea hilos de nilón o cuchillas de polímero pivotantes no rígidas. 002BA177 KN 62 FS 55, FS 55 C, FS 55 R, FS 55 RC - Stihl FS 55 R | Product Instruction Manual - Page 65
sustituya todas las cuchillas si se encuentra una fisura en una cuchilla. Cabeza segadora FixCut de STIHL Utiliza tramos de largo fijo del hilo de nilón. Observe los indicadores de desgaste. No con la zona sombreada de cualquier cuchilla rígida. 002BA135 KN FS 55, FS 55 C, FS 55 R, FS 55 RC 63 - Stihl FS 55 R | Product Instruction Manual - Page 66
dos lados, esto es, en las partes delantera y trasera. Cuando los bordes manual de instrucciones. Este tipo de trabajo debe ser realizado únicamente por el concesionario de servicio de STIHL. Use guantes para manipular o reparar las cuchillas. Advertencia! Use FS 55, FS 55 C, FS 55 R, FS 55 RC - Stihl FS 55 R | Product Instruction Manual - Page 67
máquina durante un período de más de algunos días, siempre vacíe el tanque de combustible. Consulte el capítulo "Almacenamiento de la máquina" en el manual de instrucciones. FS 55, FS 55 C, FS 55 R, FS 55 RC español / EE.UU 65 - Stihl FS 55 R | Product Instruction Manual - Page 68
pueden ser utilizados juntos. No está permitida ninguna otra combinación debido al riesgo de que ocurran accidentes. Accesorios de corte Cabezas segadoras 1 STIHL SuperCut 20-2 2 STIHL AutoCut C 25--2 3 STIHL AutoCut 25-2 4 STIHL TrimCut 31-2 5 STIHL FixCut 25-2 FS 55, FS 55 C, FS 55 R, FS 55 RC - Stihl FS 55 R | Product Instruction Manual - Page 69
6 STIHL PolyCut 20-3 Accesorios de segado metálicos 7 Cuchilla para pasto 230-4 8 Cuchilla para pasto 230-8 Las cuchillas para . N Introduzca los tornillos (7) a través de los orificios en los componentes y atorníllelos a fondo en la abrazadera (6). 233BA025 KN FS 55, FS 55 C, FS 55 R, FS 55 RC 67 - Stihl FS 55 R | Product Instruction Manual - Page 70
tuerza el cable del acelerador ni forme curvas agudas al colocar el mismo - asegúrese de que el gatillo de aceleración se mueva libremente. 68 FS 55, FS 55 C, FS 55 R, FS 55 RC - Stihl FS 55 R | Product Instruction Manual - Page 71
agujeros. N Instale las arandelas (7) en los tornillos (8) y meta los tornillos en los orificios. Coloque las tuercas cuadradas (1) y atorníllelas a fondo. N Prosiga a "Fijación del mango tórico". FS 55, FS 55 C, FS 55 R, FS 55 RC 69 - Stihl FS 55 R | Product Instruction Manual - Page 72
de engranajes de la misma manera. N Coloque el deflector en la brida de la caja de engranajes. N Inserte los tornillos (3) y apriételos bien firmes. 70 FS 55, FS 55 C, FS 55 R, FS 55 RC - Stihl FS 55 R | Product Instruction Manual - Page 73
en la faldilla y alinéela con el primer orificio. N Inserte el tornillo y apriételo bien firme. N Apoye la cortadora de matorrales sobre su parte trasera con la superficie de montaje para el N Retire la manguera (1) (protección para el transporte) del eje (2). FS 55, FS 55 C, FS 55 R, FS 55 RC 71 - Stihl FS 55 R | Product Instruction Manual - Page 74
el eje (1) N Bloquee el eje N Apriete la cabeza segadora Quite la herramienta usada para bloquear el eje. Retiro de la cabeza segadora N Bloquee el eje STIHL SuperCut 20-2, STIHL AutoCut 25-2, STIHL AutoCut C 25-2, FS 55, FS 55 C, FS 55 R, FS 55 RC - Stihl FS 55 R | Product Instruction Manual - Page 75
el deflector corta el hilo sobrante a la longitud óptima. STIHL AutoCut N Mantenga la cabeza segadora en forma paralela sobre la cuchilla para matorrales (3) - ver "Montaje del deflector". Use la placa de empuje (5, ilustración siguiente) especial opcional FS 55, FS 55 C, FS 55 R, FS 55 RC 73 - Stihl FS 55 R | Product Instruction Manual - Page 76
M-Tronic pueden utilizar gasolina con un contenido de etanol de hasta un 25% (E25). Use solamente el aceite STIHL para motores de dos tiempos o un aceite de marca equivalente para motores de dos tiempos y el envase en que se guarda la mezcla de combustible. 74 FS 55, FS 55 C, FS 55 R, FS 55 RC - Stihl FS 55 R | Product Instruction Manual - Page 77
y agítelo vigorosamente a mano para asegurar que se mezclen bien el aceite y la gasolina. Gasolina Aceite (STIHL 50:1 ó aceite de alta calidad equivalente) gal EE.UU. 1 2 1/2 5 oz fl EE.UU. cadera derecha. N Equilibre la orilladora/cortadora de matorrales. FS 55, FS 55 C, FS 55 R, FS 55 RC 75 - Stihl FS 55 R | Product Instruction Manual - Page 78
és y mosquetón (gancho con resorte) dependen del lugar de venta. La argolla de transporte forma parte del mango de control en las unidades con mango tórico - vea "Piezas principales". No es - apriete moderadamente el tornillo - suelte la unidad y espere 76 FS 55, FS 55 C, FS 55 R, FS 55 RC - Stihl FS 55 R | Product Instruction Manual - Page 79
3 Control deslizante Posiciones del control deslizante 4 START - el encendido está conectado y es posible arrancar el motor 5 F - posición de funcionamiento normal - el motor está en marcha o puede arrancarse 6 STOP0 - motor apagado - el encendido está apagado FS 55, FS 55 C, FS 55 R, FS 55 RC 77 - Stihl FS 55 R | Product Instruction Manual - Page 80
todavía se encuentra frío. N Oprima el bulbo (9) de la bomba de combustible por lo menos cinco veces, aunque el bulbo esté lleno de combustible. 78 FS 55, FS 55 C, FS 55 R, FS 55 RC - Stihl FS 55 R | Product Instruction Manual - Page 81
rápido. No tire de la cuerda de arranque totalmente hasta fuera, se podría romper. Versión con Easy2Start N Tire lentamente del mango de arranque hasta que sienta el enganche del mismo y en seguida déle un a marcha en vacío. Su máquina está lista para trabajar. FS 55, FS 55 C, FS 55 R, FS 55 RC 79 - Stihl FS 55 R | Product Instruction Manual - Page 82
íe. Vacíe el tanque de combustible y guarde la máquina en un lugar seco, alejada de fuentes de encendido, hasta que la vuelva a utilizar. Para los 80 FS 55, FS 55 C, FS 55 R, FS 55 RC - Stihl FS 55 R | Product Instruction Manual - Page 83
piezas dañadas. N Coloque el elemento de fieltro (3) en la caja (4) del filtro. N Cierre la cubierta del filtro de modo que encaje en su lugar. FS 55, FS 55 C, FS 55 R, FS 55 RC 81 - Stihl FS 55 R | Product Instruction Manual - Page 84
la potencia del motor no es adecuada para trabajar en grandes altitudes, al nivel del mar o despuí9s de cambiar el accesorio de corte. 82 FS 55, FS 55 C, FS 55 R, FS 55 RC - Stihl FS 55 R | Product Instruction Manual - Page 85
cuchilla limitadora del hilo en el deflector). Si un accesorio de corte metálico está instalado, use el ajuste normal y regule el tornillo de alta velocidad (H) de la manera descrita arriba bajo "Regla hasta que el motor funcione y se acelere de modo uniforme. FS 55, FS 55 C, FS 55 R, FS 55 RC 83 - Stihl FS 55 R | Product Instruction Manual - Page 86
! Para reducir el riesgo de incendio y de quemaduras, utilice solamente las bujías autorizadas por STIHL. Siempre empuje el casquillo (1) de la bujía firmemente en el borne (2) del tamaño adecuado bujía, coloque el casquillo y empújelo firmemente en su lugar. 84 FS 55, FS 55 C, FS 55 R, FS 55 RC - Stihl FS 55 R | Product Instruction Manual - Page 87
de bloqueo (1) - si no hay grasa en el interior, atornille el tubo (2) de lubricante STIHL para los engranajes de cortadoras de matorrales (accesorio especial) N Exprima hasta 5 g (1/5 oz) de a colocar el tornillo de bloqueo y apriételo firmemente 233BA010 KN FS 55, FS 55 C, FS 55 R, FS 55 RC 85 - Stihl FS 55 R | Product Instruction Manual - Page 88
los accesorios de corte N Use una lima (vea "Accesorios especiales STIHL (accesorio especial) - o pida que un concesionario la revise y vuelva a ajustar el equilibrio según sea 86 002BA124 KN necesario - STIHL recomienda acudir a un concesionario STIHL para servicio. FS 55, FS 55 C, FS 55 R, FS 55 RC - Stihl FS 55 R | Product Instruction Manual - Page 89
que le sustituyan el captador de combustible en el tanque. Parachispas en el silenciador. N Si el motor pierde potencia, haga revisar el chispero del silenciador. FS 55, FS 55 C, FS 55 R, FS 55 RC español / EE.UU 87 - Stihl FS 55 R | Product Instruction Manual - Page 90
en el silenciador. Solicitar al concesionario de servicio su limpieza o sustitución1) Todos los tornillos y tuercas accesibles (salvo los tornillos de ajuste) Volver a apretar X X X X X X X X X X X X X X X X 88 FS 55, FS 55 C, FS 55 R, FS 55 RC - Stihl FS 55 R | Product Instruction Manual - Page 91
concesionario STIHL para servicio. antes de comenzar el trabajo después de terminar el trabajo o diariamente después de cada parada para cargar combustible semanalmente mensualmente cada 12 meses si hay problema si tiene daños si se requiere español / EE.UU X X X FS 55, FS 55 C, FS 55 R, FS 55 RC - Stihl FS 55 R | Product Instruction Manual - Page 92
Apoyo de la máquina 18 Mango tórico 19 Barra de defensa 20 Tubo de mando 21 Interruptor de parada # Número de serie 233BA042 KN 90 FS 55, FS 55 C, FS 55 R, FS 55 RC - Stihl FS 55 R | Product Instruction Manual - Page 93
segado 2 Deflector para cabezas segadoras 3 Cuchilla limitadora del hilo 4 Deflector con faldilla para todos los accesorios de segado 5 Faldilla 6 Herramienta segadora metálica 002BA114 KN FS 55, FS 55 C, FS 55 R, FS 55 RC 91 - Stihl FS 55 R | Product Instruction Manual - Page 94
No está diseñado para contener las cuchillas metálicas fragmentadas. 5 Faldilla La faldilla en la parte inferior del deflector debe usarse de la manera descrita en el capítulo "Montaje del deflector". 6 del tanque de combustible: 0,33 l (11,2 fl.oz) 92 FS 55, FS 55 C, FS 55 R, FS 55 RC - Stihl FS 55 R | Product Instruction Manual - Page 95
FS 55: 5,0 kg (11,0 lb) FS 55 R: 4,8 kg (10,6 lb) FS 55 C con Easy2Start: 5,1 kg (11,2 lb) FS 55 RC con Easy2Start: 4,9 kg (10,8 lb) Accesorios especiales Comuníquese con su concesionario STIHL mantenimiento descritos en este manual. Solamente los talleres autorizados por STIHL deben llevar a - Stihl FS 55 R | Product Instruction Manual - Page 96
puede escribir a STIHL Inc., 536 Viking Drive, P.O. Box 2015, Virginia Beach, VA 23450-2015 EE.UU. www.stihlusa.com Cobertura por STIHL Incorporated STIHL Incorporated garantiza al último comprador y a cada comprador subsiguiente que el motor pequeño para 94 FS 55, FS 55 C, FS 55 R, FS 55 RC - Stihl FS 55 R | Product Instruction Manual - Page 97
mantenimiento requerido estará garantizada por el intervalo hasta el primer punto de reemplazo programado para esa pieza. Diagnóstico STIHL y presente la tarjeta de garantía firmada. Requerimientos de mantenimiento Las instrucciones presentadas en este manual FS 55, FS 55 C, FS 55 R, FS 55 RC 95 - Stihl FS 55 R | Product Instruction Manual - Page 98
. STIHL Incorporated le recomienda guardar todos los recibos comprobantes de los trabajos de mantenimiento hechos a su motor pequeño para equipo de uso fuera de carretera, pero STIHL Incorporated no puede negar garantía basado en el solo hecho de faltar los 96 FS 55, FS 55 C, FS 55 R, FS 55 RC - Stihl FS 55 R | Product Instruction Manual - Page 99
COBERTURA POR STIHL INCORPORATED, vea primer punto de sustitución programado para este componente. Si el componente falla antes del primer punto de sustitución programado, el fabricante del motor debe reparar o sustituir el mismo de acuerdo con la subsección (4) más FS 55, FS 55 C, FS 55 R, FS 55 RC - Stihl FS 55 R | Product Instruction Manual - Page 100
durante el resto del período de garantía antes del primer punto de sustitución programado para el componente. 4. La reparaci , y la misma debe ser suministrada gratis al propietario. STIHL Incorporated es responsable por daños a otros componentes del motor FS 55, FS 55 C, FS 55 R, FS 55 RC - Stihl FS 55 R | Product Instruction Manual - Page 101
55 C, FS 55 R, FS 55 RC Algunos de las marcas comerciales de STIHL por ley común BioPlus™ Easy2Start™ EasySpool™ ElastoStart™ Ematic™ FixCut™ HT Plus™ IntelliCarb™ Master Control Lever™ Micro™ Pro Mark™ Quad Power™ Quiet Line™ STIHL Compact™ STIHL HomeScaper Series™ STIHL Interchangeable Attachment - Stihl FS 55 R | Product Instruction Manual - Page 102
español / EE.UU 100 FS 55, FS 55 C, FS 55 R, FS 55 RC - Stihl FS 55 R | Product Instruction Manual - Page 103
- Stihl FS 55 R | Product Instruction Manual - Page 104
chemicals known to the State of California to cause cancer, birth defects or other reproductive harm. 0458-233-8621-C englisch / spanisch USA U G U www.stihl.com ! ADVERTENCIA! El gas de escape del motor de esta máquina contiene productos químicos que en el estado de California son considerados
-
 1
1 -
 2
2 -
 3
3 -
 4
4 -
 5
5 -
 6
6 -
 7
7 -
8
-
9
-
10
-
11
-
12
-
13
-
14
-
15
-
16
-
17
-
18
-
19
-
20
-
21
-
22
-
23
-
24
-
25
-
26
-
27
-
28
-
29
-
30
-
31
-
32
-
33
-
34
-
35
-
36
-
37
-
38
-
39
-
40
-
41
-
42
-
43
-
44
-
45
-
46
-
47
-
48
-
49
-
50
-
51
-
52
-
53
-
54
-
55
-
56
-
57
-
58
-
59
-
60
-
61
-
62
-
63
-
64
-
65
-
66
-
67
-
68
-
69
-
70
-
71
-
72
-
73
-
74
-
75
-
76
-
77
-
78
-
79
-
80
-
81
-
82
-
83
-
84
-
85
-
86
-
87
-
88
-
89
-
90
-
91
-
92
-
93
-
94
-
95
-
96
-
97
-
98
-
99
-
100
-
101
-
102
-
103
-
104
 |
 |
{
STIHL FS 55
Warning!
Read and follow all safety
precautions in Instruction Manual –
improper use can cause serious or
fatal injury.
Advertencia!
Lea y siga todas las precauciones
de seguridad dadas en el manual
de instrucciones – el uso incorrecto
puede causar lesiones graves o
mortales.
Instruction Manual
Manual de instrucciones