Stihl HL 90 Product Instruction Manual
Stihl HL 90 Manual
 |
View all Stihl HL 90 manuals
Add to My Manuals
Save this manual to your list of manuals |
Stihl HL 90 manual content summary:
- Stihl HL 90 | Product Instruction Manual - Page 1
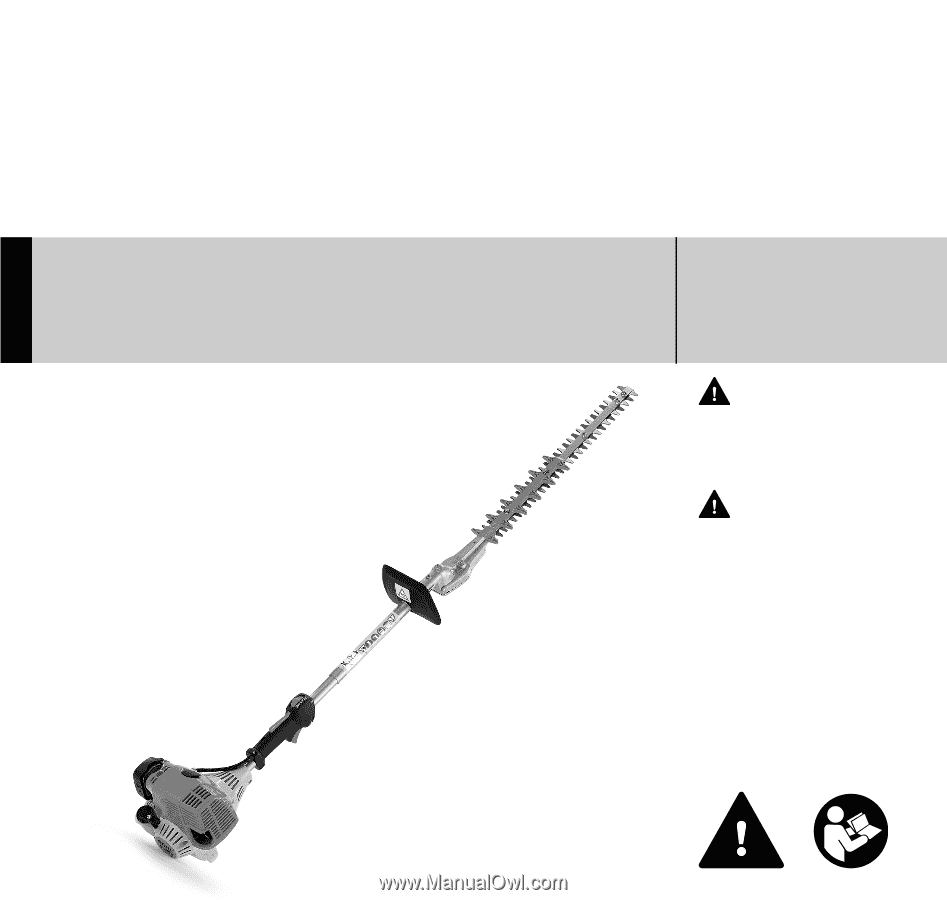
HL 90 { Instruction Manual Manual de instrucciones WARNING Read Instruction Manual thoroughly before use and follow all safety precautions - improper use can cause serious or fatal injury. ADVERTENCIA Antes de usar la máquina lea y siga todas las precauciones de seguridad dadas en el manual de - Stihl HL 90 | Product Instruction Manual - Page 2
Instruction Manual 1 - 32 Manual de instrucciones 33 - 68 - Stihl HL 90 | Product Instruction Manual - Page 3
can be recycled. Contents Guide to Using this Manual 2 Safety Precautions and Working Techniques 3 Using the Unit 11 Mounting the Gearbox 12 Adjusting the Throttle Cable 13 Fuel 13 Fueling 14 Starting / Stopping the Engine 15 Operating Instructions 17 Cleaning the Air Filter - Stihl HL 90 | Product Instruction Manual - Page 4
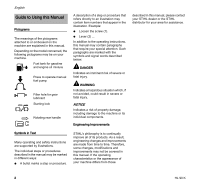
or the STIHL distributor for your area for assistance. Symbols in Text Many operating and safety instructions are supported by illustrations. The individual steps or procedures described in the manual may be marked in different ways: N A bullet marks a step or procedure. STIHL's philosophy is to - Stihl HL 90 | Product Instruction Manual - Page 5
apply to the use of all STIHL hedge trimmers. Different models may have different parts and controls. See the appropriate section of your instruction manual for a description of the controls and the function of the parts of your model. Safe use of a hedge trimmer involves 1. the operator 2. the - Stihl HL 90 | Product Instruction Manual - Page 6
English exposure to vibration are mentioned as factors in the development of whitefinger disease. In order to reduce the risk of whitefinger disease and carpal tunnel syndrome, please note the following: - Most STIHL power tools are available with an anti-vibration ("AV") system designed to reduce - Stihl HL 90 | Product Instruction Manual - Page 7
is damaged. In case of doubt, have it checked by your STIHL servicing dealer. THE USE OF THE POWER TOOL Transporting the Power Tool WARNING oilgasoline mixture for fuel (see the chapter on "Fuel" of your instruction manual). WARNING Gasoline is an extremely flammable fuel. If spilled and ignited by - Stihl HL 90 | Product Instruction Manual - Page 8
as possible. See also the "Fueling" chapter in your Instruction Manual for additional information. Before Starting WARNING Always check your equipped with a manual fuel pump). Do not start the engine if there are leaks or damage - risk of fire! Have the machine repaired by a servicing dealer before - Stihl HL 90 | Product Instruction Manual - Page 9
rope around your hand. Do not let the grip snap back, but guide the starter rope to rewind it properly. Failure to follow this procedure may directions on how to adjust idle speed, see the appropriate section of your instruction manual. Place your left hand on hose grip of shaft and your right hand - Stihl HL 90 | Product Instruction Manual - Page 10
ladder, in a tree or on any other insecure support. Never hold the machine above shoulder height. Working Conditions that are known to cause respiratory problems, cancer, birth defects, or MSHA for the type of dust encountered. Operating Instructions WARNING Do not operate your power tool using the - Stihl HL 90 | Product Instruction Manual - Page 11
, thereby increasing the risk of fire, burn injury or hearing loss. You may also permanently damage the engine. Have your muffler serviced and repaired by your STIHL servicing dealer only. WARNING The muffler and other parts of the engine (e.g. fins of the cylinder, spark plug) become hot during - Stihl HL 90 | Product Instruction Manual - Page 12
repair work or cleaning the power tool. Do not attempt any maintenance or repair work not described in your instruction manual. Have such work performed by your STIHL servicing dealer only. Wear gloves when handling or performing maintenance on blades. WARNING Use the specified spark plug and make - Stihl HL 90 | Product Instruction Manual - Page 13
as the U.S. Forest Service, may have similar requirements. Contact your local fire agency or forest service for the laws or always empty the fuel tank. See chapter "Storing the machine" in this manual. Using the Unit English Cutting Season Observe country-specific or municipal rules and - Stihl HL 90 | Product Instruction Manual - Page 14
English Vertical cut Horizontal cut Mounting the Gearbox 413BA014 KN 002BA248 KN N Pull the protective cap off the end of the drive tube. 445BA007 KN 445BA001 KN Swing the cutter bar up and down in an arc as you move along the hedge - use both sides of the cutting blades. Any working - Stihl HL 90 | Product Instruction Manual - Page 15
stop. N Line up the gearbox on the drive tube so that the machine support on the engine points down and the blades are horizontal. N Tighten down the clamp Gasoline with an ethanol content of more than 10% can cause running problems and major damage in engines and should not be used. The ethanol - Stihl HL 90 | Product Instruction Manual - Page 16
speed of the engine change if you switch from a fuel with a certain ethanol content to another fuel with a much higher or lower ethanol content. This problem can be avoided by always using fuel with the same ethanol content. Use STIHL HP Ultra oil or ask your dealer for an equivalent high - Stihl HL 90 | Product Instruction Manual - Page 17
Opening the filler cap Starting / Stopping the Engine Controls N Turn the cap counterclockwise until it can be removed from the tank opening. N Remove the filler cap. Refueling 2 Take care not to spill fuel while fueling and do not overfill the tank. Closing the filler cap 2709BA003 KN 7 4 5 - Stihl HL 90 | Product Instruction Manual - Page 18
has been running but is still cold. N Press the manual fuel pump bulb (9) at least five times - even if the ground: It must rest securely on the engine support and the gearbox. N Remove the blade scabbard. Do not let the starter grip snap back. Guide it slowly back into the housing so that the - Stihl HL 90 | Product Instruction Manual - Page 19
cold. N Now start the engine. Throttle cable adjustment N Check adjustment of throttle cable - see chapter on "Adjusting the Throttle Cable". English Operating Instructions During break-in period A factory-new machine should not be run at high revs (full throttle off load) for the first three tank - Stihl HL 90 | Product Instruction Manual - Page 20
1/2 to 3/4 turn in the same direction WARNING If the cutting attachment continues to keep rotating in idle even after adjustment, have the machine checked by a servicing dealer. 18 HL 90 K - Stihl HL 90 | Product Instruction Manual - Page 21
at part throttle etc.) affect the condition of the spark plug. These factors cause deposits to form on the insulator nose which may result in trouble in operation. Removing the spark plug N Move the slide control to STOP-0. 249BA063 KN 3 2 2 N Take out the screws (2) and remove the shroud - Stihl HL 90 | Product Instruction Manual - Page 22
Check electrode gap (A) and readjust if necessary - see chapter "Specifications." N Use only resistor type spark plugs of the approved range. Rectify problems which have caused fouling of spark plug: - too much oil in fuel mix, - dirty air filter, - unfavorable running conditions, e.g. operating at - Stihl HL 90 | Product Instruction Manual - Page 23
N Refit the filler plug and tighten it down firmly. Sharpening Instructions When cutting performance and behavior begin to deteriorate, i.e. blades frequently by a dealer on a workshop sharpener. STIHL recommends a STIHL servicing dealer. It is also possible to use a flat crosscut sharpening file - Stihl HL 90 | Product Instruction Manual - Page 24
Manual fuel pump (if fitted) Pickup body in fuel tank Check X Have repaired by servicing dealer1) Have checked by servicing dealer1) Have replaced by servicing daily after each refueling stop weekly monthly every 12 months if problem if damaged as required X X X X X X X X X X X X X - Stihl HL 90 | Product Instruction Manual - Page 25
elements (rubber buffers, springs) Check Have replaced by servicing dealer1) Cutting blades Visual inspection Clean 3) Sharpen3) Gearbox Check Replenish Safety labels Replace 1) STIHL recommends an authorized STIHL servicing dealer. 2) CARB licensed engines only 3) Spray with STIHL resin - Stihl HL 90 | Product Instruction Manual - Page 26
Hose 4 Drive Tube 5 Slide Control 6 Throttle Trigger Lockout 7 Throttle Trigger 8 Choke Knob 9 Spark Plug Boot 10 Air Filter Cover 11 Fuel Tank 12 Machine Support 13 Cutting Blades 14 Blade Scabbard 15 Cutting Blade Guard 16 Blade Drive Gear 17 Angle Drive 18 Fuel Filler Cap 19 Carburetor Adjusting - Stihl HL 90 | Product Instruction Manual - Page 27
filter. 11. Fuel Tank For fuel and oil mixture. 12. Machine Support For resting machine on the ground. 13. Cutting Blades Steel blades for the fuel tank. 19. Carburetor Adjusting Screws For tuning the carburetor. 20. Manual Fuel Pump Provides additional fuel feed for a cold start. 21. Starter Grip - Stihl HL 90 | Product Instruction Manual - Page 28
and Repairs Users of this unit should carry out only the maintenance operations described in this manual. STIHL recommends that other repair work be performed only by authorized STIHL servicing dealers. Warranty claims following repairs can be accepted only if the repair has been performed by - Stihl HL 90 | Product Instruction Manual - Page 29
the performance of the required maintenance listed in your instruction manual. STIHL Incorporated recommends that you retain all receipts for presenting your small off-road equipment engine to a STIHL service center as soon as a problem exists. The warranty repairs will be completed in a reasonable - Stihl HL 90 | Product Instruction Manual - Page 30
Fittings - Clamps - Fasteners Where to make a Claim for Warranty Service Bring the product to any authorized STIHL servicing dealer and present the signed warranty card. Maintenance Requirements The maintenance instructions in this manual are based on the application of the recommended 2-stroke fuel - Stihl HL 90 | Product Instruction Manual - Page 31
for performance of the required maintenance listed in your instruction manual. STIHL Incorporated recommends that you retain all receipts presenting your small off-road equipment engine to a STIHL servicing dealer as soon as the problem exists. The warranty repairs should be completed in a - Stihl HL 90 | Product Instruction Manual - Page 32
COVERAGE BY STIHL INCORPORATED, see above. A statement in such written instructions to the effect of "repair or replace as necessary" will not reduce Work STIHL Incorporated shall remedy warranty defects at any authorized STIHL servicing dealer or warranty station. Any such work shall be free of - Stihl HL 90 | Product Instruction Manual - Page 33
), Fuel Tank, Fuel Cap, Fuel Line, Fuel Line Fittings, Clamps, Fasteners. Where to make a Claim for Warranty Service Bring the STIHL product to any authorized STIHL servicing dealer and present the signed STIHL product registration card, or the print-out of the electronic product registration - Stihl HL 90 | Product Instruction Manual - Page 34
English OILOMATIC® Rock Boss® STIHL Cutquik® STIHL DUROMATIC® STIHL Quickstop® STIHL ROLLOMATIC® STIHL WOOD BOSS® TIMBERSPORTS® WOOD BOSS® YARD BOSS® Some of STIHL's Common Law Trademarks STIHL InjectionTM 4-MIX ™ BioPlus ™ Easy2Start ™ EasySpool ™ ElastoStart ™ Ematic ™ FixCut ™ HT Plus ™ - Stihl HL 90 | Product Instruction Manual - Page 35
con su representante de STIHL o el distribuidor de STIHL para su zona si no se entiende alguna de las instrucciones dadas en el presente manual. ADVERTENCIA Dado que el cortasetos es una herramienta de corte de gran velocidad, es necesario tomar medidas especiales de seguridad para reducir el riesgo - Stihl HL 90 | Product Instruction Manual - Page 36
Símbolos en el texto Muchas de las instrucciones de uso y seguridad vienen acompañadas de ilustraciones. Los pasos individuales o procedimientos descritos en el manual pueden estar señalados en diferentes maneras: N Se usa un punto para denotar un paso o procedimiento. Una descripción de un paso - Stihl HL 90 | Product Instruction Manual - Page 37
durante el descanso), apáguela y asegúrese de que las personas no autorizadas no puedan usarla. Las medidas de seguridad y avisos contenidos en este manual se refieren al uso de todos los cortasetos STIHL. Los distintos modelos pueden contar con piezas y controles diferentes. Vea la español / EE.UU - Stihl HL 90 | Product Instruction Manual - Page 38
español / EE.UU Estas condiciones reducen la capacidad de las manos de sentir y regular la temperatura, producen entumecimiento y ardor y pueden provocar trastornos nerviosos y circulatorios, así como necrosis de los tejidos. No se conocen todos los factores que contribuyen a la enfermedad de - Stihl HL 90 | Product Instruction Manual - Page 39
Esté especialmente alerta y tenga cuidado cuando se usa protectores de oídos, ya que los mismos reducen la posibilidad de oír señales de advertencia (gritos, alarmas, etc.). Siempre use guantes gruesos (por ejemplo, fabricados de cuero u otro material resistente al desgaste) cuando manipule la má - Stihl HL 90 | Product Instruction Manual - Page 40
a la máquina. Combustible La herramienta motorizada STIHL utiliza una mezcla de aceite-gasolina como combustible (vea el capítulo "Combustible" en el manual de instrucciones). ADVERTENCIA La gasolina es un combustible muy inflamable. Si se derrama y arde a causa de una chispa u otra fuente de ignici - Stihl HL 90 | Product Instruction Manual - Page 41
) del lugar en que lo haya llenado. español / EE.UU Para las instrucciones específicas de arranque, vea la sección correspondiente en el manual del usuario. Coloque la herramienta motorizada sobre suelo firme u otra superficie sólida en un lugar abierto. Mantenga el equilibrio y elija un buen punto - Stihl HL 90 | Product Instruction Manual - Page 42
de corte no debe moverse. Para instrucciones acerca de cómo ajustar el régimen de marcha en vacío, vea la sección correspondiente del manual de instrucciones. Si no puede regular correctamente la marcha en vacío, pida a su concesionario STIHL que revise la herramienta motorizada y haga los - Stihl HL 90 | Product Instruction Manual - Page 43
soporte poco seguro. Nunca mantenga la máquina a una altura más arriba de los hombros. Condiciones de trabajo Maneje y arranque su herramienta motorizada solamente al aire libre en un lugar bien ventilado. Manéjela solamente en condiciones de buena visibilidad y a la luz del día. Trabaje con mucho - Stihl HL 90 | Product Instruction Manual - Page 44
español / EE.UU 5m (17ft) La herramienta motorizada tiene alcance largo. Para reducir el riesgo de que otras personas sufran lesiones graves o mortales causadas por la caída de objetos, o el contacto inesperado con las cuchillas en movimiento de la herramienta motorizada, siempre mantenga a las - Stihl HL 90 | Product Instruction Manual - Page 45
ADVERTENCIA El silenciador y otros componentes del motor (por ej., aletas del cilindro, bujía) se calientan durante el funcionamiento y permanecen calientes por un buen rato después de apagar el motor. Para reducir el riesgo de quemaduras, no toque el silenciador ni los otros componentes mientras - Stihl HL 90 | Product Instruction Manual - Page 46
, reparación o limpieza de la herramienta motorizada. No intente hacer ningún trabajo de mantenimiento o reparación que no esté descrito en su manual de instrucciones. Este tipo de trabajo debe ser realizado únicamente por el concesionario de servicio de STIHL. Use guantes para manipular o reparar - Stihl HL 90 | Product Instruction Manual - Page 47
un período de más de algunos días, siempre vacíe el tanque de combustible. Consulte el capítulo "Almacenamiento de la máquina" en este manual. Uso Temporada de corte Respete las leyes y los reglamentos nacionales o municipales en cuanto al corte de setos. No utilice el cortasetos durante los per - Stihl HL 90 | Product Instruction Manual - Page 48
445BA003 KN español / EE.UU Corte horizontal Montaje de la caja de engranajes N Extraiga la tapa protectora del extremo del tubo de mando. 413BA014 KN 1 3 2 1 445BA007 KN Sujete la barra de corte a un ángulo de 0° a 10° al desplazar el cortasetos en sentido horizontal. Desplace la barra de - Stihl HL 90 | Product Instruction Manual - Page 49
Ajuste del cable del acelerador Un cable del acelerador correctamente ajustado es necesario para el funcionamiento correcto en las posiciones de arranque, marcha en vacío y máxima aceleración. Ajuste el cable del acelerador solamente cuando la máquina esté completa y correctamente armada. N Utilice - Stihl HL 90 | Product Instruction Manual - Page 50
266BA028 KN español / EE.UU No use aceites para mezclar con designaciones BIA o TCW (para motores de dos tiempos enfriados por agua) ni otros aceites para mezclar diseñados para usar en motores enfriados por agua o por aire (por ejemplo, en motores marinos fuera de borda, motonieves, sierras de - Stihl HL 90 | Product Instruction Manual - Page 51
Apertura de la tapa de llenado N Gire la tapa en sentido contrahorario hasta quitarla de la boca de llenado del tanque. N Quite la tapa de llenado. Carga de combustible Tenga cuidado de no derramar el combustible y no llene en exceso el tanque. Cierre de la tapa de llenado N Coloque la tapa en - Stihl HL 90 | Product Instruction Manual - Page 52
- también utilice esta posición si el motor ha estado en marcha, pero todavía se encuentra frío. N Oprima el bulbo (9) de la bomba de combustible manual por lo menos cinco veces, aunque el bulbo esté lleno de combustible. 249BA057 KN Arranque N Apoye la máquina en el suelo: Apóyela de modo - Stihl HL 90 | Product Instruction Manual - Page 53
Su máquina está lista para trabajar. Parada del motor N Empuje el control deslizante en el sentido de la flecha en el símbolo de parada (h) a STOP-0. Sugerencias adicionales para el arranque A temperaturas ambiente muy bajas Tan pronto arranca N Accione momentáneamente el gatillo de aceleración para - Stihl HL 90 | Product Instruction Manual - Page 54
español / EE.UU Instrucciones para el uso Durante el período de rodaje intervalos de almacenamiento por tiempo prolongado - vea "Almacenamiento de la máquina". Una máquina nueva de fábrica no debe hacerse funcionar a velocidad alta (aceleración máxima sin carga) por el lapso que tome llenar el - Stihl HL 90 | Product Instruction Manual - Page 55
Gestión del motor Ajuste del carburador Las emisiones de gases de escape son controladas por el diseño de parámetros y componentes fundamentales del motor (por ej. carburación, encendido, regulación y regulación de las válvulas o la lumbrera) sin la adición de ningún equipo importante. El - Stihl HL 90 | Product Instruction Manual - Page 56
español / EE.UU Chispero en el silenciador El silenciador tiene un chispero. N Si el motor pierde potencia, revise el chispero del silenciador. N Espere hasta que el silenciador se enfríe. N Mueva el control deslizante a STOP-0. 1 N Saque el tornillo (1). 249BA059 KN N Saque el tornillo (4). N - Stihl HL 90 | Product Instruction Manual - Page 57
Revisión de la bujía español / EE.UU Lubricación de la caja de engranajes 1 000BA039 KN 002BA363 KN A N Limpie la bujía si está sucia. N Revise la separación entre electrodos (A) y ajústela de ser necesario - vea el capítulo "Especificaciones". N Utilice únicamente bujías tipo resistencia cuyo - Stihl HL 90 | Product Instruction Manual - Page 58
español / EE.UU Transmisión angular Lubrique la transmisión angular con lubricante para engranajes STIHL para cortadoras de matorrales - vea "Accesorios especiales". N Revise el nivel de lubricante después de aproximadamente cada 25 horas de funcionamiento. Destornille el tapón de llenado (2) - Si - Stihl HL 90 | Product Instruction Manual - Page 59
(condición general, fugas) X X Limpiar X Mango de control Comprobar el funcionamiento X X Filtro de aire Limpiar Reemplazar Revisar X Bomba de combustible manual (si la tiene) Solicitar al concesionario de servicio su reparación1) Recogedor en depósito de combustible Solicitar al - Stihl HL 90 | Product Instruction Manual - Page 60
español / EE.UU Los intervalos que se indican a continuación corresponden únicamente a condiciones normales de funcionamiento. Si la jornada diaria es más prolongada que lo normal, o bien si las condiciones son extremas (zonas con demasiado polvo, etc.), acorte apropiadamente los intervalos - Stihl HL 90 | Product Instruction Manual - Page 61
corte 16 Engranaje impulsor de cuchillas 17 Transmisión angular 18 Tapa de llenado de combustible 19 Tornillos de ajuste del carburador 20 Bomba de combustible manual 21 Mango de arranque 22 Silenciador con chispero # Número de serie 445BA010 KN HL 90 K 59 - Stihl HL 90 | Product Instruction Manual - Page 62
combustible Para tapar el depósito de combustible. 19. Tornillos de ajuste del carburador Para afinar el carburador. 20. Bomba de combustible manual Suministra alimentación adicional de combustible para el arranque en frío. 21. Mango de arranque El mango del arrancador usado para arrancar el motor - Stihl HL 90 | Product Instruction Manual - Page 63
Especificaciones EPA / CEPA El período de cumplimiento de emisiones indicado en la etiqueta de cumplimiento de emisiones es la cantidad de horas de funcionamiento para la cual la máquina ha demostrado la conformidad con los requerimientos de emisiones del Gobierno federal de los EE.UU. Categoría A = - Stihl HL 90 | Product Instruction Manual - Page 64
español / EE.UU Información de reparación Los usuarios de esta máquina deben efectuar únicamente los trabajos de mantenimiento descritos en este manual. STIHL recomienda que un concesionario de servicio STIHL efectúe los demás trabajos de reparación. Los reclamos de garantía presentados después de - Stihl HL 90 | Product Instruction Manual - Page 65
motor pequeño para equipo de uso fuera de carretera, usted tiene la responsabilidad de realizar el mantenimiento requerido descrito en su manual de instrucciones. STIHL Incorporated le recomienda guardar todos los recibos comprobantes de los trabajos de mantenimiento hechos a su motor pequeño para - Stihl HL 90 | Product Instruction Manual - Page 66
centro de servicio autorizado por STIHL y presente la tarjeta de garantía firmada. Requerimientos de mantenimiento Las instrucciones presentadas en este manual se basan en la aplicación de la mezcla recomendada para motores de 2 tiempos (vea también la instrucción "Combustible"). Las discrepancias - Stihl HL 90 | Product Instruction Manual - Page 67
motor pequeño para equipo de uso fuera de carretera, usted tiene la responsabilidad de realizar el mantenimiento requerido descrito en su manual de instrucciones. STIHL Incorporated le recomienda guardar todos los recibos comprobantes de los trabajos de mantenimiento hechos a su motor pequeño para - Stihl HL 90 | Product Instruction Manual - Page 68
español / EE.UU Período de garantía contra defectos Los períodos de garantía comenzarán el día en que el motor de equipo utilitario es comprado por el comprador inicial. Si cualquier componente relacionado con el sistema de control de emisiones está defectuoso, el mismo será sustituido por STIHL - Stihl HL 90 | Product Instruction Manual - Page 69
ón de colores anaranjadogris (Números de registro EE.UU. 2,821,860; 3,010,057, 3,010,058, 3,400,477; y 3,400,476) AutoCut® EASYSTART® FARM BOSS® iCademy® MAGNUM® MasterWrench Service® MotoMix® HL 90 K 67 - Stihl HL 90 | Product Instruction Manual - Page 70
español / EE.UU OILOMATIC® Rock Boss® STIHL Cutquik® STIHL DUROMATIC® STIHL Quickstop® STIHL ROLLOMATIC® STIHL WOOD BOSS® TIMBERSPORTS® WOOD BOSS® YARD BOSS® Algunos de las marcas comerciales de STIHL por ley común STIHL InjectionTM 4-MIX ™ BioPlus ™ Easy2Start ™ EasySpool ™ ElastoStart ™ Ematic ™ - Stihl HL 90 | Product Instruction Manual - Page 71
- Stihl HL 90 | Product Instruction Manual - Page 72
WARNING This product contains a chemical known to the State of California to cause cancer. WARNING The engine exhaust from this product contains chemicals known to the State of California to cause cancer, birth defects or other reproductive harm. 0458-445-8621-D eenngglliisscchh // ssppaanniisscchh
-
 1
1 -
 2
2 -
 3
3 -
 4
4 -
 5
5 -
 6
6 -
 7
7 -
8
-
9
-
10
-
11
-
12
-
13
-
14
-
15
-
16
-
17
-
18
-
19
-
20
-
21
-
22
-
23
-
24
-
25
-
26
-
27
-
28
-
29
-
30
-
31
-
32
-
33
-
34
-
35
-
36
-
37
-
38
-
39
-
40
-
41
-
42
-
43
-
44
-
45
-
46
-
47
-
48
-
49
-
50
-
51
-
52
-
53
-
54
-
55
-
56
-
57
-
58
-
59
-
60
-
61
-
62
-
63
-
64
-
65
-
66
-
67
-
68
-
69
-
70
-
71
-
72
 |
 |
{
STIHL HL 90
WARNING
Read Instruction Manual thoroughly
before use and follow all safety
precautions – improper use can
cause serious or fatal injury.
ADVERTENCIA
Antes de usar la máquina lea y siga
todas las precauciones de
seguridad dadas en el manual de
instrucciones – el uso incorrecto
puede causar lesiones graves o
mortales.
Instruction Manual
Manual de instrucciones