Stihl KM 91 R Product Instruction Manual
Stihl KM 91 R Manual
 |
View all Stihl KM 91 R manuals
Add to My Manuals
Save this manual to your list of manuals |
Stihl KM 91 R manual content summary:
- Stihl KM 91 R | Product Instruction Manual - Page 1
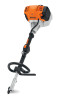
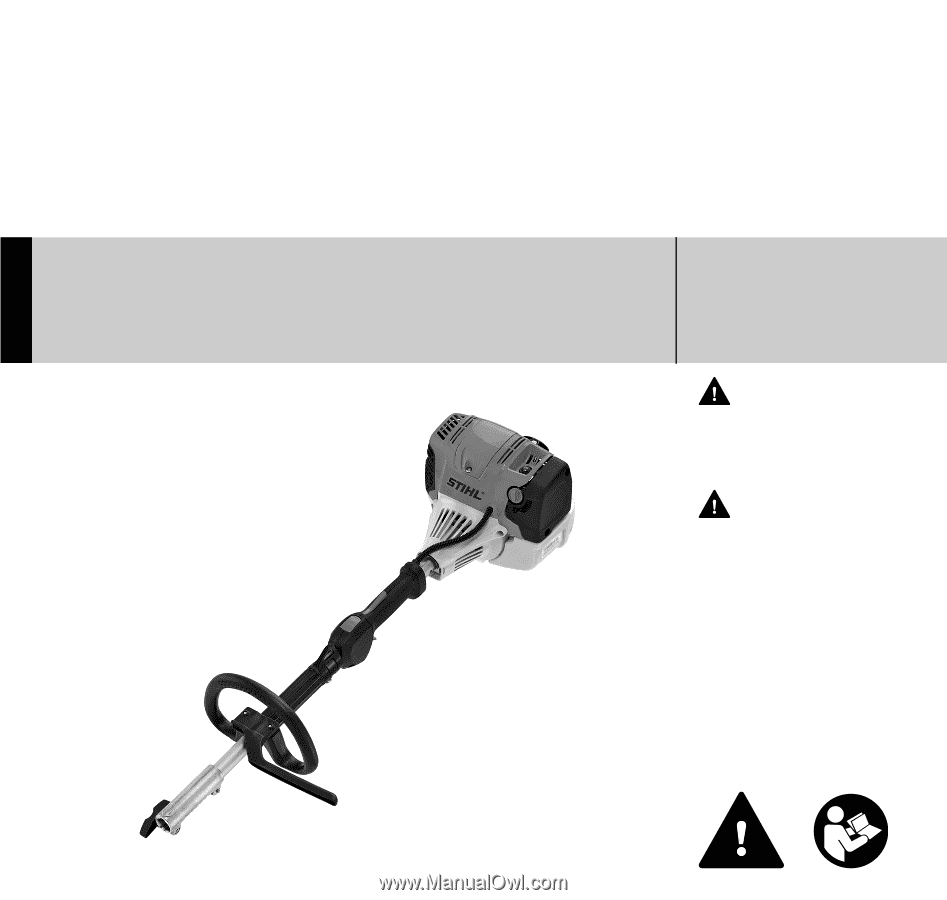
STIHL KM 91 R { Instruction Manual Manual de instrucciones WARNING Read Instruction Manual thoroughly before use and follow all safety precautions - improper use can cause serious or fatal injury. ADVERTENCIA Antes de usar la máquina lea y siga todas las precauciones de seguridad dadas en el manual - Stihl KM 91 R | Product Instruction Manual - Page 2
Instruction Manual 1 - 28 Manual de instrucciones 29 - 61 - Stihl KM 91 R | Product Instruction Manual - Page 3
Parts 21 Specifications 22 Maintenance and Repairs 23 Disposal 23 STIHL Incorporated Federal Emission Control Warranty Statement 24 STIHL injury. © ANDREAS STIHL AG & Co. KG, 2016 0458-468-8621-A. VA1.K16. 0000007504_002_GB { KM 91 R This instruction manual is protected by copyright - Stihl KM 91 R | Product Instruction Manual - Page 4
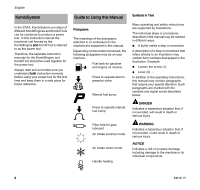
both instruction manuals before using your power tool for the first time and keep them in a safe place for future reference. Guide to Using this Manual Pictograms The meanings of the pictograms attached to property damage, including damage to the machine or its individual components. 2 KM 91 R - Stihl KM 91 R | Product Instruction Manual - Page 5
and warnings apply to the use of all STIHL power tools. Different models may have different parts and controls. See the appropriate section of your KombiEngine and KombiTool instruction manuals for a description of the controls and the function of the parts of your model. Do not clean your machine - Stihl KM 91 R | Product Instruction Manual - Page 6
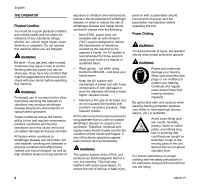
immediately. WARNING The ignition system of the STIHL unit produces an electromagnetic field of a parts of the unit. Secure hair so it is above shoulder level. For further instructions on proper clothing see the safety precautions in the instruction manual of the KombiTool you are using. 4 KM 91 - Stihl KM 91 R | Product Instruction Manual - Page 7
parts see the chapter on "Main Parts." WARNING Never modify this power tool in any way. Only attachments supplied by STIHL or expressly approved by STIHL for use with the specific STIHL Your STIHL power tool uses an oilgasoline mixture for fuel (see the chapter on "Fuel" of your instruction manual). - Stihl KM 91 R | Product Instruction Manual - Page 8
on Starting in the instruction manual of the KombiTool. Important Adjustments WARNING To reduce the risk of personal injury from loss of control or contact with the running working tool, do not use a power tool with incorrect idle adjustment. At correct idle speed, the working tool 6 KM 91 R - Stihl KM 91 R | Product Instruction Manual - Page 9
instruction manual. If you cannot set the correct idle speed, have your STIHL other insecure support. Working Conditions parts while they are hot. Keep the area around the muffler clean. Remove excess lubricant and all debris such as pine needles, branches or leaves. Let the engine cool down KM 91 - Stihl KM 91 R | Product Instruction Manual - Page 10
your KombiEngine and KombiTool instruction manuals. Have such work performed by your STIHL servicing dealer only. WARNING attached.) A loose connection between spark plug boot and the ignition wire connector in the boot may create arcing that could ignite combustible fumes and cause a fire. 8 KM 91 - Stihl KM 91 R | Product Instruction Manual - Page 11
service for the laws or regulations relating to fire protection requirements. Store the power tool in a dry and high or locked location out of reach of children. English Approved KombiTools The following STIHL KombiTools may be mounted on the KombiEngine: KombiTool FS-KM FS-KM 1) FSB-KM HL-KM - Stihl KM 91 R | Product Instruction Manual - Page 12
English Mounting the Loop Handle A barrier bar is supplied with the machine. Attach the barrier bar to the loop handle. 4 2 3 5 2 6 7 1 1 N Insert square nuts (1) in the loop handle and control handle. Always leave the barrier bar attached. 002BA098 KN 002BA099 KN 002BA353 KN 10 KM 91 R - Stihl KM 91 R | Product Instruction Manual - Page 13
and the STIHL twostroke engine problems or damage the engine. For this reason STIHL authorized STIHL servicing dealer STIHL engine, use a high quality 2cycle engine oil, such as STIHL 2-cycle engine oils. STIHL 2-cycle engine oils are specially designed for STIHL recommend to use STIHL HP Ultra oil - Stihl KM 91 R | Product Instruction Manual - Page 14
suited for high performance engines. For further details, see www.STIHLusa.com/ethanol Fuel mix ages If not using STIHL MotoMix, only mix sufficient fuel for a few days of work, not to exceed 30 days of storage. Store winter blend in winter, summer blend in summer. 0000-GXX-0476-A0 12 KM 91 R - Stihl KM 91 R | Product Instruction Manual - Page 15
The ignition is switched on again after the engine stops - the engine is then ready to start. N Press the manual fuel pump bulb (9) at least five times - even if the bulb is already filled with fuel. N Press in has been running but is still cold. The choke knob must engage in position. KM 91 R 13 - Stihl KM 91 R | Product Instruction Manual - Page 16
support: Check that the working tool is not touching the ground or any other obstacles - see also "Starting / Stopping the Engine" in the KombiTool instruction manual otherwise break. N Do not let the starter grip snap back. Guide it slowly back into the housing so that the starter rope can KM 91 R - Stihl KM 91 R | Product Instruction Manual - Page 17
completely dry N After refueling, press the manual fuel pump bulb at least five times - . N Now start the engine. Operating Instructions During break-in period A factory-new in period. As all moving parts have to bed in during element (3). N Replace any damaged parts. Installing the Filter Element N - Stihl KM 91 R | Product Instruction Manual - Page 18
to 3/4 turn in the same direction. WARNING If the attachment continues to run when the engine is idling, have your machine checked and repaired by your servicing dealer. N Take out the screw (4). N Lift the spark arresting screen (5). N Insert the screw (4) and tighten it down firmly. 16 KM 91 R - Stihl KM 91 R | Product Instruction Manual - Page 19
Use only resistor type spark plugs of the approved range. Rectify problems which have caused fouling of spark plug: - too much oil , e.g. operating at part load. 1 3 2 WARNING To reduce the risk of fire and burn injury, use only spark plugs authorized by STIHL. Always press the wrench. KM 91 R 17 - Stihl KM 91 R | Product Instruction Manual - Page 20
the carburetor diaphragms sticking together. N Thoroughly clean the machine. N Remove, clean and check the attachment. Coat metal parts with corrosion inhibiting oil. N Store the machine in a dry and secure location Keep out of the reach of children and other unauthorized persons. 18 KM 91 R - Stihl KM 91 R | Product Instruction Manual - Page 21
Clean X Replace any damaged parts X Check operation X X Visual inspection Replace1) Check X Have repaired by servicing dealer2) Have checked by servicing dealer2) Have replaced by servicing dealer2) Clean Check idle adjustment - the working/cutting attachment must not run X X Adjust - Stihl KM 91 R | Product Instruction Manual - Page 22
labels Replace 1) Only if there is a noticeable loss of engine power 2) STIHL recommends an authorized STIHL servicing dealer. before starting work after finishing work or daily after each refueling stop weekly monthly every 12 months if problem if damaged as required X X X X X 20 KM 91 R - Stihl KM 91 R | Product Instruction Manual - Page 23
5 Cover 6 Muffler with Spark Arresting Screen 7 Machine Support 8 Coupling Sleeve 9 Wing Screw 10 Loop Handle 11 Barrier Bar 12 Carrying Ring 13 Stop Switch 14 Throttle Trigger Lockout 15 Throttle Trigger 16 Choke Knob 17 Air Filter Cover 18 Fuel Tank # Serial Number 0000-GXX-0497-A0 KM 91 R 21 - Stihl KM 91 R | Product Instruction Manual - Page 24
, for starting the engine. 4 Manual Fuel Pump Provides additional fuel feed Support For resting machine on the ground. 8 Coupling Sleeve Connects drive tube to lower part of drive tube (stub shaft). 9 Wing Screw Secures lower part with mixture lubrication KM 91 R Displacement: Bore: Stroke: 28.4 cc - Stihl KM 91 R | Product Instruction Manual - Page 25
carry out only the maintenance operations described in this manual. STIHL recommends that other repair work be performed only by authorized STIHL servicing dealers using genuine STIHL replacement parts. Genuine STIHL parts can be identified by the STIHL part number, the { logo and, in some cases, by - Stihl KM 91 R | Product Instruction Manual - Page 26
your small off-road equipment engine or a part has failed due to abuse, neglect, improper maintenance or unapproved modifications. You are responsible for presenting your small off-road equipment engine to a STIHL service center as soon as a problem exists. The warranty repairs will be completed in - Stihl KM 91 R | Product Instruction Manual - Page 27
part. Diagnosis You, as the owner, shall not be charged for diagnostic labor which leads to the determination that a warranted part Service Bring the product to any authorized STIHL servicing dealer. Maintenance Requirements The maintenance instructions in this manual STIHL (1-800-4678445). The STIHL - Stihl KM 91 R | Product Instruction Manual - Page 28
that are not exempted by CARB may not be used. The use of any non-exempted add-on or modified parts will be grounds for disallowing a warranty claim. STIHL Incorporated will not be liable to warrant failures of warranted parts caused by the use of a non-exempted add-on or modified part. 26 KM 91 R - Stihl KM 91 R | Product Instruction Manual - Page 29
Line, Fuel Line Fittings, Clamps, Fasteners. Where to make a Claim for Warranty Service Bring the STIHL product to any authorized STIHL servicing dealer. Limitations The repair or replacement of any warranted part otherwise eligible for warranty coverage may be excluded from such warranty coverage - Stihl KM 91 R | Product Instruction Manual - Page 30
& Co. KG, Waiblingen is strictly prohibited. AutoCut® FARM BOSS® iCademy® MAGNUM® MasterWrench Service® MotoMix® OILOMATIC® 28 4-MIX ™ BioPlus ™ Easy2Start ™ EasySpool ™ ElastoStart ™ Ematic ™ FixCut ™ IntelliCarb ™ Master Control Lever ™ Micro ™ Pro Mark ™ Quiet Line ™ STIHL M-Tronic ™ KM 91 R - Stihl KM 91 R | Product Instruction Manual - Page 31
obtener el rendimiento y satisfacción máximos de la herramienta motorizada STIHL, es importante que lea, comprenda y respete las medidas de seguridad puede causar lesiones graves e incluso mortales. { KM 91 R Este manual de instrucciones está protegido por derechos de propiedad intelectual - Stihl KM 91 R | Product Instruction Manual - Page 32
KombiSystem Con el sistema KombiSystem de STIHL, varios motores KombiEngine y accesorios KombiTool pueden combinarse para formar una herramienta motorizada. En este manual de instrucciones la unidad formada por ón de peligro que, de no evitarse, podría causar lesiones graves o mortales. 30 KM 91 R - Stihl KM 91 R | Product Instruction Manual - Page 33
las características de funcionamiento o la apariencia de su máquina difieren de las descritas en este manual, comuníquese con el concesionario STIHL para obtener la ayuda que requiera. KM 91 R Medidas de seguridad y técnicas de manejo Dado que este motor KombiEngine es el motor para una herramienta - Stihl KM 91 R | Product Instruction Manual - Page 34
blancos y del síndrome del túnel carpiano, sírvase notar lo siguiente: - La mayor parte de las herramientas motorizadas de STIHL se ofrecen con un sistema antivibración ("AV") cuyo propósito es reducir la transmisión sus médicos y al fabricante del marcapasos antes de usar esta máquina. 32 KM 91 R - Stihl KM 91 R | Product Instruction Manual - Page 35
en un vehículo, sujétela firmemente para impedir su vuelco, el derrame de combustible y el daño a la herramienta motorizada. Combustible La herramienta motorizada STIHL utiliza una mezcla de aceite-gasolina como combustible (vea el capítulo "Combustible" en el manual del propietario). KM 91 R 33 - Stihl KM 91 R | Product Instruction Manual - Page 36
a mano tan firmemente como sea posible. Consulte también el capítulo "Combustible" del Manual de instrucciones para obtener información adicional. Antes de arrancar ADVERTENCIA Siempre revise la herramienta motorizada y siempre debe regresar a la posición de marcha en vacío por la acción de KM 91 R - Stihl KM 91 R | Product Instruction Manual - Page 37
especialmente las partes visibles, por ejemplo, la tapa de llenado, conexiones de mangueras y la bomba de combustible manual (únicamente para ón correspondiente del manual de instrucciones. Si no puede regular correctamente la marcha en vacío, pida a su concesionario STIHL que revise la KM 91 R 35 - Stihl KM 91 R | Product Instruction Manual - Page 38
ón repetida o de grandes cantidades de polvo u otros contaminantes del aire, especialmente los de partículas pequeñas puede causar enfermedades respiratorias o de otro tipo. Controle el polvo en su motor. Haga reparar el silenciador únicamente por el concesionario de servicio STIHL. 36 KM 91 R - Stihl KM 91 R | Product Instruction Manual - Page 39
ado para reducir el riesgo de incendio debido a la emisión de partículas calientes. Nunca haga funcionar la unidad sin tener instalado el chispero secas. español / EE.UU ADVERTENCIA Algunas herramientas motorizadas STIHL están equipadas con un convertidor catalítico, el que est para KM 91 R 37 - Stihl KM 91 R | Product Instruction Manual - Page 40
accesorio KombiTool. Este tipo de trabajo debe ser realizado únicamente por el concesionario de servicio de STIHL. ADVERTENCIA Use la bujía especificada y asegúrese de que ella y el cable de encendido de combustible. Consulte el capítulo "Almacenamiento de la máquina" en este manual. 38 KM 91 R - Stihl KM 91 R | Product Instruction Manual - Page 41
STIHL pueden instalarse en el motor KombiEngine: Accesorio KombiTool FS-KM FS-KM 1) FSB-KM HL-KM 145° HL-KM 0° FH-KM 145° BG-KM HT-KM BF-KM FBD-KM FCB-KM FCS-KM KB-KM KW-KM las tuercas cuadradas (1) en la barra de defensa (2) - los orificios deben quedar alineados 002BA098 KN KM 91 R 39 - Stihl KM 91 R | Product Instruction Manual - Page 42
indica la flecha hasta que perciba una resistencia inicial. Luego gírelo otra media vuelta en el mismo sentido. 002BA099 KN 002BA353 KN 002BA655 KN 40 KM 91 R - Stihl KM 91 R | Product Instruction Manual - Page 43
de alta calidad equivalente. Para satisfacer los requisitos de la norma EPA y CARB recomendamos el uso del aceite STIHL HP Ultra o equivalente. No use aceites para mezclar con designaciones BIA o TCW (para motores de dos Limpie el tanque de combustible de la máquina según sea necesario. KM 91 R 41 - Stihl KM 91 R | Product Instruction Manual - Page 44
. Cierre el envase y agítelo vigorosamente a mano para asegurar que se mezclen bien el aceite y la gasolina. Gasolina Aceite (STIHL 50:1 ó aceite de alta calidad equi- valente) Litros 1 5 10 20 Litros 0,02 0,10 0,20 0,40 (ml) en el tanque pueda escapar lentamente. 0000-GXX-0476-A0 42 KM 91 R - Stihl KM 91 R | Product Instruction Manual - Page 45
áticamente a la posición de Marcha al soltarlo. El encendido vuelve a conectarse una vez que el motor se para - el motor entonces está listo para arrancar. KM 91 R 43 - Stihl KM 91 R | Product Instruction Manual - Page 46
tocando el suelo ni otros obstáculos. Vea también el capítulo "Arranque/parada del motor" en el manual de instrucciones de la herramienta KombiTool. N Asegúrese de tener los pies apoyados de modo seguro y firme. aceleración hacia abajo y abra el acelerador - la palanca del KM 91 R 0000-GXX-1558-A0 - Stihl KM 91 R | Product Instruction Manual - Page 47
enfríe. Vacíe el tanque de combustible y guarde la máquina en un lugar seco, alejada de fuentes de encendido, hasta que la vuelva a utilizar. Para los KM 91 R 45 - Stihl KM 91 R | Product Instruction Manual - Page 48
. Instalación del elemento del filtro N Instale el elemento del filtro (3) en la caja del filtro y coloque la cubierta. N Inserte los tornillos (1) y apriételos bien firmes. KM 91 R - Stihl KM 91 R | Product Instruction Manual - Page 49
el chispero está dañado o con depósitos gruesos de carbón, instale uno nuevo. N Vuelva a instalar el chispero (5). N Inserte el tornillo (4) y apriételo bien firme. KM 91 R 47 - Stihl KM 91 R | Product Instruction Manual - Page 50
1 3 2 ADVERTENCIA Para reducir el riesgo de incendio y de quemaduras, utilice solamente las bujías autorizadas por STIHL. Siempre inserte el casquillo de la bujía (1) bien apretado en el borne de la bujía (2). No use Use únicamente bujías de tipo resistor con bornes sólidos, sin roscas. 48 KM 91 R - Stihl KM 91 R | Product Instruction Manual - Page 51
ón N Guarde la máquina en un lugar seco y bajo llave, fuera del alcance de los niños y de otras personas no autorizadas. español / EE.UU KM 91 R 49 - Stihl KM 91 R | Product Instruction Manual - Page 52
X X Filtro de aire Inspección visual Reemplazar1) Revisar X Bomba de combustible manual (si la tiene) Solicitar al concesionario de servicio su reparación2) Recogedor en del cilindro Solicitar al concesionario de servicio su limpieza2) 50 X X X X X X X X X X X X X X X KM 91 R - Stihl KM 91 R | Product Instruction Manual - Page 53
STIHL autorizado para servicio. antes de comenzar el trabajo después de completar el trabajo o diariamente después de cada parada para cargar combustible semanalmente mensualmente cada 12 meses si hay problemas si presenta daños según se requiera español / EE.UU X X X X X X X X X KM 91 - Stihl KM 91 R | Product Instruction Manual - Page 54
1 Tapa de llenado de combustible 2 Tornillos de ajuste del carburador 3 Mango de arranque 4 Bomba de combustible manual 5 Cubierta 6 Silenciador con chispero 7 Apoyo de la máquina 8 Manguito de acoplamiento 9 Tornillo mariposa 10 Mango de combustible # Número de serie 0000-GXX-0497-A0 52 KM 91 R - Stihl KM 91 R | Product Instruction Manual - Page 55
usado para arrancar el motor. 4 Bomba de combustible manual Suministra alimentación adicional de combustible para el arranque en Conecta el tubo de mando a la parte inferior del tubo de mando (eje corto). 9 Tornillo mariposa Sujeta la parte inferior del tubo de mando (eje corto aceite KM 91 R 53 - Stihl KM 91 R | Product Instruction Manual - Page 56
por medio del número de pieza STIHL, el logotipo { y el símbolo de piezas STIHL K. El símbolo aparece solo en algunas piezas pequeñas. Para reparar algún componente del sistema de control de emisiones de aire, consulte la garantía de sistemas de emisiones dada en este manual. 54 KM 91 R - Stihl KM 91 R | Product Instruction Manual - Page 57
en su manual de instrucciones. STIHL Incorporated le recomienda guardar todos los recibos comprobantes de los trabajos de mantenimiento hechos a su motor pequeño para equipo de uso fuera de carretera, pero STIHL Incorporated no puede negar garantía basado en el solo hecho de faltar los KM 91 R 55 - Stihl KM 91 R | Product Instruction Manual - Page 58
si usted reclama garantía para un componente y se comprueba que la máquina no está defectuosa, STIHL Incorporated le cobrará el costo de la prueba del sistema de control de emisiones. El trabajo de de arranque en frío) (si corresponde) - Varillajes de control - Múltiple de admisión 56 KM 91 R - Stihl KM 91 R | Product Instruction Manual - Page 59
STIHL en su localidad. Requerimientos de mantenimiento Las instrucciones presentadas en este manual STIHL por STIHL Incorporated STIHL Incorporated Este producto está sujeta a la Política de garantía limitada de STIHL 800-GO-STIHL (1-800-467-8445). La Política de garantía limitada de STIHL Incorporated - Stihl KM 91 R | Product Instruction Manual - Page 60
STIHL y STIHL Incorporated se STIHL Incorporated garantía, STIHL Incorporated STIHL manual de instrucciones. STIHL pero STIHL Incorporated STIHL servicio STIHL tan STIHL llamando al 1800-467-8445, o si lo prefiere puede escribir a STIHL por STIHL Incorporated STIHL Incorporated Además, STIHL Incorporated - Stihl KM 91 R | Product Instruction Manual - Page 61
(vea más abajo) debe garantizarse por el período de garantía definido en la subsección COBERTURA POR STIHL INCORPORATED, vea más arriba. Si uno de estos componentes falla durante el período de garantía, el el sistema de control de emisiones, y la misma debe ser suministrada gratis al KM 91 R 59 - Stihl KM 91 R | Product Instruction Manual - Page 62
bajo garantía. Marcas comerciales Marcas registradas de STIHL STIHL® { K La combinación de colores anaranjadogris (Números de registro EE.UU. 2,821,860; 3,010,057, 3,010,058, 3,400,477; y 3,400,476) AutoCut® FARM BOSS® iCademy® MAGNUM® MasterWrench Service® MotoMix® OILOMATIC® 60 KM 91 R - Stihl KM 91 R | Product Instruction Manual - Page 63
de estas marcas comerciales sin el consentimiento expreso por escrito de ANDREAS STIHL AG & Co. KG, Waiblingen. 4-MIX ™ BioPlus ™ Easy2Start ™ EasySpool ™ ElastoStart ™ Ematic ™ FixCut ™ IntelliCarb ™ Master Control Lever ™ Micro ™ Pro Mark ™ Quad Power ™ Quiet Line ™ KM 91 R español / EE.UU 61 - Stihl KM 91 R | Product Instruction Manual - Page 64
to the State of California to cause cancer, birth defects or other reproductive harm. 0458-468-8621-A eenngglliisscchh // ssppaanniisscchh UUSSAA U G U www.stihl.com ADVERTENCIA Este producto contiene sustancias químicas consideradas por el Estado de California como causantes de cáncer, defectos de
-
 1
1 -
 2
2 -
 3
3 -
 4
4 -
 5
5 -
 6
6 -
 7
7 -
8
-
9
-
10
-
11
-
12
-
13
-
14
-
15
-
16
-
17
-
18
-
19
-
20
-
21
-
22
-
23
-
24
-
25
-
26
-
27
-
28
-
29
-
30
-
31
-
32
-
33
-
34
-
35
-
36
-
37
-
38
-
39
-
40
-
41
-
42
-
43
-
44
-
45
-
46
-
47
-
48
-
49
-
50
-
51
-
52
-
53
-
54
-
55
-
56
-
57
-
58
-
59
-
60
-
61
-
62
-
63
-
64
 |
 |
{
STIHL KM 91 R
WARNING
Read Instruction Manual thoroughly
before use and follow all safety
precautions – improper use can
cause serious or fatal injury.
ADVERTENCIA
Antes de usar la máquina lea y siga
todas las precauciones de
seguridad dadas en el manual de
instrucciones – el uso incorrecto
puede causar lesiones graves o
mortales.
Instruction Manual
Manual de instrucciones