Sub-Zero 685 Built-In Installation Guide - Page 4
Important Note - parts
 |
View all Sub-Zero 685 manuals
Add to My Manuals
Save this manual to your list of manuals |
Page 4 highlights
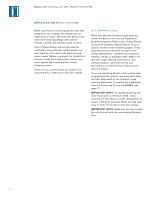
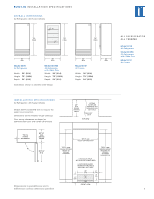
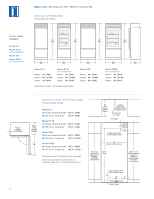
B U I LT- I N I N S TA L L A T I O N S P E C I F I C A T I O N S I N S TA L L AT I O N S P E C I F I C AT I O N S Make sure that the actual equipment that was shipped to you matches the design you are expecting to install. The Sub-Zero Built-In line offers the following design alternatives- framed, overlay and stainless steel models. Each of these design options has specific installation requirements, which means it is vital that the unit match your planning and space needs. Before you begin the installation process, check the exact model number you need against the model number on the shipping carton. If the unit you receive does not match your requirements, contact your Sub-Zero dealer. SITE PREPARATION Make sure that the finished rough opening where the Built-In unit is to be installed is properly prepared. Refer to the Overall Dimensions and Installation Specifications for your specific model on the following pages. These specifications are identical for each of the design alternatives-whether your model is framed, overlay or stainless steel. Make sure that the rough opening dimensions, door swing clearance, electrical service and plumbing are correct for the model you are about to install. If you are installing Built-In units side by side, a separating filler strip is recommended. Add the filler strip width to the finished rough opening dimension. Complete the installation with the Anchoring Kit (part #4200900), see page 21. IMPORTANT NOTE: To operate properly, the door must open a minimum of 90˚. Use a minimum 3" (76) filler in corner installations to assure a 90˚ door opening. Allow enough clearance in front of the unit for full door swing. IMPORTANT NOTE: Make sure the floor under the unit is level with the surrounding finished floor. 4
-
 1
1 -
 2
2 -
 3
3 -
 4
4 -
 5
5 -
 6
6 -
 7
7 -
 8
8 -
 9
9 -
 10
10 -
11
-
12
-
13
-
14
-
15
-
16
-
17
-
18
-
19
-
20
-
21
-
22
-
23
-
24
 |
 |
