Symantec 10514879 User Guide - Page 14
Guidelines for entering guarded information, Enable File Guard, and specify some confidential files
 |
UPC - 037648267304
View all Symantec 10514879 manuals
Add to My Manuals
Save this manual to your list of manuals |
Page 14 highlights
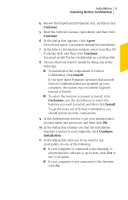
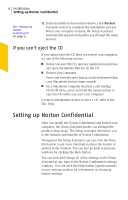
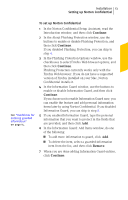
14 Installation Setting up Norton Confidential 8 In the File Guard window, do one of the following: 1 To enable File Guard, select Enable File Guard and specify some confidential files. If you specified items of confidential information earlier, select the Find and guard files in your home directory... checkbox. 1 To disable File Guard, select Disable File Guard. If you disable File Guard now, you can enable the feature and guard files later by using Norton Confidential. 9 When you are done enabling or disabling File Guard, click Continue. If you disabled File Guard, you can skip to step 12. 10 If you enabled File Guard, click Add File, select a file from the file browser, and then click Add. 11 When you are done adding files to guard, click Continue. 12 In the Vulnerability Protection window, use the button to enable or disable Vulnerability Protection, and then click Continue. 13 In the Finish Setup window, do all the following actions: 1 Review the list of features that are enabled or disabled to ensure that they are set the way you want. 1 Use the checkbox to choose whether to put the Norton Confidential icon in the Dock. 1 Use the checkbox to choose whether to register Norton Confidential. 14 When you are done with the Setup Assistant, click Finish. 15 In the Authenticate window, enter an administrator account name and password, and then click OK. Guidelines for entering guarded information Before you add information to Information Guard, you should think about the information you want to guard. You might want to guard information such as the following:
-
 1
1 -
2
-
3
-
4
-
5
-
6
-
7
-
8
-
 9
9 -
 10
10 -
 11
11 -
 12
12 -
 13
13 -
 14
14 -
 15
15 -
 16
16 -
 17
17 -
 18
18 -
 19
19 -
20
-
21
-
22
-
23
-
24
-
25
-
26
-
27
-
28
 |
 |
