TASCAM DM-24 Application-Specific Documents DM-24 with MX2424 - Page 2
Machine Ctrl, List Auto Detect, Enter, Mm/mx, Shift+option/aux 1-2, Sync/tc
 |
View all TASCAM DM-24 manuals
Add to My Manuals
Save this manual to your list of manuals |
Page 2 highlights
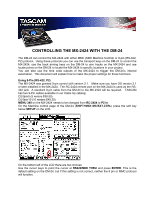
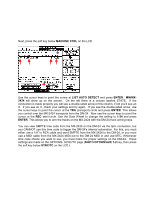
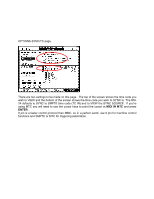
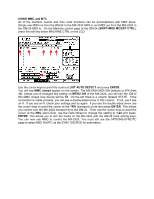
Next, press the soft key below MACHINE CTRL on the LCD. Use the cursor keys to point the cursor at LIST AUTO DETECT and press ENTER. MM/MX2424 will show up on the screen. On the left there is a column labeled STATE. If the connection is made properly you will see a double-sided arrow in this column, if not you'll see an X. If you see an X, check your settings and try again. If you see the double-sided arrow, use the cursor keys to point the cursor at the TRA (transport) circle and press ENTER. This allows you control over the MX-2424 transports from the DM-24. Now use the cursor keys to point the cursor at the REC semi-circle. Use the Data Wheel to change the setting to 1-24 and press ENTER. This allows you to arm the tracks on the MX-2424 with the DM-24 track arming keys. You can view SMPTE time code from the MX-2424 on the DM-24 via the 9pin connection, but you CANNOT use this time code to trigger the DM-24's internal automation. For this, you must either use a 1/4" to RCA cable and send SMPTE from the MX-2424 to the DM-24, or you must use a MIDI cable from the MX-2424 MIDI out to the DM-24 MIDI in and use MTC. Whichever time code choice you want to use, you must make the proper settings on the DM-24. These settings are made on the OPTIONS- SYNC/TC page (SHIFT+OPTION/AUX 1-2 key, then press the soft key below SYNC/TC on the LCD.)
-
 1
1 -
 2
2 -
 3
3 -
 4
4
 |
 |
