TASCAM DR-70D Owners Manual - Page 10
Preparation
 |
View all TASCAM DR-70D manuals
Add to My Manuals
Save this manual to your list of manuals |
Page 10 highlights
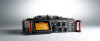
2 Elapsed time This shows the elapsed time (hours: minutes: seconds) of the current file. 3 Monitoring mode This shows what audio is now being monitored. Indicator Meaning MIX Mix of channels 1-4 CAM IN jack sound input 4 Auto tone function status No icon: Auto tone off : Auto tone on 5 Power supply status When a battery is being used, a battery icon shows the amount of power remaining with 10 levels ( e e ). The battery is almost dead and the power will soon turn off (enter standby) if the icon appears empty and blinks. When using the PS-P515U AC adapter (sold separately) or USB bus power, appears. 6 Level meters These show the levels of the input and playback signals. 7 Recording status : Recording off : Recording on 8 Project name This shows the name of the project playing back. A project is a group of files used for recording/ playback. 10 TASCAM DR-70D 9 Remaining time This shows the elapsed time (hours: minutes: seconds) of the current file. 0 HOLD/ switch status : HOLD switch off : HOLD switch on q Peak value in decibels (dB) The maximum level that occurs in a fixed period of time is displayed in decibels. Preparation Powering the unit 88Using AA batteries 1. Open the front cover on the front of the unit. 2. Pull the lever on the battery compartment cover down to open it. 3. Install 4 AA batteries with their ¥ and ^ marks as shown in the battery compartment . 4. Close the battery compartment cover. • Use the BATTERY TYPE item of the OTHERS menu to set the type of battery in order to allow the unit to accurately show the amount of power remaining and determine whether enough power is available for proper operation. (By default, this is set to "ALKAL" for alkaline batteries.) Turning the unit on. To start the unit when off (in standby), slide the HOLD/ switch toward until TASCAM DR-70D(start-up screen) appears on the display. The Home Screen appears after the unit starts up. Setting the built-in clock When the unit is started up for the first time (or when the built-in clock is reset after being left unused without batteries), the DATE/TIMEscreen appears before the start-up screen to allow the date and time to be set.
-
 1
1 -
2
-
3
-
4
-
 5
5 -
 6
6 -
 7
7 -
 8
8 -
 9
9 -
 10
10 -
 11
11 -
 12
12 -
 13
13 -
 14
14 -
 15
15 -
16
-
17
-
18
-
19
-
20
-
21
-
22
-
23
-
24
-
25
-
26
-
27
-
28
-
29
-
30
-
31
-
32
-
33
-
34
-
35
-
36
-
37
-
38
-
39
-
40
-
41
-
42
-
43
-
44
-
45
-
46
-
47
-
48
-
49
-
50
-
51
-
52
-
53
-
54
-
55
-
56
-
57
-
58
-
59
-
60
-
61
-
62
-
63
-
64
-
65
-
66
-
67
-
68
-
69
-
70
-
71
-
72
-
73
-
74
-
75
-
76
-
77
-
78
-
79
-
80
-
81
-
82
-
83
-
84
-
85
-
86
-
87
-
88
-
89
-
90
-
91
-
92
-
93
-
94
-
95
-
96
-
97
-
98
-
99
-
100
-
101
-
102
-
103
-
104
-
105
-
106
-
107
-
108
-
109
-
110
-
111
-
112
-
113
-
114
-
115
-
116
-
117
-
118
-
119
-
120
-
121
-
122
-
123
-
124
-
125
-
126
-
127
-
128
 |
 |
