TASCAM IF-E100 Reference Manual - Page 2

Features, Models compatible for installation, Updating the firmware, Installation procedure overview - how does a work

Page 2 highlights

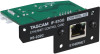
Contents Features 2 Models compatible for installation 2 CD-400U/CD-400UDAB 2 Updating the firmware 2 Installation procedure overview 2 Conventions used in this manual 2 Trademarks 2 Using the TEAC Global Site 3 Product registration 3 About TASCAM customer support service 3 Names and functions of parts 3 Rear panel...3 Installing the Ethernet card 3 Connecting to Ethernet 3 Network function settings 4 Enabling Ethernet (Serial Mode setting 4 Network function settings 4 Password setting 4 IP mode setting 4 IP address setting (IP Address 4 Setting the subnet mask (Subnet Mask 5 Setting the default gateway (Gateway 5 Setting the DNS address (DNS Address 5 Remote control 6 Required settings for Telnet connection 6 Connecting to this unit by Telnet 6 Specifications 6 Input and output 6 Ethernet connectors 6 Other...6 Dimensions 6 Weight...6 Dimensional drawings 6 Software Licensing 7 Apache License 7 APPENDIX: How to apply the Apache License to your work.8 Features 00Enables external control of a CD-400U/CD−400U DAB using Telnet through an Ethernet connection 00Supports 100BASE-T Models compatible for installation Before installing this card, check the TEAC Global Site (http:// teac-global.com/) for the latest information about the models in which it can be installed. CD-400U/CD-400UDAB Use firmware Ver 1.10 or later for these models. Updating the firmware The firmware of this card can be updated to add functions to it. Check the TEAC Global Site (http://teac-global.com/) for details about the latest firmware and update procedures. Installation procedure overview 00Always disconnect the CD-400U/CD−400U DAB AC cord before installing or removing this card. 00Securely tighten the attachment screws on the right and the left of the card before use. Conventions used in this manual In this manual, we use the following conventions: 00When we refer to buttons, connectors and other parts of this unit, we use a bold font like this: ENTER button. 00When we show characters that appear on the display, the typeface looks like this: Serial Mode. 00As necessary, additional information is provided under TIP, NOTE and CAUTION headings. TIP These are tips about how to use the unit. NOTE These provide additional explanations and describe special cases. ATTENTION Failure to follow these instructions could result in damage to equipment or lost data, for example. VCAUTION Failure to follow these instructions could result in injury. Trademarks 00TASCAM is a registered trademark of TEAC Corporation. 00Other company names, product names and logos in this doc- ument are the trademarks or registered trademarks of their respective owners. 2 TASCAM IF-E100

  • 1
  • 2
  • 3
  • 4
  • 5
  • 6
  • 7
  • 8
  • 9
  • 10

2
TASCAM
IF-E100
Features
0
Enables external control of a CD-400U/CD−400U DAB using
Telnet through an Ethernet connection
0
Supports 100BASE-T
Models compatible for installation
Before installing this card, check the TEAC Global Site (
http:// te-
ac-global.com/
) for the latest information about the models in
which it can be installed.
CD-400U/CD-400UDAB
Use firmware Ver 1.10 or later for these models.
Updating the firmware
The firmware of this card can be updated to add functions to it.
Check the TEAC Global Site (
http://teac-global.com/
) for details
about the latest firmware and update procedures.
Installation procedure overview
0
Always disconnect the CD-400U/CD−400U DAB AC cord be-
fore installing or removing this card.
0
Securely tighten the attachment screws on the right and the
left of the card before use.
Conventions used in this manual
In this manual, we use the following conventions:
0
When we refer to buttons, connectors and other parts of this
unit, we use a bold font like this:
ENTER
button.
0
When we show characters that appear on the display, the
typeface looks like this:
Serial Mode
.
0
As necessary, additional information is provided under TIP,
NOTE and CAUTION headings.
TIP
These are tips about how to use the unit.
NOTE
These provide additional explanations and describe special
cases.
ATTENTION
Failure to follow these instructions could result in damage to
equipment or lost data, for example.
V
CAUTION
Failure to follow these instructions could result in injury.
Trademarks
0
TASCAM is a registered trademark of TEAC Corporation.
0
Other company names, product names and logos in this doc-
ument are the trademarks or registered trademarks of their
respective owners.
Contents
Features
....................................................................................
2
Models compatible for installation
........................................
2
CD-400U/CD-400UDAB
.....................................................................
2
Updating the firmware
............................................................
2
Installation procedure overview
............................................
2
Conventions used in this manual
...........................................
2
Trademarks
..............................................................................
2
Using the TEAC Global Site
.....................................................
3
Product registration
................................................................
3
About TASCAM customer support service
.............................
3
Names and functions of parts
................................................
3
Rear panel
...................................................................................................
3
Installing the Ethernet card
....................................................
3
Connecting to Ethernet
...........................................................
3
Network function settings
......................................................
4
Enabling Ethernet (Serial Mode setting)
.........................................
4
Network function settings
....................................................................
4
Password setting
.................................................................................
4
IP mode setting
....................................................................................
4
IP address setting (IP Address)
.......................................................
4
Setting the subnet mask (Subnet Mask)
.....................................
5
Setting the default gateway (Gateway)
......................................
5
Setting the DNS address (DNS Address)
.....................................
5
Remote control
........................................................................
6
Required settings for Telnet connection
.....................................
6
Connecting to this unit by Telnet
..................................................
6
Specifications
...........................................................................
6
Input and output
.....................................................................................
6
Ethernet connectors
...........................................................................
6
Other
............................................................................................................
6
Dimensions
............................................................................................
6
Weight
.....................................................................................................
6
Dimensional drawings
...........................................................................
6
Software Licensing
..................................................................
7
Apache License
....................................................................................
7
APPENDIX: How to apply the Apache License to your work8