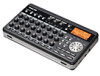
TEAC DP-008 DP-008 Owner's Manual - Page 18
Record vocals on TRACK 3, to start recording.
 |
View all TEAC DP-008 manuals
Add to My Manuals
Save this manual to your list of manuals |
Page 18 highlights
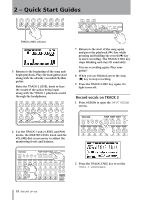
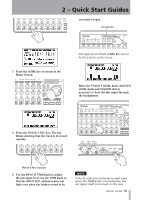
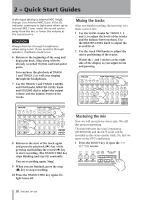
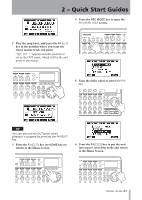
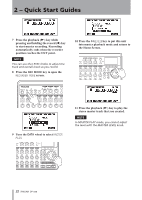
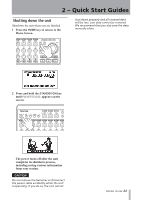
2 - Quick Start Guides TRACK 2 REC indicator 5 Return to the beginning of the song and begin playback. Play the lead guitar part along with the already recorded rhythm guitar. Raise the TRACK 2 LEVEL knob to hear the sound of the guitar being input along with the TRACK 1 playback sound through the headphones. 7 Return to the start of the song again and press the playback (Á) key while pressing and holding the record (-) key to start recording. The TRACK 2 REC key stops blinking and stays lit constantly. You are recording again. Play your guitar! 8 When you are finished, press the stop (ª) key to stop recording. 9 Press the TRACK 2 REC key again. Its light turns off. Record vocals on TRACK 3 1 Press ASSIGN to open the INPUT ASSIGN screen. 6 Use the TRACK 1 and 2 LEVEL and PAN knobs, the MASTER LEVEL knob and the VOLUME dial as necessary to adjust the monitoring levels and balance. 2 Press the TRACK 3 REC key to set the TRACK 3 SOURCE to B. 18 TASCAM DP-008
-
 1
1 -
2
-
3
-
4
-
5
-
6
-
7
-
8
-
9
-
10
-
11
-
12
-
 13
13 -
 14
14 -
 15
15 -
 16
16 -
 17
17 -
 18
18 -
 19
19 -
 20
20 -
 21
21 -
 22
22 -
 23
23 -
24
-
25
-
26
-
27
-
28
-
29
-
30
-
31
-
32
-
33
-
34
-
35
-
36
-
37
-
38
-
39
-
40
-
41
-
42
-
43
-
44
-
45
-
46
-
47
-
48
-
49
-
50
-
51
-
52
-
53
-
54
-
55
-
56
-
57
-
58
-
59
-
60
-
61
-
62
-
63
-
64
-
65
-
66
-
67
-
68
-
69
-
70
-
71
-
72
-
73
-
74
-
75
-
76
-
77
-
78
-
79
-
80
-
81
-
82
-
83
-
84
-
85
-
86
-
87
-
88
 |
 |
