TP-Link TL-PA101KIT User Guide - Page 18
TL-PA101, Password, Add Device, Device Name, Diagnostics
 |
View all TP-Link TL-PA101KIT manuals
Add to My Manuals
Save this manual to your list of manuals |
Page 18 highlights
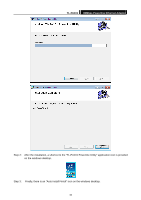
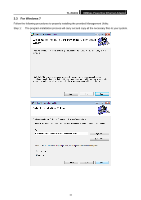
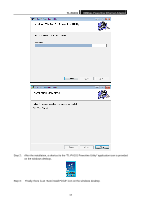
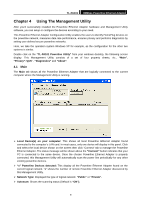
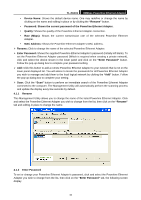
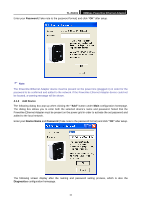
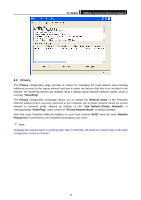
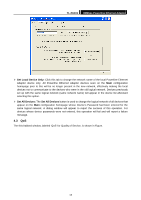
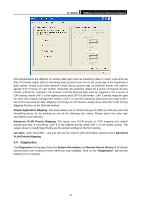
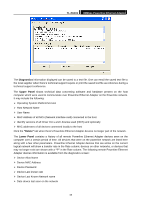
TL-PA101 85Mbps Powerline Ethernet Adapter Enter your Password (Take note to the password format) and click "OK" after setup. ) Note: The Powerline Ethernet Adapter device must be present on the power line (plugged in) in order for the password to be confirmed and added to the network. If the Powerline Ethernet Adapter device could not be located, a warning message will be shown. 4.1.3 Add Device The following dialog box pop-up when clicking the "Add" button under Main configuration homepage. The dialog box allows you to enter both the selected device's name and password. Noted that the Powerline Ethernet Adapter must be present on the power grid in order to activate the set password and added to the local network. Enter your Device Name and Password (Take note to the password format) and click "OK" after setup. The following screen display after the naming and password setting process, which is also the Diagnostics configuration homepage. 11
-
 1
1 -
2
-
3
-
4
-
5
-
6
-
7
-
8
-
9
-
10
-
11
-
12
-
 13
13 -
 14
14 -
 15
15 -
 16
16 -
 17
17 -
 18
18 -
 19
19 -
 20
20 -
 21
21 -
 22
22 -
 23
23 -
24
 |
 |
