TP-Link TL-PA9020 KIT tpPLC Utility User Guide - Page 19
Add a Device to the Network, 4. 2. Set a New Powerline Network Name, Add Device
 |
View all TP-Link TL-PA9020 KIT manuals
Add to My Manuals
Save this manual to your list of manuals |
Page 19 highlights
Chapter 4 Manage the Whole Powerline Network 4. 1. Add a Device to the Network To add a device to the current network, follow the steps below: 1. Write down the 16-digit powerline key printed on the device label. 2. Plug the device into a wall socket and wait until its LEDs become stable. 3. Open the utility, and click Add Device on the left column. 4. On the Add a New Device page, enter the powerline key you wrote down, and click Save. Now the new device will appear on the utility. 4. 2. Set a New Powerline Network Name Powerline network name groups powerline devices into a network. TP-Link powerline devices use the name HomePlugAV by default, and therefore they can form a network 20
-
 1
1 -
2
-
3
-
4
-
5
-
6
-
7
-
8
-
9
-
10
-
11
-
12
-
13
-
 14
14 -
 15
15 -
 16
16 -
 17
17 -
 18
18 -
 19
19 -
 20
20 -
 21
21 -
 22
22 -
 23
23
 |
 |
20
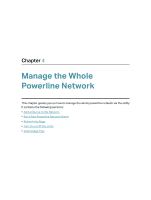
Chapter 4
Manage the Whole Powerline Network
4° 1°
Add a Device to the Network
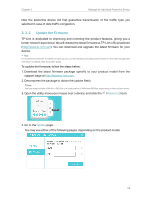
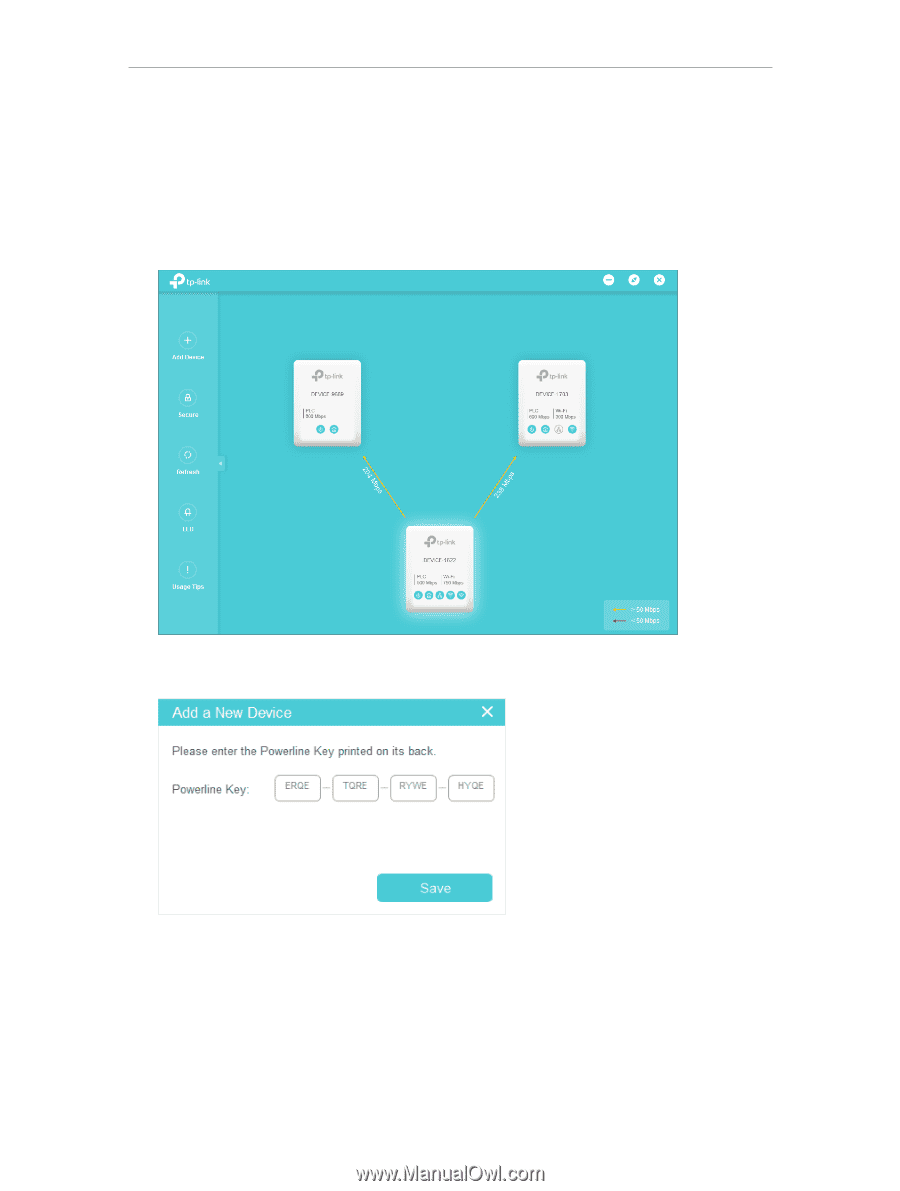
To add a device to the current network, follow the steps below:
1. Write down the 16-digit powerline key printed on the device label.
2. Plug the device into a wall socket and wait until its LEDs become stable.
3. Open the utility, and click
Add Device
on the left column.
4. On the
Add a New Device
page, enter the powerline key you wrote down, and click
Save
.
Now the new device will appear on the utility.
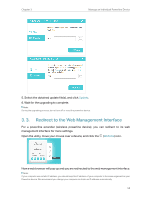
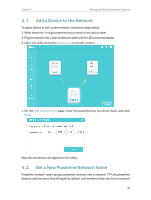
4° 2°
Set a New Powerline Network Name
Powerline network name groups powerline devices into a network. TP-Link powerline
devices use the name HomePlugAV by default, and therefore they can form a network