TRENDnet TE100-MFP1 User's Guide - Page 13
Connect to a Scanner, Apply, Connect - drivers
 |
View all TRENDnet TE100-MFP1 manuals
Add to My Manuals
Save this manual to your list of manuals |
Page 13 highlights
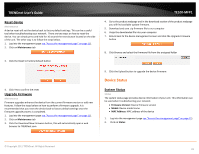
TRENDnet User's Guide 2. Select the assigned printer to use as the auto connect printer by checking the box. 3. When you are finished, click Apply. TE100-MFP1 Connect to a Scanner Note: This function applies to stand-alone USB scanners or USB scanners included with multi-function printers. It is required that the scanner drivers are installed before your computer is able to scan. Please ensure the scanner drivers are installed. If the scanner drivers are not installed, please refer to your printer manufacturer website or documentation on where to download and how to install the scanner drivers. Before installing the scanner drivers, connect your computer to the printer using the USB utility first. Some scanners may require that the scanner is directly connected to the computer in order to complete the driver installation. 1. Select the scanner or multi-function printer with scanning capability listed in the utility. 2. Click Connect to connect your computer to the scanner. 3. Once your computer is connected, you can receive scanned files from the scanner. 4. After you have finished printing, click Disconnect, to make the scanner available to other computers on your network that use the scanner. © Copyright 2011 TRENDnet. All Rights Reserved. 11
-
 1
1 -
2
-
3
-
4
-
5
-
6
-
7
-
 8
8 -
 9
9 -
 10
10 -
 11
11 -
 12
12 -
 13
13 -
 14
14 -
 15
15 -
 16
16 -
 17
17 -
 18
18 -
19
-
20
-
21
-
22
-
23
-
24
-
25
 |
 |
