TRENDnet TEW-805UB Quick Installation Guide - Page 10
WiFi Protected Setup (WPS), Pin Input Configuration (PIN), Pin Input, Configuration - tew 639gr
 |
View all TRENDnet TEW-805UB manuals
Add to My Manuals
Save this manual to your list of manuals |
Page 10 highlights
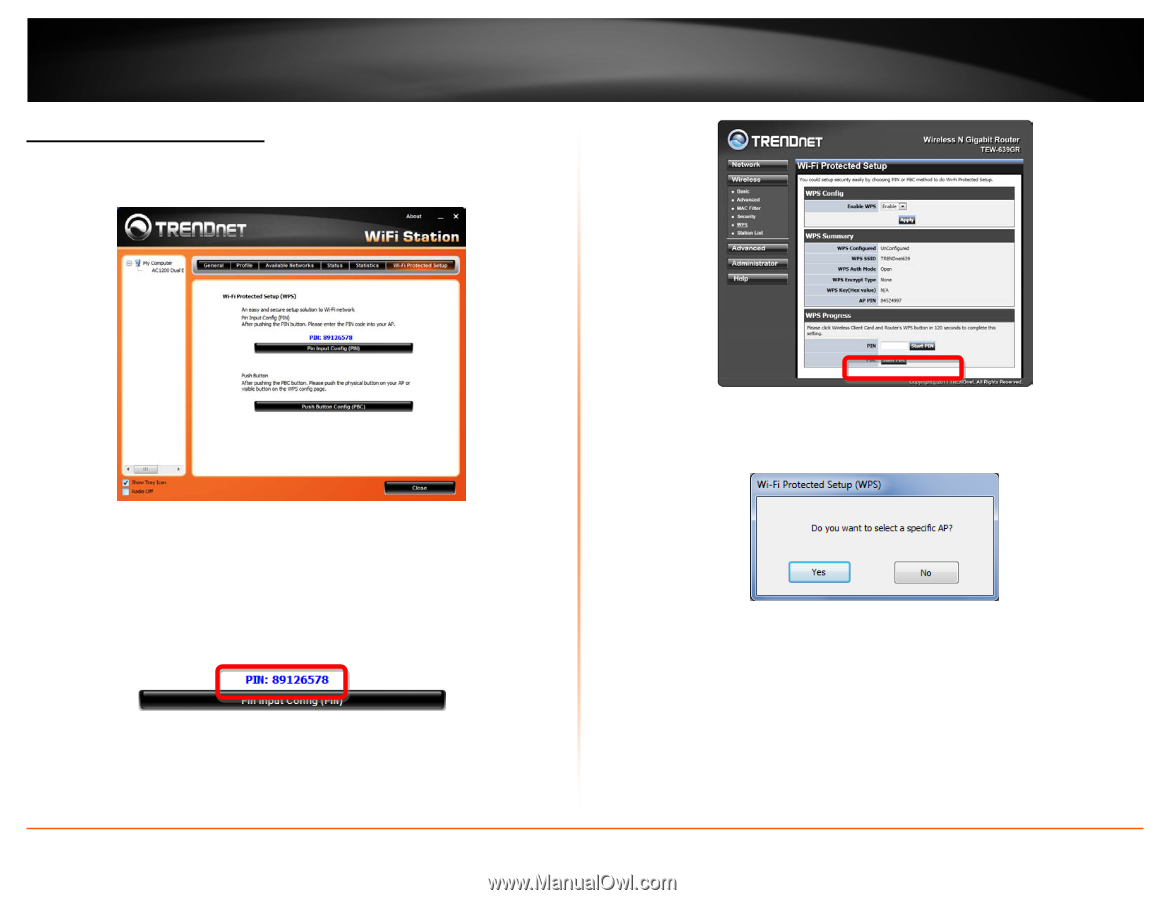
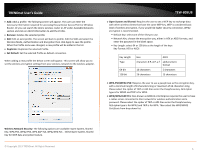
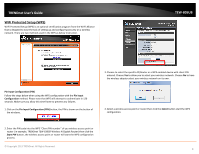
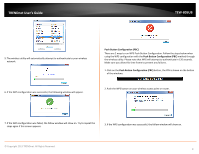
TRENDnet User's Guide WiFi Protected Setup (WPS) Wi-Fi Protected Setup (WPS) is an optional certification program from the Wi-Fi Alliance that is designed to ease the task of setting up and configuring security on a wireless network. There are two methods used in the WPS as below instruction. TEW-805UB 3. Choose to select the specific AP/Router or a WPS enabled device with client PIN entered. Choose Yes to allow you to select your wireless network. Choose No to have the wireless adapter select your wireless network on its own. Pin Input Configuration (PIN) Follow the steps below when using the WPS configuration with the Pin Input Configuration method. Please note that WPS will attempt to authenticate in 120 seconds. Make sure you allow this time frame to prevent any failures. 1. Click on the Pin Input Configuration (PIN) button, the PIN is shown on the button of the windows. 4. Select a wireless access point or router then click the Select button start the WPS configuration. 2. Enter the PIN code into the WPS "Client PIN number" of you wireless access point or router ( in example, TRENDnet TEW-639GR Wireless N Gigabit Router) then click the Start PIN button, the wireless access point or router will start the WPS configuration process. © Copyright 2013 TRENDnet. All Rights Reserved. 8
-
 1
1 -
2
-
3
-
4
-
 5
5 -
 6
6 -
 7
7 -
 8
8 -
 9
9 -
 10
10 -
 11
11 -
 12
12 -
 13
13 -
 14
14 -
 15
15 -
16
-
17
-
18
-
19
-
20
-
21
-
22
 |
 |