TRENDnet TEW-821DAP Quick Installation Guide - Page 9
Mounting the Device - a
 |
View all TRENDnet TEW-821DAP manuals
Add to My Manuals
Save this manual to your list of manuals |
Page 9 highlights
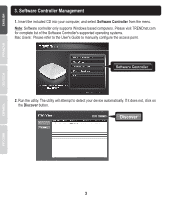
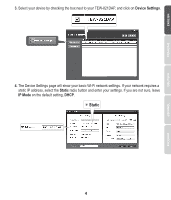
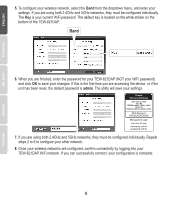
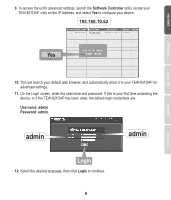
4. Mounting the Device 1. Remove the mounting plate from the TEW-821DAP. 2. Place the mounting plate on the wall or ceiling where the device will be located, and mark the location of the screw holes. Ensure that the device has enough clearance to slide on and off the mounting plate. If it is a non-PoE installation, ensure that your mounting location has access to an electrical outlet. 3. Drill out the marked screw holes, and insert the plastic wall anchors into the screw holes. 4. Secure the mounting plate, using the screws that came with the device. 5. Place the TEW-821DAP on the mounting plate, and attach the network cable. If it is a non-PoE installation, connect the power adapter. 234 5 Toll Free English Technical Support US/Canada: 855-373-4741 Hours: Monday-Friday 7:00 AM- 6:00 PM, Pacific Standard Time. After hours: 866-845-3673 8
-
 1
1 -
2
-
3
-
 4
4 -
 5
5 -
 6
6 -
 7
7 -
 8
8 -
 9
9 -
 10
10 -
 11
11 -
 12
12 -
 13
13 -
 14
14
 |
 |
