TRENDnet TV-IP344PI Users Guide - Page 9
Configuration
 |
View all TRENDnet TV-IP344PI manuals
Add to My Manuals
Save this manual to your list of manuals |
Page 9 highlights
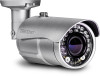
TRENDnet User's Guide Configuration Viewing Camera Basic Function Open the Web browser on your computer (example showed in this User's Guide is based on the Internet Explorer). In the Address bar, type the IP address you got from "Camera Installation" chapter or found by IP Installer, and then press [Enter]. TV‐IP344PI After you login into the live screen of the camera, the main page will appear as below: When the login window appears, enter the User name (admin) and Password and press OK to access to the main screen of the camera's Web Configuration. The live screen of the IP camera configuration provides you with many useful information and functions, including: SETUP: Click the button to configure the camera. LOGOUT: Click the button to log out of the camera viewing and configuration page. Digital Zoom: Click on the + or - or the digital button to zoom in and out, or right click on the live view and select zoom to configure from 100% to 400% zoom size. FOCUS: Click on + or - button or AF button to adjust the focus of the camera. Home button: resume the camera back to default viewing settings. Snapshot button: Click on snap shot button to save the current image to a destination folder. Recording button: Click on recording button to save the current image to a destination folder. © Copyright 2016 TRENDnet. All Rights Reserved. 7
-
 1
1 -
2
-
3
-
 4
4 -
 5
5 -
 6
6 -
 7
7 -
 8
8 -
 9
9 -
 10
10 -
 11
11 -
 12
12 -
 13
13 -
 14
14 -
15
-
16
-
17
-
18
-
19
-
20
-
21
-
22
-
23
-
24
-
25
-
26
-
27
-
28
-
29
-
30
-
31
-
32
-
33
-
34
-
35
-
36
-
37
-
38
-
39
-
40
 |
 |
