Thermador T30IR70NSP Design Guide - Freedom Refrigeration - Page 17
Side-by-side Installation
 |
View all Thermador T30IR70NSP manuals
Add to My Manuals
Save this manual to your list of manuals |
Page 17 highlights
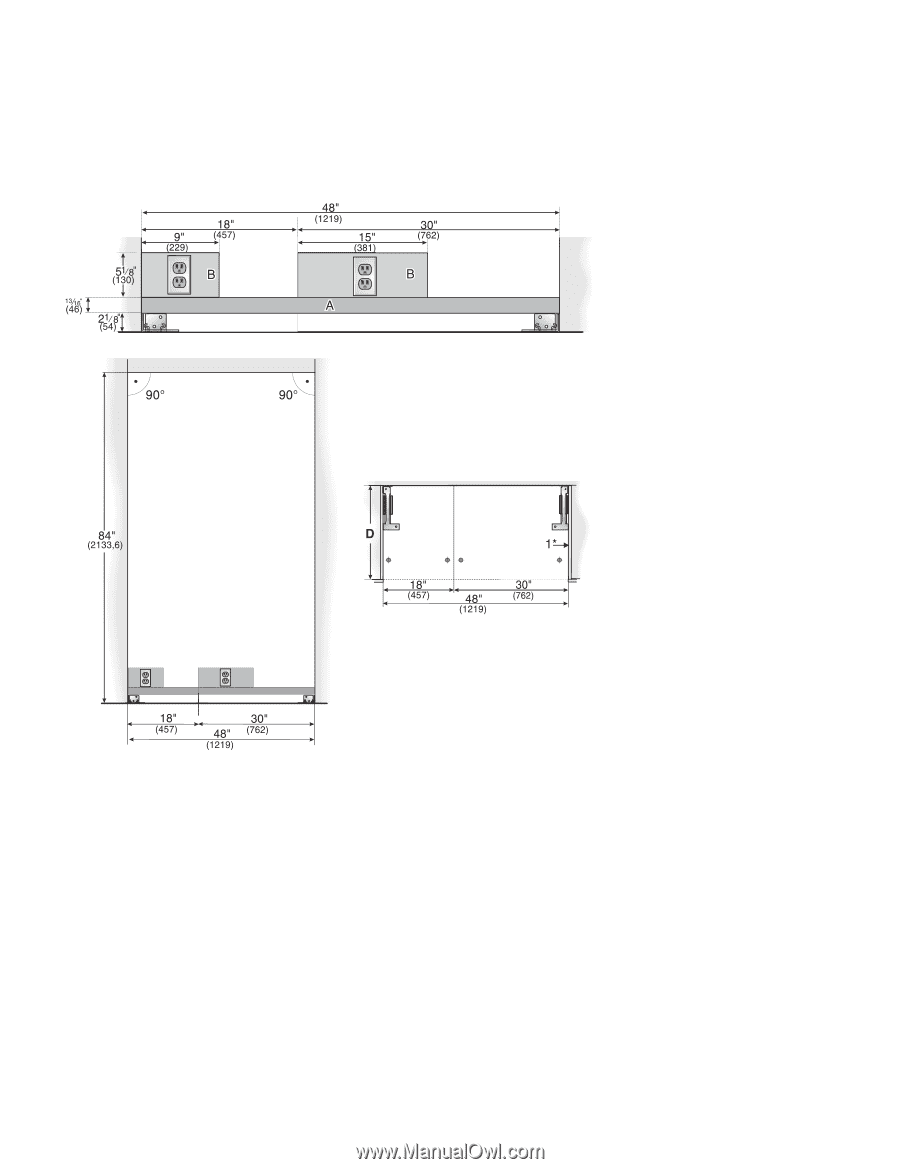
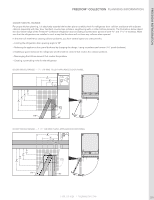
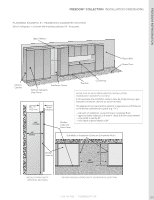
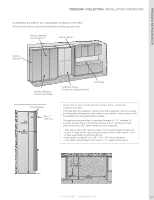
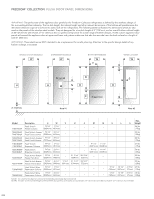
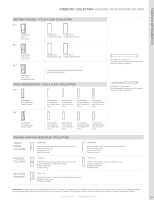
FREEdOM® COLLECTION INSTALLATION dIMENSIONS SIdE-BY-SIdE INSTALLATION The width dimension of a niche for side-by-side installations is defined by adding the dimensions of the two single columns. Below illustrates the dimensions of a classic 48-inch side-by-side, with a 18-inch freezer unit on the left and a 30-inch refrigerator on the right. 48" SxS (18" freezer + 30" refrigerator) A: Area for running the water line. It is recommended the water-box be placed adjacent to the installation cavity, so that it can be accessed for service without uninstalling the appliance. If this is not possible, place the recessed water box adjacent to the power supply socket elevated at the heights as referenced in areas A+B. B: Area for installing the power connection D: Opening depth of niche, depending on kitchen design (24" minimum) IMPORTANT It is strongly recommended the top panel boundary of the niche be of solid material (5/8" thickness). Make sure that the upper boundary is completely flush for a depth of at least 4". Make sure that the side walls of the niche are completely flush! If, for some reason, a separate niche cabinet is created, make sure that the furniture return area is at least 4" deep. There is a wide range of combination possibilities, which always end up in simple niche dimensions. Some examples: 18" + 18" columns = 36" niche 24" + 18" columns = 42" niche 24" + 24" columns = 48" niche 30" + 18" columns = 48" niche 24" + 30" columns = 54" niche 30" + 30" columns = 60" niche 30" + 36" column/bottom freezer = 66" niche 36" + 36" bottom freezers = 72" niche You just have to make sure that the sockets for the power supply and the water line are located at the correct positions. Take the needed dimensions from the niche description of a split column installation (see page 224.) 226
-
 1
1 -
2
-
3
-
4
-
5
-
6
-
7
-
8
-
9
-
10
-
11
-
 12
12 -
 13
13 -
 14
14 -
 15
15 -
 16
16 -
 17
17 -
 18
18 -
 19
19 -
 20
20 -
 21
21 -
 22
22 -
23
-
24
-
25
-
26
-
27
-
28
-
29
-
30
-
31
-
32
-
33
-
34
-
35
-
36
-
37
-
38
-
39
-
40
-
41
-
42
-
43
-
44
-
45
-
46
-
47
-
48
-
49
-
50
 |
 |