Toshiba 20HLK86 User Manual
Toshiba 20HLK86 Manual
 |
View all Toshiba 20HLK86 manuals
Add to My Manuals
Save this manual to your list of manuals |
Toshiba 20HLK86 manual content summary:
- Toshiba 20HLK86 | User Manual - Page 1
Setting up your Using the remote Connecting your OWNER'S MANUAL LCD Color Television TV Using the TV's features Appendix 20HLK86 © 2006 TOSHIBA CORPORATION All Rights Reserved Owner's Record The model number and serial number are on the back of your TV. Record these numbers in the spaces - Toshiba 20HLK86 | User Manual - Page 2
Toshiba LCD TV. This manual will help you use many exciting features of your new LCD TV. Before operating the TV, please read this manual SERVICEABLE PARTS INSIDE. REFER SERVICING TO QUALIFIED SERVICE installation instructions. (See item 20 on The Toshiba 20HLK86 LCD Color and applying power to the - Toshiba 20HLK86 | User Manual - Page 3
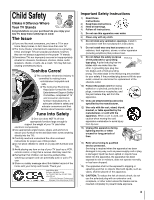
instructions for proper use of this product. Do not allow children to climb on or play with furniture and TVs. Avoid placing any item on top of your TV (such as a VCR, remote your outlet, consult an electrician for replacement of the obsolete outlet. 10) Protect the power cord from being walked on or - Toshiba 20HLK86 | User Manual - Page 4
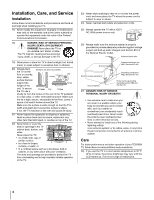
Code). Antenna lead-in wire Ground clamp Antenna discharge unit (NEC Section 810-20) Electric service equipment Grounding conductors (NEC Section 810-21) Ground clamps Power service operation of your TOSHIBA TV, follow these recommendations and precautions: 28) If you use the TV in a room - Toshiba 20HLK86 | User Manual - Page 5
clean the LCD screen, follow the instructions in item 29 on page 5. Service 36. WARNING: RISK OF ELECTRIC SHOCK! Never attempt to service the TV yourself. Opening and removing the covers may expose you to dangerous voltage or other hazards. Refer all servicing to a Toshiba Authorized Service Center - Toshiba 20HLK86 | User Manual - Page 6
(PC 17 Using the remote control 18 Learning about the remote control 18 Installing or replacing the remote control battery 19 Remote control effective range 19 Setting up your TV 20 Learning about the On-Screen Display (OSD) menu system 20 Changing the on-screen display language 21 Adding - Toshiba 20HLK86 | User Manual - Page 7
this Toshiba LCD TV. The goal of this manual is to guide you through setting up and operating your Toshiba TV as quickly as possible. The model and serial numbers are on the back of your TV. Write these numbers in the space provided on the front cover of this manual for your records. Instructions in - Toshiba 20HLK86 | User Manual - Page 8
17. TV front Right side panel POWER CHANNEL VOLUME INPUT MENU Power indicator Remote sensor Headphone jack Remote control Back Power cord Terminal cover removed. (see page 9) Cable clamper HDMI™ IN Audio output Audio input ANT IN PC AUDIO IN RGB/PC IN VIDEO-2 IN (ColorStream HD) VIDEO - Toshiba 20HLK86 | User Manual - Page 9
of the cover. 2. Install cables as necessary. 3. Reinstall the cover. Align the holes on the TV back with the three tabs on the rear terminal cover as shown. 4. Close the cover. Setting up your Using the remote Connecting your Cable clamper The cable clamper can be used to bundle the connection - Toshiba 20HLK86 | User Manual - Page 10
are typically color-coded red, green, and blue. (ColorStream® is Toshiba's brand of component TV Coaxial (antenna) cable Standard A/V cables (red/white/yellow) S-video cable Component video cables HDMI cable Mini D-sub 15-pin cable Audio cable NOTE: RISK OF EQUIPMENT DAMAGE! Never plug in any power - Toshiba 20HLK86 | User Manual - Page 11
you to watch basic and premium cable channels. Tune the TV to channel 3 or 4 (whichever channel is vacant in your area), and use the converter box to change channels. Back of TV Note: When you use a converter box with your TV, the remote control will not operate some features, such as favorite - Toshiba 20HLK86 | User Manual - Page 12
4 (the same channel as the converter box output switch), and use the cable converter box to change channels. Back of TV Note: When you use a converter box with your TV, the remote control will not operate some features, such as favorite channel programming or channel return. If you have a mono VCR - Toshiba 20HLK86 | User Manual - Page 13
For the highest possible picture quality, use component video cables between the TV and DVD player. The ColorStream jacks can be used with 480i and criminal liability. Back of TV TV control Setting up your Using the remote Connecting your TV Using the TV's features Appendix From Antenna - Toshiba 20HLK86 | User Manual - Page 14
to the channel to watch. Note: For the highest possible picture quality, use component video cables between the TV and DTV receiver/set-top box. The TV side panel can be used to connect a VCR with S-video. The unauthorized recording, use, distribution, or revision of television programs, videotapes - Toshiba 20HLK86 | User Manual - Page 15
or DVI device. • When turning off your electronic components, turn off the HDMI or DVI device first, and then the TV. Setting up your Using the remote Connecting your Note: The HDMI jack is not intended for connection to and should not be used with a personal computer. For PC connection, see page - Toshiba 20HLK86 | User Manual - Page 16
an audio amplifier. The audio signal level (fixed) is not affected by pressing the volume buttons on the TV or the TV's remote control. To control the audio through the amplifier, use the audio system's remote control. Note: Set the TV's volume to the minimum level if necessary. Amplifier Back of - Toshiba 20HLK86 | User Manual - Page 17
personal Note: S computer (PC) on the TV screen. When connecting a PC to • Some PC models cannot be connected Introduction the TV, use an analog RGB (15-pin) computer cable and a PC to this TV. audio cable. • - To use a PC, set the monitor output resolution on the PC before connecting it to - Toshiba 20HLK86 | User Manual - Page 18
remote control 1. POWER I : Turns the TV on and off (standby mode*). 2. INPUT: Selects the video input source (page 23). 3. MUTE: Turns off the sound (page 32). 4. DISPLAY: Displays TV settings on-screen (page 36) or closes the on-screen the menu system (page 20). 11. Channel Numbers (0-9, - Toshiba 20HLK86 | User Manual - Page 19
period of time. This will prevent battery acid from leaking into the battery compartment. 5. Replace the battery cover on the remote control and turn the battery cover (with a coin or coin-like object) back into place. Remote control effective range TV Using the TV's features Appendix Index 19 - Toshiba 20HLK86 | User Manual - Page 20
Setting up your TV Learning about the On-Screen Display (OSD) menu system After you have installed the batteries, you will need to set some preferences on the TV by using the OSD menu system. You can access the system using the buttons on the TV or remote control. 1. Press MENU/ENTER to display the - Toshiba 20HLK86 | User Manual - Page 21
up your Using the remote Connecting your Language Special TV/CATV TV CH PROGRAM Add/Erase Add Favorite Channel > Blue Screen On MENU/ENTER EXIT 100% CH Program TV/CATV TV CH PROGRAM Add/Erase Add Favorite Channel > Blue Screen On MENU/ENTER EXIT 100% CH Program TV/CATV TV - Toshiba 20HLK86 | User Manual - Page 22
TV's channel memory, you can manually add or erase specific channels. To add or erase channels: 1. Tune your TV TV side panel Setting up your TV TV/CATV CH Program TV CH PROGRAM Add/Erase Add Favorite Channel > Blue Screen On MENU/ENTER EXIT 100% TV/CATV CH Program TV the TV or remote - Toshiba 20HLK86 | User Manual - Page 23
> Blue Screen On MENU/ENTER EXIT 100% Selecting the video input source Press INPUT on the remote control or on the TV side panel to view a signal from another device connected to your TV, such as a VCR or DVD player. You can select VIDEO1, VIDEO2 (including ColorStream), PC, or HDMI depending - Toshiba 20HLK86 | User Manual - Page 24
directly on the remote control or in the On-Screen Display (OSD) menu. • Using the remote control Repeatedly press PIC SIZE on the remote control to picture size is not supported with the input signal (720p or 1080i), a message "Not Available" will display on screen. Language Special English - Toshiba 20HLK86 | User Manual - Page 25
you are currently watching. Setting up your Using the remote Connecting your TheaterWide3 picture size example Conventional picture on a Conventional picture in Natural size conventional TV screen on your wide-screen TV Note: TheaterWide1 picture size (For 4:3 format programs) • The picture - Toshiba 20HLK86 | User Manual - Page 26
Language - adult language (applies to TV-PG & above, TV-14 & above, TV-MA) • Sex - sexual situations (applies to TV-PG & above, TV-14 & above, TV-MA) • Violence (applies to TV-PG & above, TV-14 & above, TV-MA) • F. Violence - fantasy violence (applies only to TV-Y7) • No Rating (blocks all - Toshiba 20HLK86 | User Manual - Page 27
TV control E V-Chip blocking (Parental control) setup F 1. Press MENU/ENTER, and then press W or X until the S Special menu appears. 2. Press S or T to highlight Block Setting >. Press X to enter the Block Setting page. Introduction Setting up your Using the remote For USA TV Ratings, - Toshiba 20HLK86 | User Manual - Page 28
PIC MODE on the remote control to display the current mode. 2. Press PIC MODE repeatedly until your desired mode is selected. Dynamic Standard Movie Memory • Using the On-Screen Display (OSD) menu The picture qualities you adjusted can be saved in the TV's Memory mode. Contrast 50 Using the - Toshiba 20HLK86 | User Manual - Page 29
TV control Setting up your Using the remote Connecting your E To adjust the picture quality and advanced picture narration, and sound effects of TV programs and videos that are closed captioned (usually marked as "CC" in TV listings). • Text-An on-screen display of information not related - Toshiba 20HLK86 | User Manual - Page 30
TV automatically: • Using the remote control 1. Press SLEEP TIMER to display the current setting. 2. Repeatedly press SLEEP TIMER to set the length of time before the TV minutes" appears. Note: • When an instant power failure occurs, the sleep timer settings may be cleared. • To display the amount - Toshiba 20HLK86 | User Manual - Page 31
X Number Introduction Setting up your Using the remote Connecting your MENU/ENTER EXIT MENU/ENTER EXIT LCD TV set have a bright fluorescent light behind its LCD panel. The light source, which is called backlight, affects the brightness of the entire screen. In a darkened room with proper lighting - Toshiba 20HLK86 | User Manual - Page 32
stereo or SAP broadcast, the word "ST.SAP", "Stereo" or "SAP" appears on-screen every time the TV is turned on, the channel is changed, or DISPLAY is pressed. When the TV is in VIDEO1, VIDEO2, PC, or HDMI mode, the options for MTS feature are L+R, L+L, R+R. Your selection decides from which speaker - Toshiba 20HLK86 | User Manual - Page 33
TV control Selecting the sound mode You can select your desired sound type from five sound modes: Flat, Hall, Theater, News, or Memory. To select the sound mode: • Using the remote control Repeatedly press SOUND MODE to select a desired sound mode. • Using the On-Screen Display menu 1. Press MENU/ - Toshiba 20HLK86 | User Manual - Page 34
MTS Stereo AVL Off Speaker Out On Audio Advanced Setting > MENU/ENTER EXIT Using the Speaker Out feature Be sure you have correctly connected your TV to an external audio system, if you want to activate the Speaker Out function. For connection method, refer to "Connecting an audio system" on - Toshiba 20HLK86 | User Manual - Page 35
the screen), and phase (to remove horizontal noise and sharpen the picture). Introduction You can auto-configure or set these settings manually. 1. Confirm a PC is connected (see "Connecting a personal computer (PC)" on page 17). 2. Repeatedly press INPUT on the remote control or on the TV side - Toshiba 20HLK86 | User Manual - Page 36
(by children, for example). When the Panel Lock is on, no control buttons on the TV side panel will operate except POWER. DISPLAY MENU/ ENTER STW X Number MENU/ENTER EXIT Displaying on-screen information Press DISPLAY to display the following information onscreen: • Channel number or Video mode - Toshiba 20HLK86 | User Manual - Page 37
OF ELECTRIC SHOCK! Never attempt to service the TV yourself. Opening and removing the covers may expose you to dangerous voltage or other hazards. Refer all servicing to a Toshiba Authorized Service Center. Setting up your Using the remote Connecting your Television System NTSC standard Channel - Toshiba 20HLK86 | User Manual - Page 38
Troubleshooting Before calling a service technician, please check the following table for a possible cause of the symptom and some solutions. Symptom Solution TV will not turn on • Make sure the power cord is plugged in, then press POWER. • The remote control battery may be dead. Replace screen - Toshiba 20HLK86 | User Manual - Page 39
TV control E Limited United States Warranty F for 20" LCD Television S Introduction Setting up your Using the remote Connecting your Toshiba the operating instructions in this manual THESE WARRANTIES. and reviewing the section entitled "Troubleshooting," you find that service is needed: - Toshiba 20HLK86 | User Manual - Page 40
instructions in this manual and materials or workmanship for a period of one (1) year after the date reviewing the section entitled "Troubleshooting," you find that of original retail purchase. DURING THIS PERIOD, TCL WILL, AT service is needed: TCL'S OPTION, REPAIR OR REPLACE A DEFECTIVE - Toshiba 20HLK86 | User Manual - Page 41
your Index A F S Picture size selection 24 A/V cables 10 POWER button 18 Introduction Antenna cables 10 Audio system connection 16 AVL 34 R Remote control Battery installation 19 B Learning about the buttons 18 Back of the TV 8 Blue screen 23 S SAP sound 32 C Set-top box 14 - Toshiba 20HLK86 | User Manual - Page 42
HEAD OFFICE:82 TOTOWA ROAD, WAYNE, NEW JERSEY 07470, U.S.A. NATIONAL SERVICE DIVISION:1420B TOSHIBA DRIVE, LEBANON, TN. 37087, U.S.A. HEAD OFFICE/191 McNABB STREET MARKHAM, ONTARIO L3R 8H2, CANADA TEL: (905) 470-5400 SERVICE CENTERS: TORONTO: 191 McNABB STREET MARKHAM, ONTARIO L3R 8H2, CANADA TEL: (
-
 1
1 -
 2
2 -
 3
3 -
 4
4 -
 5
5 -
 6
6 -
 7
7 -
8
-
9
-
10
-
11
-
12
-
13
-
14
-
15
-
16
-
17
-
18
-
19
-
20
-
21
-
22
-
23
-
24
-
25
-
26
-
27
-
28
-
29
-
30
-
31
-
32
-
33
-
34
-
35
-
36
-
37
-
38
-
39
-
40
-
41
-
42
 |
 |
O
WNER'S
M
ANUAL
LCD Color Television
Introduction
Connecting your
TV
Using the remote
control
Setting up your
TV
Using the TV's
features
Appendix
Index
Owner's Record
The model number and serial number are on the
back of your TV. Record these numbers in the
spaces below. Refer to these numbers whenever
you communicate with your Toshiba dealer about
this TV.
Model number:
© 2006 TOSHIBA CORPORATION
All Rights Reserved
Serial number:
20HLK86
20HLK86