Toshiba BDX3000KU Owners Manual - Page 28
stomizing, Function, Settings
 |
View all Toshiba BDX3000KU manuals
Add to My Manuals
Save this manual to your list of manuals |
Page 28 highlights
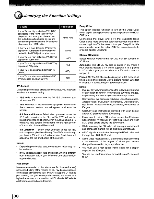
C stomizing the Function Settings You can change the default settings to customize performance to your preference. General Operations 1. Press T / ... to select Settings in home menu while in full stop mode, the Settings menu appears. 2. Press ~ button, then use A / T button to select the setting options. 3. Press OK button. 4. Press ~ or RETURN button to return to the previous menu. 3. Follow the on-screen instructions to customize the following settings to your preference: • OSD Language Settings • Resolution • TV Aspect • Wireless • Optical Disc Auto Play • Screen Saver Duration 4. After setting, press OK to confirm and exit the setup. Home Menu D,splay Note: If it is the first time for the player to start up or users restore all settings to factory defaults, the system will prompt you to perform Quick Setup. Repeat the steps described as above to complete the setup. [£] Settings H_ OMI s._ tD6 _ ..'.oe~ oo
-
 1
1 -
2
-
3
-
4
-
5
-
6
-
7
-
8
-
9
-
10
-
11
-
12
-
13
-
14
-
15
-
16
-
17
-
18
-
19
-
20
-
21
-
22
-
 23
23 -
 24
24 -
 25
25 -
 26
26 -
 27
27 -
 28
28 -
 29
29 -
 30
30 -
 31
31 -
 32
32 -
 33
33 -
34
-
35
-
36
-
37
-
38
-
39
-
40
-
41
-
42
-
43
-
44
-
45
-
46
-
47
-
48
-
49
-
50
-
51
-
52
-
53
-
54
-
55
-
56
-
57
-
58
-
59
-
60
-
61
-
62
-
63
-
64
-
65
-
66
-
67
-
68
-
69
-
70
-
71
-
72
-
73
-
74
-
75
-
76
-
77
 |
 |
