Toshiba Excite AT300SE PDA0DC-00300D Users Manual Canada; English - Page 51
ADD NETWORK, Security, Forget, Modify network, Show advanced options., Manual, Static
 |
View all Toshiba Excite AT300SE PDA0DC-00300D manuals
Add to My Manuals
Save this manual to your list of manuals |
Page 51 highlights
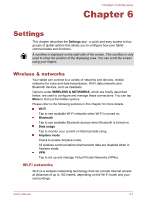
TOSHIBA AT300SE series 2. In the Wi-Fi settings screen, tap ADD NETWORK. 3. Enter the Network SSID (name). If the network is secured, tap Security and then tap the type of security deployed on the network. 4. Enter the required security credentials. 5. Tap Save. The tablet will connect to the wireless network. Any credentials that you enter will be saved, so you can connect automatically the next time you come within range of this network. Forgetting a Wi-Fi network You can make your tablet forget about the details of a Wi-Fi network that you added. For example, if you don't want the tablet to connect to it automatically or if it is a network that you no longer use. 1. Turn on Wi-Fi if it's not already on. 2. In the Wi-Fi settings screen, tap the network name. 3. Tap Forget in the dialog that opens. Modifying a Wi-Fi network You can modify each connected Wi-Fi network settings including credentials, proxy server settings and IP settings. Proxy server settings may be required for some internal or external network connection. By default, the Wi-Fi networks you add are not configured to connect via a proxy server, but you can change that for each Wi-Fi network you've added. Proxy settings are used by Browser and may not be used by other apps. 1. In the Wi-Fi settings screen, press & hold the network name you have added. 2. Tap Modify network. 3. Check Show advanced options. 4. If the network has no proxy settings, tap None and select Manual. 5. Enter the required proxy settings you have obtained. 6. Tap Save. A static IP address may also be manually configured for some network. By default, the Wi-Fi networks you add are configured for automatic IP assignment. You can change it for each Wi-Fi network you've added. 1. In the Wi-Fi settings screen, press & hold the network name you have added. 2. Tap Modify network. 3. Check Show advanced options. 4. If the network has no manual IP settings, tap DHCP and select Static. 5. Enter the required IP address you have obtained. 6. Tap Save. User's Manual 6-3
-
 1
1 -
2
-
3
-
4
-
5
-
6
-
7
-
8
-
9
-
10
-
11
-
12
-
13
-
14
-
15
-
16
-
17
-
18
-
19
-
20
-
21
-
22
-
23
-
24
-
25
-
26
-
27
-
28
-
29
-
30
-
31
-
32
-
33
-
34
-
35
-
36
-
37
-
38
-
39
-
40
-
41
-
42
-
43
-
44
-
45
-
 46
46 -
 47
47 -
 48
48 -
 49
49 -
 50
50 -
 51
51 -
 52
52 -
 53
53 -
 54
54 -
 55
55 -
 56
56 -
57
-
58
-
59
-
60
-
61
-
62
-
63
-
64
-
65
-
66
-
67
-
68
-
69
-
70
-
71
-
72
-
73
-
74
-
75
-
76
-
77
-
78
-
79
-
80
 |
 |
