Toshiba Excite AT7-B PDA0HC-002005 Users Manual Canada; English - Page 58
Personal, Location access
 |
View all Toshiba Excite AT7-B PDA0HC-002005 manuals
Add to My Manuals
Save this manual to your list of manuals |
Page 58 highlights
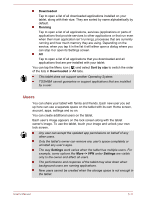
Add a user To add a user, you must be the owner. Tap the ADD USER on the top right of the user's screen. A dialog will appear, tap OK to continue: If the person is available, tap Set up now and ask the person to set up the Google account and other settings. If the person is not available, tap Not now. A new user appears in the list. When you can hand over the tablet to the person for setup, tap the user image in Device -> Users under Settings app, or on the lock screen. Modify user information Each user can modify his/her own image and information shown on the lock screen: Change image: tap the user name. Change nickname: tap Nickname. Add or change additional text: tap Owner info or User info. Delete a user The tablet's owner can delete any user's space by tapping the Trash icon ( ) beside the user's name. Other users can only delete their own space by tapping Menu icon ( ) on the top right of the screen and select Delect from this device. Switch users Each user's image and nickname appear on the lock screen along with the tablet owner's. To enter your own space, tap your image and unlock the screen with your screen lock. Alternatively, swipe down from the top right of any screen to open Quick Settings panel, and then tap your image near the top left. This returns you to the lock screen, from which each user can unlock his/her own space. Personal Options under PERSONAL allow you to manage personal accounts, data backup and security. Location access You can use Location access settings to configure location related settings. Location access contains the following options: User's Manual 6-12
-
 1
1 -
2
-
3
-
4
-
5
-
6
-
7
-
8
-
9
-
10
-
11
-
12
-
13
-
14
-
15
-
16
-
17
-
18
-
19
-
20
-
21
-
22
-
23
-
24
-
25
-
26
-
27
-
28
-
29
-
30
-
31
-
32
-
33
-
34
-
35
-
36
-
37
-
38
-
39
-
40
-
41
-
42
-
43
-
44
-
45
-
46
-
47
-
48
-
49
-
50
-
51
-
52
-
 53
53 -
 54
54 -
 55
55 -
 56
56 -
 57
57 -
 58
58 -
 59
59 -
 60
60 -
 61
61 -
 62
62 -
 63
63 -
64
-
65
-
66
-
67
-
68
-
69
-
70
-
71
-
72
-
73
-
74
-
75
-
76
-
77
-
78
-
79
-
80
-
81
-
82
 |
 |
