Toshiba M205-S3217 Toshiba Online Users Guide for Portege M200/M205 - Page 65
Setting up your software, Confirm acceptance of Microsoft's End User License
 |
View all Toshiba M205-S3217 manuals
Add to My Manuals
Save this manual to your list of manuals |
Page 65 highlights
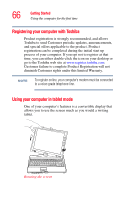
Getting Started Using the computer for the first time 65 Using the Cross-Functional button The Cross-Functional button is located on the front of the display (the first left button) and can be used to move the cursor as well as making selections by pressing it. NOTE While in Primary Landscape mode, you can use FN + Spacebar to change the screen resolution on the fly; from 1450 x 1050 to 1024 x 768 to 800 x 600 (repeated use will recycle the resolutions). For more information, see "Display modes" on page 227. Setting up your software The first time you turn on your computer, the Setup Wizard guides you through steps to set up your software. 1 From the welcome screen, click Next to enter the Setup Wizard. 2 Confirm acceptance of Microsoft's End User License Agreement and click Next. 3 Enter your name and the name of your company or organization and click Next. 4 Enter the information about your computer. NOTE If your computer has the Microsoft® Windows® XP Tablet PC Edition operating system and will be connected to a network, consult your system administrator before you choose your computer name and network settings. 5 Set the correct date, time and time zone for your computer and click Next. Your computer restarts automatically.
-
 1
1 -
2
-
3
-
4
-
5
-
6
-
7
-
8
-
9
-
10
-
11
-
12
-
13
-
14
-
15
-
16
-
17
-
18
-
19
-
20
-
21
-
22
-
23
-
24
-
25
-
26
-
27
-
28
-
29
-
30
-
31
-
32
-
33
-
34
-
35
-
36
-
37
-
38
-
39
-
40
-
41
-
42
-
43
-
44
-
45
-
46
-
47
-
48
-
49
-
50
-
51
-
52
-
53
-
54
-
55
-
56
-
57
-
58
-
59
-
 60
60 -
 61
61 -
 62
62 -
 63
63 -
 64
64 -
 65
65 -
 66
66 -
 67
67 -
 68
68 -
 69
69 -
 70
70 -
71
-
72
-
73
-
74
-
75
-
76
-
77
-
78
-
79
-
80
-
81
-
82
-
83
-
84
-
85
-
86
-
87
-
88
-
89
-
90
-
91
-
92
-
93
-
94
-
95
-
96
-
97
-
98
-
99
-
100
-
101
-
102
-
103
-
104
-
105
-
106
-
107
-
108
-
109
-
110
-
111
-
112
-
113
-
114
-
115
-
116
-
117
-
118
-
119
-
120
-
121
-
122
-
123
-
124
-
125
-
126
-
127
-
128
-
129
-
130
-
131
-
132
-
133
-
134
-
135
-
136
-
137
-
138
-
139
-
140
-
141
-
142
-
143
-
144
-
145
-
146
-
147
-
148
-
149
-
150
-
151
-
152
-
153
-
154
-
155
-
156
-
157
-
158
-
159
-
160
-
161
-
162
-
163
-
164
-
165
-
166
-
167
-
168
-
169
-
170
-
171
-
172
-
173
-
174
-
175
-
176
-
177
-
178
-
179
-
180
-
181
-
182
-
183
-
184
-
185
-
186
-
187
-
188
-
189
-
190
-
191
-
192
-
193
-
194
-
195
-
196
-
197
-
198
-
199
-
200
-
201
-
202
-
203
-
204
-
205
-
206
-
207
-
208
-
209
-
210
-
211
-
212
-
213
-
214
-
215
-
216
-
217
-
218
-
219
-
220
-
221
-
222
-
223
-
224
-
225
-
226
-
227
-
228
-
229
-
230
-
231
-
232
-
233
-
234
-
235
-
236
-
237
-
238
-
239
-
240
-
241
-
242
-
243
-
244
-
245
-
246
-
247
-
248
-
249
-
250
-
251
-
252
-
253
-
254
-
255
-
256
-
257
-
258
-
259
-
260
-
261
-
262
-
263
-
264
-
265
-
266
-
267
 |
 |
