Toshiba M205-S3217 Toshiba Online Users Guide for Portege M200/M205 - Page 68
Setting up a printer, Start, Printers and Faxes, Add a Printer
 |
View all Toshiba M205-S3217 manuals
Add to My Manuals
Save this manual to your list of manuals |
Page 68 highlights
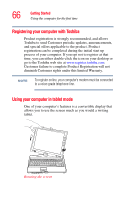
68 Getting Started Using the computer for the first time For more information on using the computer in tablet mode, see "Using tablet mode" on page 118. NOTE Included with your computer is Sensiva's Symbol Commander™ allowing you to quickly execute commands (for example, changing the layout of the screen from landscape to portrait) by drawing a pre-assigned symbol on the screen, and the Cross Menu application which allows you to make Hot Key assignments, access other Toshiba utilities, and create your own custom menus. For details on using Symbol Commander, refer to the online help with the application. For details on using the Cross Menu, refer to "Cross Menu Utility" on page 173. Your computer came with applications already installed specifically designed to work with the tablet feature of the system. For more information on those applications, see the documentation provided with them. Setting up a printer If you have a printer, follow these steps to set it up for the first time. You only need to set up the printer once. 1 Click Start, Printers and Faxes. The Printers and Faxes window appears. 2 Click Add a Printer. The Add Printer Wizard appears
-
 1
1 -
2
-
3
-
4
-
5
-
6
-
7
-
8
-
9
-
10
-
11
-
12
-
13
-
14
-
15
-
16
-
17
-
18
-
19
-
20
-
21
-
22
-
23
-
24
-
25
-
26
-
27
-
28
-
29
-
30
-
31
-
32
-
33
-
34
-
35
-
36
-
37
-
38
-
39
-
40
-
41
-
42
-
43
-
44
-
45
-
46
-
47
-
48
-
49
-
50
-
51
-
52
-
53
-
54
-
55
-
56
-
57
-
58
-
59
-
60
-
61
-
62
-
 63
63 -
 64
64 -
 65
65 -
 66
66 -
 67
67 -
 68
68 -
 69
69 -
 70
70 -
 71
71 -
 72
72 -
 73
73 -
74
-
75
-
76
-
77
-
78
-
79
-
80
-
81
-
82
-
83
-
84
-
85
-
86
-
87
-
88
-
89
-
90
-
91
-
92
-
93
-
94
-
95
-
96
-
97
-
98
-
99
-
100
-
101
-
102
-
103
-
104
-
105
-
106
-
107
-
108
-
109
-
110
-
111
-
112
-
113
-
114
-
115
-
116
-
117
-
118
-
119
-
120
-
121
-
122
-
123
-
124
-
125
-
126
-
127
-
128
-
129
-
130
-
131
-
132
-
133
-
134
-
135
-
136
-
137
-
138
-
139
-
140
-
141
-
142
-
143
-
144
-
145
-
146
-
147
-
148
-
149
-
150
-
151
-
152
-
153
-
154
-
155
-
156
-
157
-
158
-
159
-
160
-
161
-
162
-
163
-
164
-
165
-
166
-
167
-
168
-
169
-
170
-
171
-
172
-
173
-
174
-
175
-
176
-
177
-
178
-
179
-
180
-
181
-
182
-
183
-
184
-
185
-
186
-
187
-
188
-
189
-
190
-
191
-
192
-
193
-
194
-
195
-
196
-
197
-
198
-
199
-
200
-
201
-
202
-
203
-
204
-
205
-
206
-
207
-
208
-
209
-
210
-
211
-
212
-
213
-
214
-
215
-
216
-
217
-
218
-
219
-
220
-
221
-
222
-
223
-
224
-
225
-
226
-
227
-
228
-
229
-
230
-
231
-
232
-
233
-
234
-
235
-
236
-
237
-
238
-
239
-
240
-
241
-
242
-
243
-
244
-
245
-
246
-
247
-
248
-
249
-
250
-
251
-
252
-
253
-
254
-
255
-
256
-
257
-
258
-
259
-
260
-
261
-
262
-
263
-
264
-
265
-
266
-
267
 |
 |
