Toshiba S20-Silver User Manual - Page 16
Picture Recording, Taking Close up Pictures/Movies, Using Digital Light or Light Function
 |
View all Toshiba S20-Silver manuals
Add to My Manuals
Save this manual to your list of manuals |
Page 16 highlights
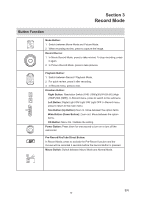
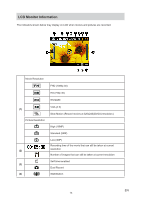
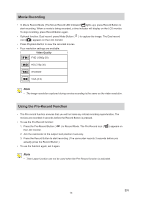
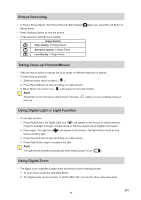
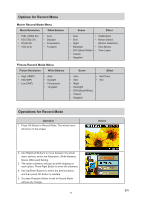
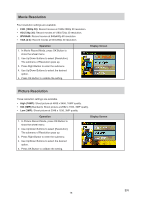
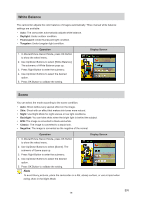
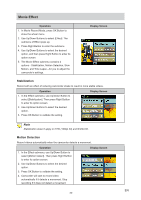
Picture Recording • In Picture Record Mode (The Picture Record LED Indicator take pictures. • Press Playback Button to view the picture. • Three resolution settings are available: Image Quality High Quality: 16 Mega Pixels Standard Quality: 5 Mega Pixels Low Quality: 3 Mega Pixels lights up), press Record Button to Taking Close up Pictures/Movies • Slide the macro switch to change the focus range for different distances of objects. • To take close-up pictures: 1. Slide the macro switch to Macro ( ). 2. Press Record Button to start recording or to take picture. • In Macro Mode, the macro icon ( ) will appear on the LCD monitor. Note Remember to turn the macro switch back to Normal ( pictures. ) when you are not taking close-up Using Digital Light or Light Function • To use light function: 1. Press Right Button, the Digital Light icon ( ) will appear on the screen to extend dynamic range for backlight and high contrast sense so that the objects will be brighter and clearer. 2. Press again, the Light icon ( keeps providing light. ) will appear on the screen. The light will be turned on and 3. Press Record Button to start recording or to take picture. 4. Press Right Button again to suspend the light. Note The light will be disabled automatically when battery power is low ( ). Using Digital Zoom • The digital zoom magnifies images when recording movies or taking pictures. 1. To zoom in/out, press the Tele/Wide Button. 2. The digital zoom can be set from 1x (FHD 1080p 30)/ 1x to 4x (for other video resolution). EN 16
-
 1
1 -
2
-
3
-
4
-
5
-
6
-
7
-
8
-
9
-
10
-
 11
11 -
 12
12 -
 13
13 -
 14
14 -
 15
15 -
 16
16 -
 17
17 -
 18
18 -
 19
19 -
 20
20 -
 21
21 -
22
-
23
-
24
-
25
-
26
-
27
-
28
-
29
-
30
-
31
-
32
-
33
-
34
-
35
-
36
-
37
-
38
-
39
-
40
-
41
-
42
-
43
-
44
-
45
-
46
-
47
-
48
-
49
 |
 |
