Toshiba S20-Silver User Manual - Page 19
White Balance, Scene, Daylight, Fluorescent, Tungsten, Backlight, Classic, Negative
 |
View all Toshiba S20-Silver manuals
Add to My Manuals
Save this manual to your list of manuals |
Page 19 highlights
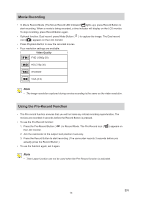
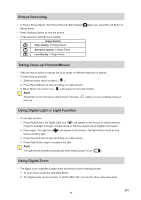
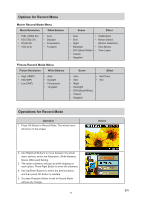
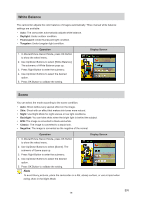
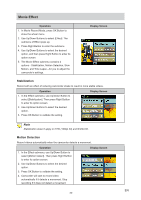
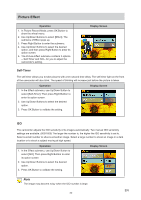
White Balance The camcorder adjusts the color balance of images automatically. Three manual white balance settings are available: • Auto: The camcorder automatically adjusts white balance. • Daylight: Under outdoor condition. • Fluorescent: Under fluorescent light condition. • Tungsten: Under tungsten light condition. Operation 1. In Movie/Picture Record Mode, press OK Button to show the wheel menu. 2. Use Up/Down Buttons to select [White Balance]. The submenu of White Balance pops up. 3. Press Right Button to enter the submenu. 4. Use Up/Down Buttons to select the desired option. 5. Press OK Button to validate the setting. Display Screen Scene You can select the mode according to the scene condition. • Auto: Shoot without any special effect on the image. • Skin: Shoot with an effect that makes skin tones more natural. • Night: Use Night Mode for night scenes or low light conditions. • Backlight: You can take shots when the bright light is behind the subject. • B/W: The image is converted to black-and-white. • Classic: The image is converted to a sepia look. • Negative: The image is converted as the negative of the normal. Operation Display Screen 1. In Movie/Picture Record Mode, press OK Button to show the wheel menu. 2. Use Up/Down Buttons to select [Scene]. The submenu of Scene pops up. 3. Press Right Button to enter the submenu. 4. Use Up/Down Buttons to select the desired option. 5. Press OK Button to validate the setting. Note To avoid blurry pictures, place the camcorder on a flat, steady surface, or use a tripod when taking shots in the Night Mode. EN 19
-
 1
1 -
2
-
3
-
4
-
5
-
6
-
7
-
8
-
9
-
10
-
11
-
12
-
13
-
 14
14 -
 15
15 -
 16
16 -
 17
17 -
 18
18 -
 19
19 -
 20
20 -
 21
21 -
 22
22 -
 23
23 -
 24
24 -
25
-
26
-
27
-
28
-
29
-
30
-
31
-
32
-
33
-
34
-
35
-
36
-
37
-
38
-
39
-
40
-
41
-
42
-
43
-
44
-
45
-
46
-
47
-
48
-
49
 |
 |
