Toshiba SD-2300U Owners Manual - Page 48
items
 |
View all Toshiba SD-2300U manuals
Add to My Manuals
Save this manual to your list of manuals |
Page 48 highlights
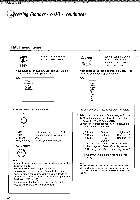
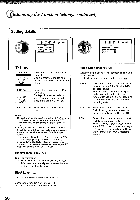
kr.170W.1.6.17•K+7:•", 7,,,r,`, Quick control Accessing Features - NAVI - (continued) NAVI menu items You can view a picture with less video noise. DNR After selecting this icon and pressing ENTER, the following on-screen display appears: e.g. DNR DNR1 DNR Off Edge Enhance Capture You can sample a scene from a playback picture and transform it into a background picture. After selecting this icon and pressing ENTER, the following on-screen display appears: e.g. Capture *ling Contrast Brightness Color Gamma Red Green Blue Revert Exit 1 Move the cursor control to select. • • DNR2: DNR1: DNR Off: Edge Enhance : To increase the DNR1 effect. To reduce minute video noise. Off. To sharpen picture edges. 2 Press ENTER. ° ono 0 0 ENTER o 0 0 Notes • Actual picture enhancement may vary depending on the quality of the disc. • While the DNR2 level can provide additional improvement in the reduction of noise in the video signal, it may produce undesireble picture artifacts on some discs. Should this occur, select a more appropriate DNR level (DNR1 or off). • Depending on the disc, some kinds of picture details may be lost by the picture enhancement. 1 Pause playback at a scene you want to capture. 2 Adjust the picture quality if necessary as follows. 1) Move the cursor control (A / V) to select a desired item, and press ENTER. 2) Move the cursor control (1/ ►) to adjust the value, and press ENTER. (-7) Lower Contrast Higher (+7) (-7) Darker Brightness Brighter (+7) (-7) Duller Color Brighter (+7) (-7) Gamma" (+7) (-7) Reducing red Red Enhancing red (+7) (-7) Reducing green Green Enhancing green (+7) (-7) Reducing blue Blue Enhancing blue (+7) *1: Adjust when a picture is too dark or too whitish. Note You cannot move the picture to sample another scene after you have started the adjustment. To change the scene, select "Revert" then press ENTER, and return to step 1. 152
-
 1
1 -
2
-
3
-
4
-
5
-
6
-
7
-
8
-
9
-
10
-
11
-
12
-
13
-
14
-
15
-
16
-
17
-
18
-
19
-
20
-
21
-
22
-
23
-
24
-
25
-
26
-
27
-
28
-
29
-
30
-
31
-
32
-
33
-
34
-
35
-
36
-
37
-
38
-
39
-
40
-
41
-
42
-
 43
43 -
 44
44 -
 45
45 -
 46
46 -
 47
47 -
 48
48 -
 49
49 -
 50
50 -
 51
51 -
 52
52 -
 53
53 -
54
-
55
-
56
-
57
-
58
-
59
-
60
-
61
-
62
-
63
-
64
-
65
-
66
-
67
 |
 |
