Toshiba SD 890 Owners Manual - Page 34
Setting details
 |
UPC - 762711563044
View all Toshiba SD 890 manuals
Add to My Manuals
Save this manual to your list of manuals |
Page 34 highlights
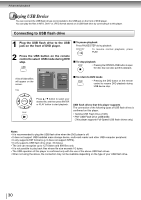
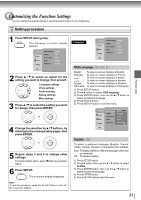
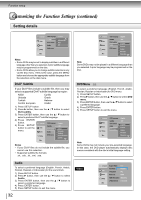
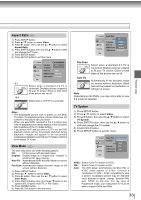
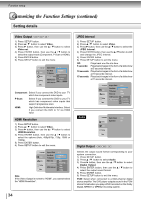
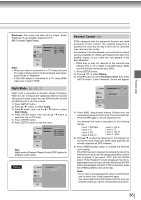
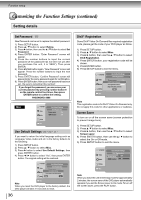
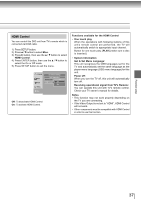
Function setup Customizing the Function Settings (continued) Setting details Video Output 1) Press SETUP button. 2) Press / button to select Video. 3) Press button, then use the / button to select Video out. 4) Press ENTER button, then use the / button to select the output mode (Component, P-Scan or HDMI). 5) Press ENTER button. 6) Press SETUP button to exit the menu. Aspect Ratio TV System :4 :3 : Original : PAL Video out HDMI Resolution JPEG Interval P-Scan HDMI Component: Select if you connect the DVD to your TV which has component video inputs. P-Scan: Select if you connect the DVD to your TV which has component video inputs that support progressive scan. HDMI: High Definition Multimedia Interface. Select if you connect the DVD to TV via HDMI input. HDMI Resolution 1) Press SETUP button. 2) Press / button to select Video. 3) Press button, then use the / button to select HDMI Resolution. 4) Press ENTER button, then use the / button to select the options (Auto, 480p/576p, 720p, 1080i or 1080p). 5) Press ENTER button. 6) Press SETUP button to exit the menu. Aspect Ratio : 4 : 3 : Original TV System : PAL Video out HDMI Resolution JPEG Interval Auto 480p/576p 720p 1080i 1080p Note If the Video Output is not set to "HDMI", you cannot select the "HDMI Resolution". 34 JPEG Interval 1) Press SETUP button. 2) Press / button to select Video. 3) Press button, then use the / button to select the JPEG Interval. 4) Press ENTER button, then use the / button to shift and change the JPEG Interval. 5) Press ENTER button. 6) Press SETUP button to exit the menu. Off: Plays back one file at a time. 5 seconds: Plays back images in the form of a slide show at 5 seconds interval. 10 seconds: Plays back images in the form of a slide show at 10 seconds interval. 15 seconds: Plays back images in the form of a slide show at 15 seconds interval. Aspect Ratio : 4 : 3 : Original TV System Video out : PAL : HDMI HDMI Resolution JPEG Interval Off 5 seconds 10 seconds 15 seconds Audio : PCM : Off Digital Output Selects the output sound format corresponding to your system connection. 1) Press SETUP button. 2) Press / button to select Audio. 3) Press button, then use the / button to select Digital Output. 4) Press ENTER button, then use the / button to select the output sound format. 5) Press ENTER button. 6) Press SETUP button to exit the menu. PCM: Select when connected to a Multi-channel digital stereo amplifier. The DVD player outputs sound in the PCM stereo format when you play a DVD recorded on the Dolby Digital, MPEG1 or MPEG2 recording system.
-
 1
1 -
2
-
3
-
4
-
5
-
6
-
7
-
8
-
9
-
10
-
11
-
12
-
13
-
14
-
15
-
16
-
17
-
18
-
19
-
20
-
21
-
22
-
23
-
24
-
25
-
26
-
27
-
28
-
 29
29 -
 30
30 -
 31
31 -
 32
32 -
 33
33 -
 34
34 -
 35
35 -
 36
36 -
 37
37 -
 38
38 -
 39
39 -
40
 |
 |