Toshiba Satellite P500 PSPE8C Users Manual Canada; English - Page 157
Setting for display video on HDMI, Settings for audio on HDMI, i.LINK (IEEE1394), Precautions
 |
View all Toshiba Satellite P500 PSPE8C manuals
Add to My Manuals
Save this manual to your list of manuals |
Page 157 highlights
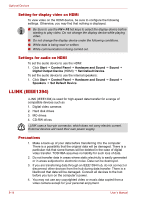
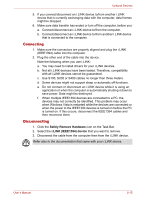
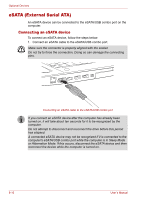
Optional Devices Setting for display video on HDMI To view video on the HDMI device, be sure to configure the following settings. Otherwise, you may find that nothing is displayed. ■ Be Sure to use the FN + F5 hot keys to select the display device before starting to play video. Do not change the display device while playing video. ■ Do not change the display device under the following conditions. ■ While data is being read or written. ■ While communication is being carried out. Settings for audio on HDMI To set the audio device to use the HDMI: 1. Click Start J Control Panel J Hardware and Sound J Sound J Digital Output Device (HDMI) J Set Default Device. To set the audio device to use the internal speakers: 1. Click Start J Control Panel J Hardware and Sound J Sound J Speakers J Set Default Device. i.LINK (IEEE1394) i.LINK (IEEE1394) is used for high-speed data transfer for a range of compatible devices such as 1. Digital video cameras 2. Hard disk drives 3. MO drives 4. CD-RW drives i.LINK uses a four-pin connector, which does not carry electric current. External devices will need their own power supply. Precautions 1. Make a back-up of your data before transferring it to the computer. There is a possibility that the original data will be damaged. There is a particular risk that some frames will be deleted in the case of digital video transfer. TOSHIBA assumes no liability for such loss of data. 2. Do not transfer data in areas where static electricity is easily generated or in areas subjected to electronic noise. Data can be destroyed. 3. If you are transferring data through an IEEE1394 hub, do not connect or disconnect other devices from the hub during data transfer. There is a likelihood that data will be damaged. Connect all devices to the hub before you turn on the computer's power. 4. You may not use any copyrighted video or music data copied from a video camera except for your personal enjoyment. 8-14 User's Manual
-
 1
1 -
2
-
3
-
4
-
5
-
6
-
7
-
8
-
9
-
10
-
11
-
12
-
13
-
14
-
15
-
16
-
17
-
18
-
19
-
20
-
21
-
22
-
23
-
24
-
25
-
26
-
27
-
28
-
29
-
30
-
31
-
32
-
33
-
34
-
35
-
36
-
37
-
38
-
39
-
40
-
41
-
42
-
43
-
44
-
45
-
46
-
47
-
48
-
49
-
50
-
51
-
52
-
53
-
54
-
55
-
56
-
57
-
58
-
59
-
60
-
61
-
62
-
63
-
64
-
65
-
66
-
67
-
68
-
69
-
70
-
71
-
72
-
73
-
74
-
75
-
76
-
77
-
78
-
79
-
80
-
81
-
82
-
83
-
84
-
85
-
86
-
87
-
88
-
89
-
90
-
91
-
92
-
93
-
94
-
95
-
96
-
97
-
98
-
99
-
100
-
101
-
102
-
103
-
104
-
105
-
106
-
107
-
108
-
109
-
110
-
111
-
112
-
113
-
114
-
115
-
116
-
117
-
118
-
119
-
120
-
121
-
122
-
123
-
124
-
125
-
126
-
127
-
128
-
129
-
130
-
131
-
132
-
133
-
134
-
135
-
136
-
137
-
138
-
139
-
140
-
141
-
142
-
143
-
144
-
145
-
146
-
147
-
148
-
149
-
150
-
151
-
 152
152 -
 153
153 -
 154
154 -
 155
155 -
 156
156 -
 157
157 -
 158
158 -
 159
159 -
 160
160 -
 161
161 -
 162
162 -
163
-
164
-
165
-
166
-
167
-
168
-
169
-
170
-
171
-
172
-
173
-
174
-
175
-
176
-
177
-
178
-
179
-
180
-
181
-
182
-
183
-
184
-
185
-
186
-
187
-
188
-
189
-
190
-
191
-
192
-
193
-
194
-
195
-
196
-
197
-
198
-
199
-
200
-
201
-
202
-
203
-
204
-
205
-
206
-
207
-
208
 |
 |
