Toshiba Satellite Pro C640 PSC2TC Users Manual Canada; English - Page 86
Changing System Sounds, SmartAudio, Adjusting Microphone Level, Notes on Using the Microphone
 |
View all Toshiba Satellite Pro C640 PSC2TC manuals
Add to My Manuals
Save this manual to your list of manuals |
Page 86 highlights
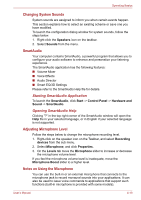
Operating Basics Changing System Sounds System sounds are assigned to inform you when certain events happen. This section explains how to select an existing scheme or save one you have modified. To launch the configuration dialog window for system sounds, follow the steps below. 1. Right-click the Speakers icon on the taskbar. 2. Select Sounds from the menu. SmartAudio Your computer contains SmartAudio, a powerful program that allows you to configure your audio software to enhance and personalize your listening experience. The SmartAudio application has the following features: ■ Volume Mixer ■ Voice Effects ■ Audio Director ■ Smart EQ/3D Settings Please refer to the SmartAudio Help file for details. Starting SmartAudio Application To launch the SmartAudio, click Start -> Control Panel -> Hardware and Sound -> SmartAudio. Opening SmartAudio Help Clicking "?" in the top right corner of the SmartAudio window will open the Help file in your selected language, or in English if your selected language is not supported. Adjusting Microphone Level Follow the steps below to change the microphone recording level. 1. Right-click on the speaker icon on the Taskbar, and select Recording devices from the sub menu. 2. Select Microphone, and click Properties. 3. On the Levels tab move the Microphone slider to increase or decrease the microphone volume level. If you feel the microphone volume level is inadequate, move the Microphone Boost slider to a higher level. Notes on Using the Microphone You can use the built-in or an external microphone that connects to the microphone jack to record monaural sounds into your applications. It can also be used to issue voice commands to applications that support such functions (built-in microphone is provided with some models). User's Manual 4-19
-
 1
1 -
2
-
3
-
4
-
5
-
6
-
7
-
8
-
9
-
10
-
11
-
12
-
13
-
14
-
15
-
16
-
17
-
18
-
19
-
20
-
21
-
22
-
23
-
24
-
25
-
26
-
27
-
28
-
29
-
30
-
31
-
32
-
33
-
34
-
35
-
36
-
37
-
38
-
39
-
40
-
41
-
42
-
43
-
44
-
45
-
46
-
47
-
48
-
49
-
50
-
51
-
52
-
53
-
54
-
55
-
56
-
57
-
58
-
59
-
60
-
61
-
62
-
63
-
64
-
65
-
66
-
67
-
68
-
69
-
70
-
71
-
72
-
73
-
74
-
75
-
76
-
77
-
78
-
79
-
80
-
 81
81 -
 82
82 -
 83
83 -
 84
84 -
 85
85 -
 86
86 -
 87
87 -
 88
88 -
 89
89 -
 90
90 -
 91
91 -
92
-
93
-
94
-
95
-
96
-
97
-
98
-
99
-
100
-
101
-
102
-
103
-
104
-
105
-
106
-
107
-
108
-
109
-
110
-
111
-
112
-
113
-
114
-
115
-
116
-
117
-
118
-
119
-
120
-
121
-
122
-
123
-
124
-
125
-
126
-
127
-
128
-
129
-
130
-
131
-
132
-
133
-
134
-
135
-
136
-
137
-
138
-
139
-
140
-
141
-
142
-
143
-
144
-
145
-
146
-
147
-
148
-
149
-
150
-
151
-
152
-
153
-
154
-
155
-
156
-
157
-
158
 |
 |