Toshiba Satellite Pro L550 PSLWTC-00P00F Users Manual Canada; English - Page 149
Removing a PC Card, Safely Remove Hardware and Eject Media, PC Card device
 |
View all Toshiba Satellite Pro L550 PSLWTC-00P00F manuals
Add to My Manuals
Save this manual to your list of manuals |
Page 149 highlights
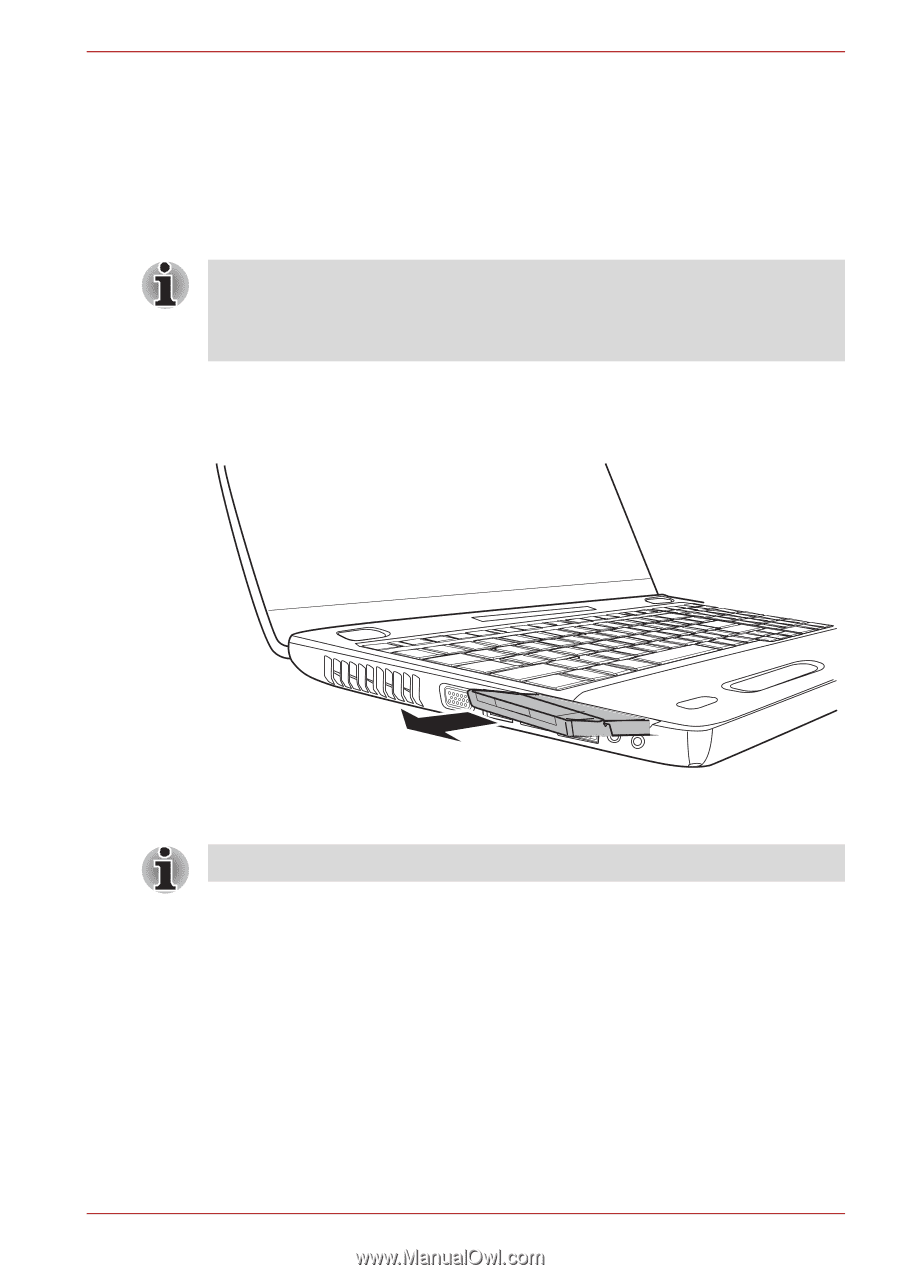
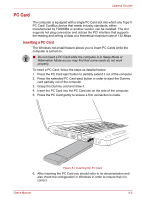
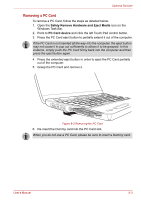
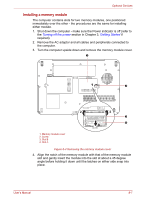
Optional Devices Removing a PC Card To remove a PC Card, follow the steps as detailed below. 1. Open the Safely Remove Hardware and Eject Media icon on the Windows Task Bar. 2. Point to PC Card device and click the left Touch Pad control button. 3. Press the PC Card eject button to partially extend it out of the computer. If the PC Card is not inserted all the way into the computer, the eject button may not cause it to pop out sufficiently to allows it to be grasped. In this instance, simply push the PC Card firmly back into the computer and then press the eject button again. 4. Press the extended eject button in order to eject the PC Card partially out of the computer. 5. Grasp the PC Card and remove it. Figure 8-2 Removing the PC Card 6. Re-insert the Dummy card into the PC Card slot. When you do not use a PC Card, please be sure to insert a Dummy card. User's Manual 8-3
-
 1
1 -
2
-
3
-
4
-
5
-
6
-
7
-
8
-
9
-
10
-
11
-
12
-
13
-
14
-
15
-
16
-
17
-
18
-
19
-
20
-
21
-
22
-
23
-
24
-
25
-
26
-
27
-
28
-
29
-
30
-
31
-
32
-
33
-
34
-
35
-
36
-
37
-
38
-
39
-
40
-
41
-
42
-
43
-
44
-
45
-
46
-
47
-
48
-
49
-
50
-
51
-
52
-
53
-
54
-
55
-
56
-
57
-
58
-
59
-
60
-
61
-
62
-
63
-
64
-
65
-
66
-
67
-
68
-
69
-
70
-
71
-
72
-
73
-
74
-
75
-
76
-
77
-
78
-
79
-
80
-
81
-
82
-
83
-
84
-
85
-
86
-
87
-
88
-
89
-
90
-
91
-
92
-
93
-
94
-
95
-
96
-
97
-
98
-
99
-
100
-
101
-
102
-
103
-
104
-
105
-
106
-
107
-
108
-
109
-
110
-
111
-
112
-
113
-
114
-
115
-
116
-
117
-
118
-
119
-
120
-
121
-
122
-
123
-
124
-
125
-
126
-
127
-
128
-
129
-
130
-
131
-
132
-
133
-
134
-
135
-
136
-
137
-
138
-
139
-
140
-
141
-
142
-
143
-
 144
144 -
 145
145 -
 146
146 -
 147
147 -
 148
148 -
 149
149 -
 150
150 -
 151
151 -
 152
152 -
 153
153 -
 154
154 -
155
-
156
-
157
-
158
-
159
-
160
-
161
-
162
-
163
-
164
-
165
-
166
-
167
-
168
-
169
-
170
-
171
-
172
-
173
-
174
-
175
-
176
-
177
-
178
-
179
-
180
-
181
-
182
-
183
-
184
-
185
-
186
-
187
-
188
-
189
-
190
-
191
-
192
-
193
-
194
-
195
-
196
-
197
-
198
-
199
-
200
-
201
-
202
-
203
-
204
-
205
-
206
-
207
-
208
-
209
-
210
-
211
-
212
-
213
-
214
-
215
-
216
-
217
-
218
-
219
-
220
-
221
-
222
-
223
-
224
-
225
-
226
-
227
 |
 |