Tripp Lite B072-016-1A B072-008-1 and B072-016-1 Owner's Manual 933350 (Englis - Page 5
Installation
 |
View all Tripp Lite B072-016-1A manuals
Add to My Manuals
Save this manual to your list of manuals |
Page 5 highlights
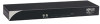
5. Installation (continued) 5.2 Rackmounting the NetCommander KVM Use the L-shaped brackets and screws provided to mount the KVM in a server rack as illustrated below. Insert screws to connect to rack Figure 5.2 Connecting the L-shaped bracket 5.3 Pre-Installation Guidelines Insert screws to connect to Switch side panel • Switch off all computers • Ensure that the cables are not close to any sources of electrical noise interference such as fluorescent lights, HVAC systems or motors • Ensure that the distance between any computer and the KVM switch does not exceed 100 ft. • Shut down all PS/2 computers. If you plug the keyboard and mouse connectors into an active PC, they may not work. 5.4 Connecting the NetCommander KVM System Connect each computer to the KVM using a Server Interface Unit (SIU) and Cat5e/6 patch cable. Figure 5.3 illustrates the connection options. NetCommander B072-016-1 KVM Switch Cat 5e/6 Cable Cat 5e/6 Cable SIU SIU SIU Figure 5.4 NetCommander KVM system connections 5.5 NetCommander Server Interface Unit (SIU) The Server Interface Unit receives power from the connected computer. In the case of the NetCommander PS/2 Server Interface Unit (B078-101-PS2), power is drawn from the keyboard port. In the case of the NetCommander USB Server Interface Unit (B078-101-USB-1), power is drawn from the USB port. SIUs allow a computer/server to be located up to 100 ft. from the KVM switch. 5 14-03-231-933350.indd 5 3/27/2014 4:38:35 PM
-
 1
1 -
 2
2 -
 3
3 -
 4
4 -
 5
5 -
 6
6 -
 7
7 -
 8
8 -
 9
9 -
 10
10 -
 11
11 -
12
-
13
-
14
-
15
-
16
-
17
-
18
-
19
-
20
 |
 |
