Troy-Bilt TB180B Operation Manual - Page 7
Blower Assembly
 |
View all Troy-Bilt TB180B manuals
Add to My Manuals
Save this manual to your list of manuals |
Page 7 highlights
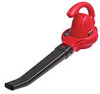
BLOWER ASSEMBLY Assembling Blower WARNING: To Reduce The Risk of Personal Injury or Electric Shock - Disconnect from power source before assembling or changing attachments. FPO Follow the steps below to assemble Figure 1 - Sliding blower tube into place the blower. 1. Slide the blower tube competely onto outlet on front of blower housing with the curved end of the blower tube facing up. (See Figure 1) 2. Fasten with the two mounting screws. (See Figure 2) Figure 2- Fasten with mounting screws. ENGLISH 7
-
 1
1 -
 2
2 -
 3
3 -
 4
4 -
 5
5 -
 6
6 -
 7
7 -
 8
8 -
 9
9 -
 10
10 -
 11
11 -
 12
12 -
13
-
14
-
15
-
16
-
17
-
18
-
19
-
20
-
21
-
22
-
23
-
24
-
25
-
26
-
27
-
28
-
29
-
30
-
31
-
32
 |
 |

FPO
ENGLISH
BLOWER ASSEMBLY
Assembling Blower
Follow the steps below to assemble
the blower.
WARNING: To Re-
duce The Risk of Per-
sonal Injury or Electric
Shock – Disconnect from
power source before as-
sembling or changing at-
tachments.
Figure 1 -
Sliding blower tube into place
Figure 2- Fasten with mounting screws.
1.
Slide the blower tube competely
onto outlet on front of blower
housing with the curved end of
the blower tube facing up.
(See
Figure 1)
2. Fasten with the two mounting
screws. (See Figure 2)
7