Troy-Bilt TB180B Operation Manual - Page 8
Blower Operation
 |
View all Troy-Bilt TB180B manuals
Add to My Manuals
Save this manual to your list of manuals |
Page 8 highlights
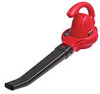
BLOWER OPERATION IMPORTANT: This blower is for household use only. WARNING: Read and understand this owner's manual before operating blower. Make certain you read and understand all Safety Warnings on pages 4 and 5 of this manual. Improper use of this blower can result in severe injury or death from fire, electric shock, or body contact with moving parts. WARNING: To reduce the risk of electric shock, use only with an extension cord intended for outdoor use, such as SW-A, SOW-A, STWA, STOW-A, SJW-A, SJOW-A, SJTW-A, or SJTOW-A. Extension Cords Make sure your extension cord is in good condition. Inspect extension cords periodically and replace if damaged. When using an extension cord, be sure to use one heavy enough to carry the current your blower will draw. An undersized extension cord will cause a drop in line voltage resulting in loss of power and overheating. The table below shows the correct size extension cord to use depending on cord length and nameplate ampere rating. If in doubt, use the next larger gauge cord. The smaller the gauge number, the larger the cord. To reduce the risk of disconnection of blower from the extension cord during operation, use the cord hitch described in this manual. Cord Length 25 feet 50 feet 100 feet 150 feet AWG Cord Size 18 AWG 16 AWG 14 AWG 12 AWG To reduce the risk of electric shock, this blower has a polarized plug (one blade is wider than the other) and will require the use of a polarized extension cord. The blower plug will fit into a polarized extension cord only one way. If the plug does not fit fully into the extension cord, reverse the plug. If the plug still does not fit, obtain a correct polarized extension cord. A polarized extension cord will require the use of a polarized wall outlet. This plug will fit into the polarized wall outlet only one way. If the plug does not fit fully into the wall outlet, reverse the plug. If the plug still does not fit, contact a qualified electrician to install the proper wall outlet. Do not change the blower plug, extension cord receptacle, or extension cord plug in any way. Inspect cord often. Replace if damaged. Connecting Extension Cord WARNING: Fully seat the extension cord on the inlet plug of blower. Failure to do so could lead to overheating of blower. This could cause a fire that results in personal injury to you or others. The blower has a built-in extension cord retainer. This cord hitch prevents accidental disconnection of the power cord during use. The cord hitch is molded into the lower rear of the blower housing. 1. Plug extension cord into the inlet plug of appliance (See Figure 3). 2. Create a loop in the extension cord and insert the loop through the cord slot of the blower housing (see Figure 4). 3. Pull the loop tight around the molded cord hitch (see Figure 5). Figure 3 - Plugging extension cord into inlet plug Figure 4 - Inserting extension cord loop through cord slot Figure 5 - Pull extension cord loop tight around molded cord hitch w 8
-
 1
1 -
2
-
 3
3 -
 4
4 -
 5
5 -
 6
6 -
 7
7 -
 8
8 -
 9
9 -
 10
10 -
 11
11 -
 12
12 -
 13
13 -
14
-
15
-
16
-
17
-
18
-
19
-
20
-
21
-
22
-
23
-
24
-
25
-
26
-
27
-
28
-
29
-
30
-
31
-
32
 |
 |
