URC THZ-100 Owners Manual - Page 38
Auto Dimming ON, Auto Dimming OFF, Auto Dimming, Cancel, Information, Options, Date & Time, Go
 |
View all URC THZ-100 manuals
Add to My Manuals
Save this manual to your list of manuals |
Page 38 highlights
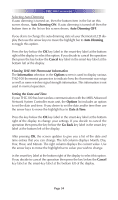
THZ-100 THERMOSTAT Selecting Auto Dimming If auto dimming is turned on, then the bottom item in the list on this screen shows, Auto Dimming ON. If auto dimming is turned off then the bottom item in the list on this screen shows, Auto Dimming OFF. If you desire to change the auto dimming state of your thermostat LCD display then use the arrow keys to move the highlight bar to Auto Dimming to toggle this option. Press the key below the OK key label in the smart-key label at the bottom right of the display to select this option. If you decide to cancel the operation then press the key below the Cancel key label in the smart-key label at the bottom left of the display. Viewing THZ-100 Thermostat Information The Information selection in the Options screen is used to display various THZ-100 thermostat parameters to indicate how the thermostat was setup as well as some wireless signal strength information. This information is not used in normal operation. Setting the Date and Time If your THZ-100 has lost wireless communication with the MRX Advanced Network System Controller main unit, the Options list includes an option to set the date and time. If you desire to set the date and/or time then use the arrow keys to move the highlight bar to Date & Time. Press the key below the OK key label in the smart-key label at the bottom right of the display to change your settings. If you decide to cancel the operation then press the key below the Go Back key label in the smart-key label at the bottom left of the display. After pressing OK, the screen updates to give you a list of the date and time entries that you can change. The left column displays Month, Day, Year, Hour, and Minute. The right column displays the current value. Use the arrow keys to move the highlight bar to value you wish to change. in the smart-key label at the bottom right of the display to select this option. If you decide to cancel the operation then press the key below the Cancel key label in the smart-key label at the bottom left of the display. Page 34
-
 1
1 -
2
-
3
-
4
-
5
-
6
-
7
-
8
-
9
-
10
-
11
-
12
-
13
-
14
-
15
-
16
-
17
-
18
-
19
-
20
-
21
-
22
-
23
-
24
-
25
-
26
-
27
-
28
-
29
-
30
-
31
-
32
-
 33
33 -
 34
34 -
 35
35 -
 36
36 -
 37
37 -
 38
38 -
 39
39 -
 40
40 -
 41
41 -
 42
42 -
 43
43 -
44
-
45
-
46
-
47
-
48
-
49
-
50
-
51
-
52
 |
 |
