Uniden SOLARA English Owners Manual - Page 9
Engine Noise Suppression, Installing the SOLARA - microphone
 |
UPC - 050633500712
View all Uniden SOLARA manuals
Add to My Manuals
Save this manual to your list of manuals |
Page 9 highlights
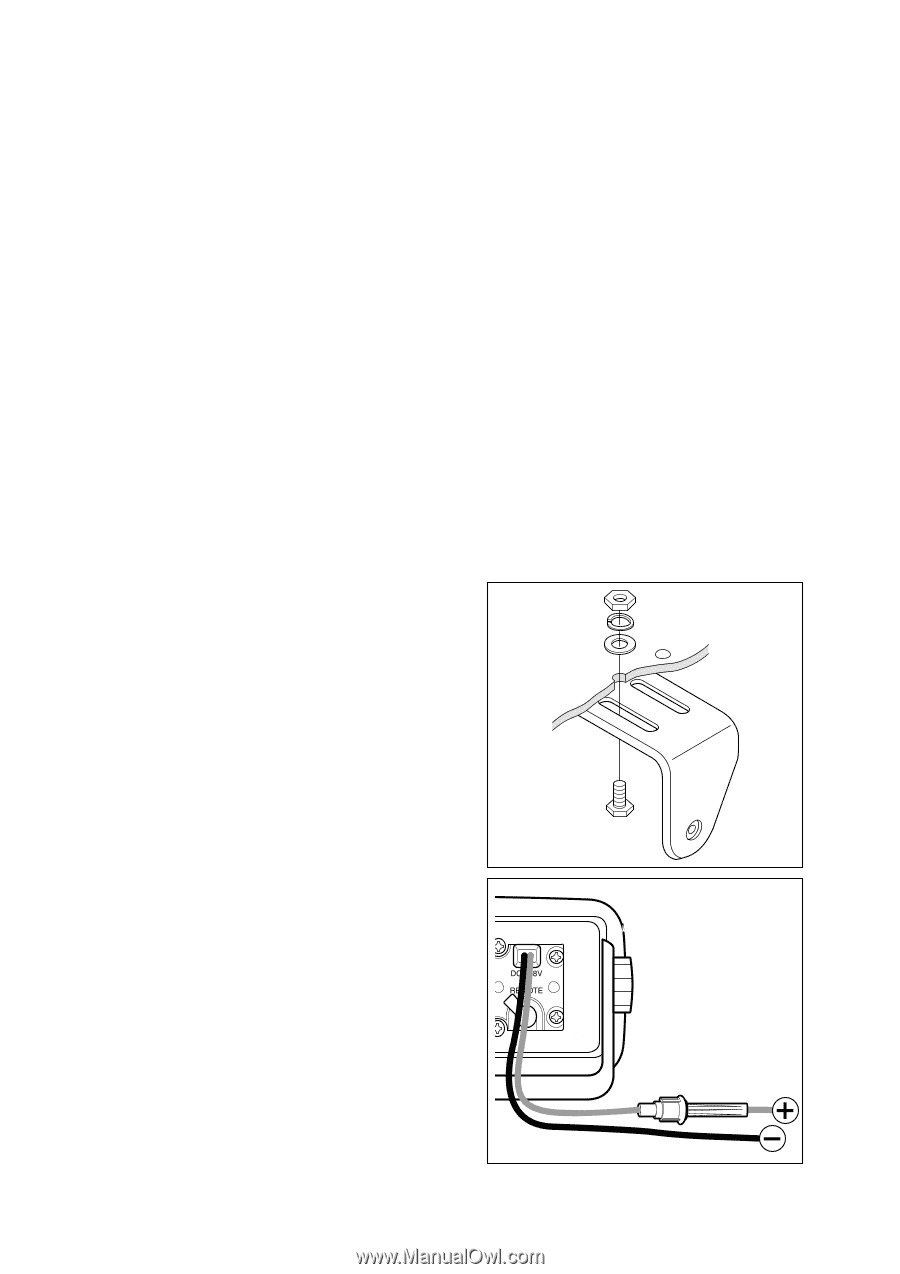
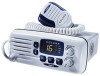
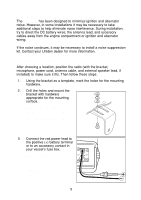
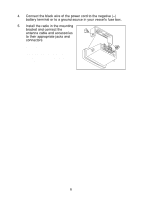
Engine Noise Suppression The SOLARA has been designed to minimize ignition and alternator noise. However, in some installations it may be necessary to take additional steps to help eliminate noise interference. During installation, try to direct the DC battery wires, the antenna lead, and accessory cables away from the engine compartment or ignition and alternator wiring. If the noise continues, it may be necessary to install a noise suppression kit. Contact your Uniden dealer for more information. Installing the SOLARA After choosing a location, position the radio (with the bracket, microphone, power cord, antenna cable, and external speaker lead, if installed) to make sure it fits. Then follow these steps: 1. Using the bracket as a template, mark the holes for the mounting hardware. 2. Drill the holes and mount the bracket with hardware appropriate for the mounting surface. Note: This HEXAGON HEAD BOLT is only for mounting the bracket with hardware. Do not use it for installing the radio in the mounting bracket. 3. Connect the red power lead to the positive (+) battery terminal or to an accessory contact in your vessel's fuse box. Note: The power cord is equipped with a 6-ampere fast blow fuse to protect your radio. Use only a 6-ampere replacement fuse. 5
-
 1
1 -
2
-
3
-
 4
4 -
 5
5 -
 6
6 -
 7
7 -
 8
8 -
 9
9 -
 10
10 -
 11
11 -
 12
12 -
 13
13 -
 14
14 -
15
-
16
-
17
-
18
-
19
-
20
-
21
-
22
-
23
 |
 |