Vantec NST-360U2-BK User Guide - Page 8
Installation
 |
View all Vantec NST-360U2-BK manuals
Add to My Manuals
Save this manual to your list of manuals |
Page 8 highlights
5. Installation: NexStar 3 External 3.5" HDD Enclosure: 5.1. Hardware Installation: Preparing the hard drive: 1) Set the hard drive jumpers to MASTER or SINGLE DRIVE ONLY. Please refer to the documentation included with your hard drive for information on how to accomplish this. Preparing the NexStar 3: 1) Remove the side of the NexStar 3 with the power and USB connection ports. If it has previously been screwed in place, remove the screws first. 2) Carefully slide out the side approximately 3 inches. 3) Unplug the red and white cable for the LED. 4) Slide out the rest of the side. Installing the hard drive in the NexStar 3: 1) Connect the IDE or SATA cable and power cable to the hard drive as pictured below. Installation
-
 1
1 -
2
-
 3
3 -
 4
4 -
 5
5 -
 6
6 -
 7
7 -
 8
8 -
 9
9 -
 10
10 -
 11
11 -
 12
12 -
 13
13 -
14
-
15
-
16
-
17
-
18
-
19
-
20
-
21
-
22
-
23
 |
 |
Installation
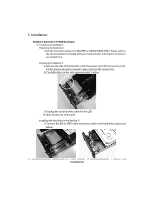
5. Installation:
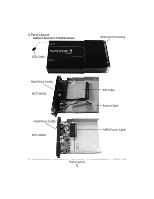
NexStar 3 External 3.5” HDD Enclosure:
5.1. Hardware Installation:
Preparing the hard drive:
1) Set the hard drive jumpers to MASTER or SINGLE DRIVE ONLY.
Please refer to
the documentation included with your hard drive for information on how to
accomplish this.
Preparing the NexStar 3:
1) Remove the side of the NexStar 3 with the power and USB connection ports.
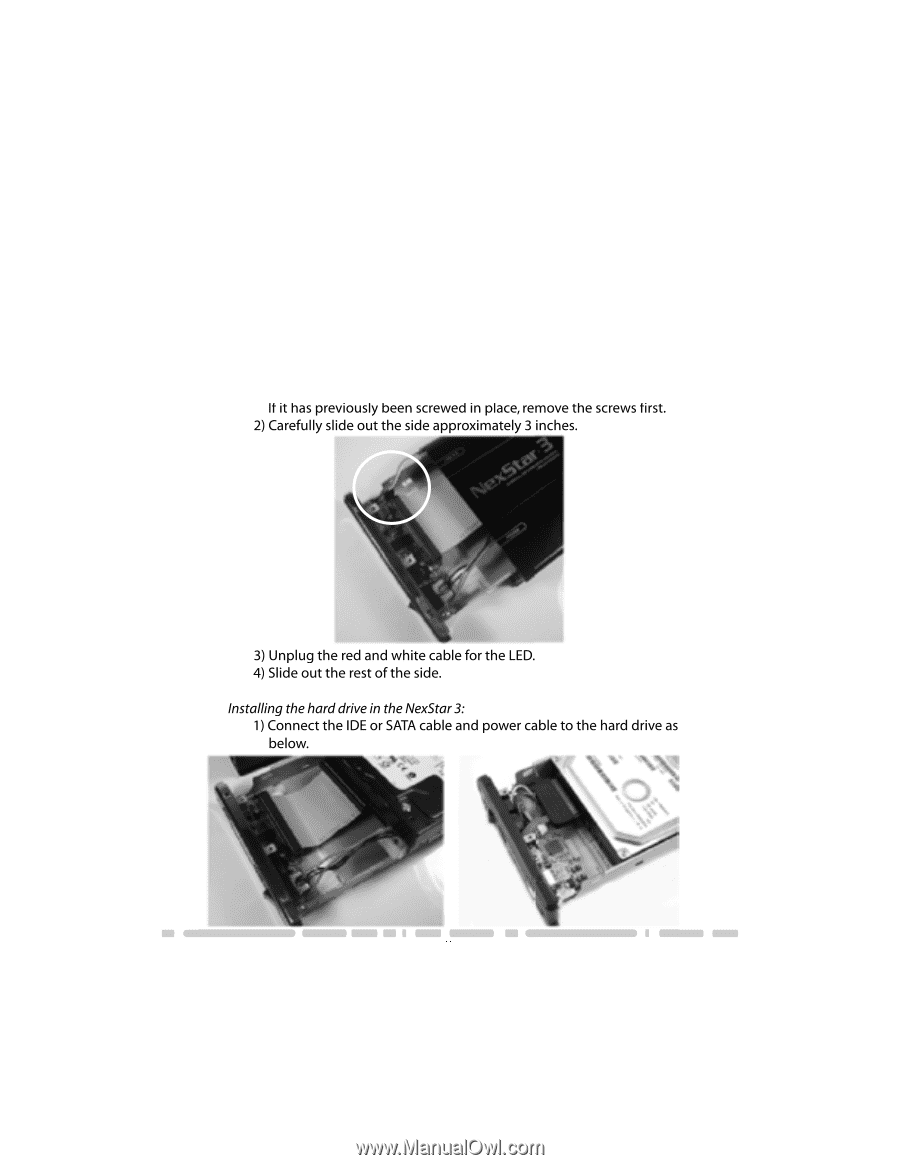
If it has previously been screwed in place, remove the screws first.
2) Carefully slide out the side approximately 3 inches.
3) Unplug the red and white cable for the LED.
4) Slide out the rest of the side.
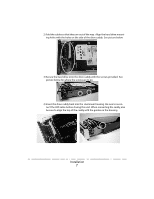
Installing the hard drive in the NexStar 3:
1) Connect the IDE or SATA cable and power cable to the hard drive as pictured
below.