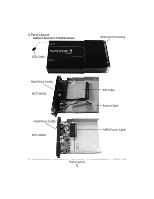
Vantec NST-360U2-BK User Guide - Page 9
aluminum housing.
 |
View all Vantec NST-360U2-BK manuals
Add to My Manuals
Save this manual to your list of manuals |
Page 9 highlights
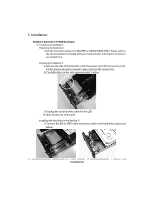
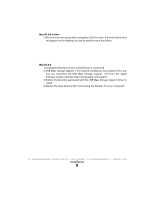
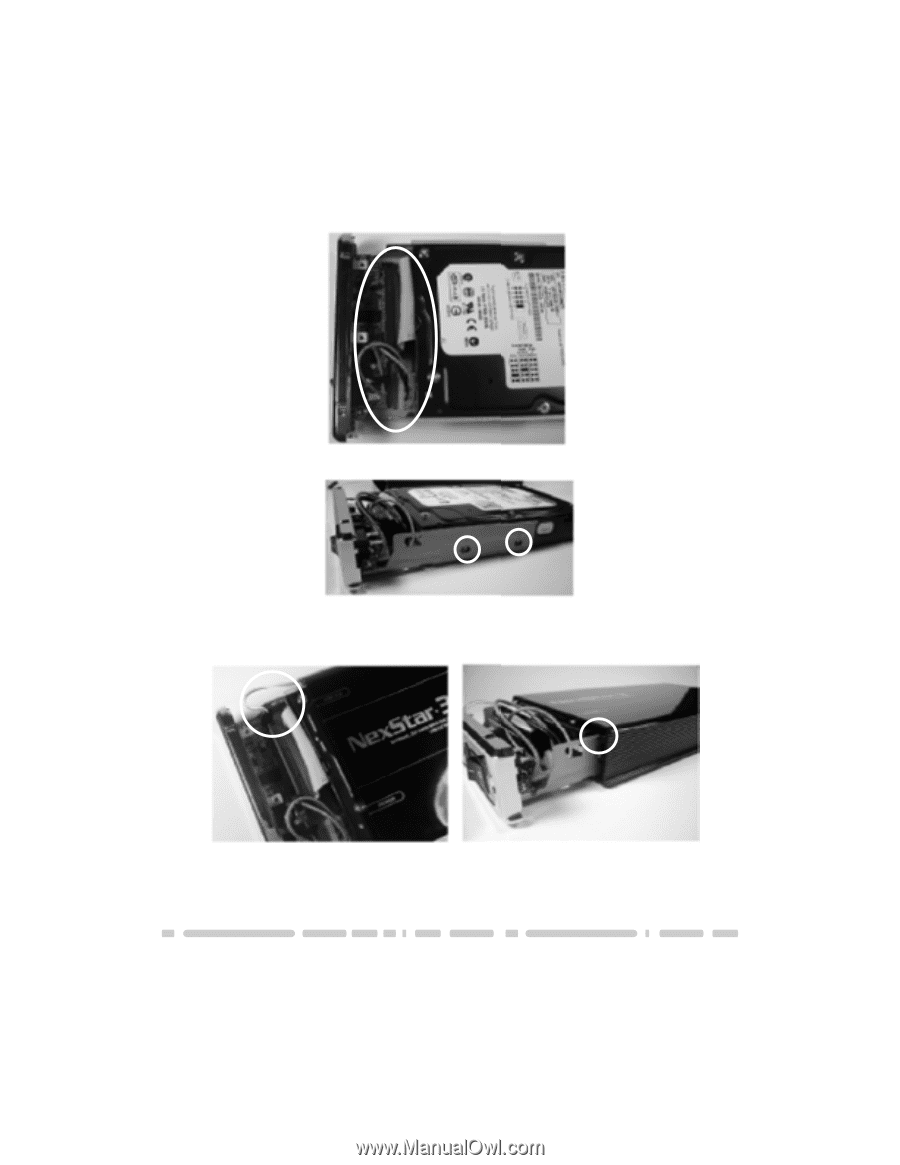
2) Fold the cables so that they are out of the way. Align the hard drive mounting holes with the holes on the side of the drive caddy. See picture below. 3) Secure the hard drive onto the drive caddy with the screws provided. See picture below for where the screws are to go. 4) Insert the drive caddy back into the aluminum housing. Be sure to reconnect the LED cable before closing the unit. When reinserting the caddy, also be sure to align the top of the caddy with the guides on the housing. Installation 7
-
 1
1 -
2
-
3
-
 4
4 -
 5
5 -
 6
6 -
 7
7 -
 8
8 -
 9
9 -
 10
10 -
 11
11 -
 12
12 -
 13
13 -
 14
14 -
15
-
16
-
17
-
18
-
19
-
20
-
21
-
22
-
23
 |
 |
Installation
7
2) Fold the cables so that they are out of the way.
Align the hard drive mount-
ing holes with the holes on the side of the drive caddy.
See picture below.
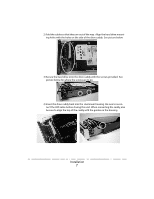
3) Secure the hard drive onto the drive caddy with the screws provided.
See
picture below for where the screws are to go.
4) Insert the drive caddy back into the
aluminum housing.
Be sure to recon-
nect the LED cable before closing the unit.
When reinserting the caddy, also
be sure to align the top of the caddy with the guides on the housing.