Vantec NST-400MX-S3R User Guide - Page 8
Installation - hardware raid
 |
View all Vantec NST-400MX-S3R manuals
Add to My Manuals
Save this manual to your list of manuals |
Page 8 highlights
5.Installation: Dual 3.5" RAID Enclosure w/Fan USB 3.0 & eSATA Interface 5.1.Hardware Installation: Installing the hard drive: (1) Release the four screws then pull out the rear panel and tray of the NexStar MX. ( figure 5.1-A ) (2) Place the first HDD onto the drive caddy then insert the HDD into the SATA connector. ( figure 5.1-B ) ( figure 5.1-A ) (3) Place the second HDD onto the drive caddy then insert the HDD into the SATA connector. ( figure 5.1-C ) ( figure 5.1-B ) ( figure 5.1-C ) Installation 6
-
 1
1 -
2
-
 3
3 -
 4
4 -
 5
5 -
 6
6 -
 7
7 -
 8
8 -
 9
9 -
 10
10 -
 11
11 -
 12
12 -
 13
13 -
14
-
15
-
16
-
17
-
18
-
19
-
20
-
21
-
22
-
23
 |
 |
Installation
6
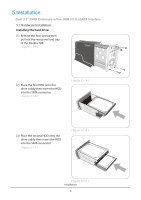
5.Installation:
Dual 3.5” RAID Enclosure w/Fan USB 3.0 & eSATA Interface
5.1.Hardware Installation:
Installing the hard drive:
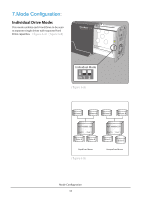
(1)
Release the four screws then
pull out the rear panel and tray
of the NexStar MX.
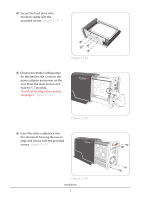
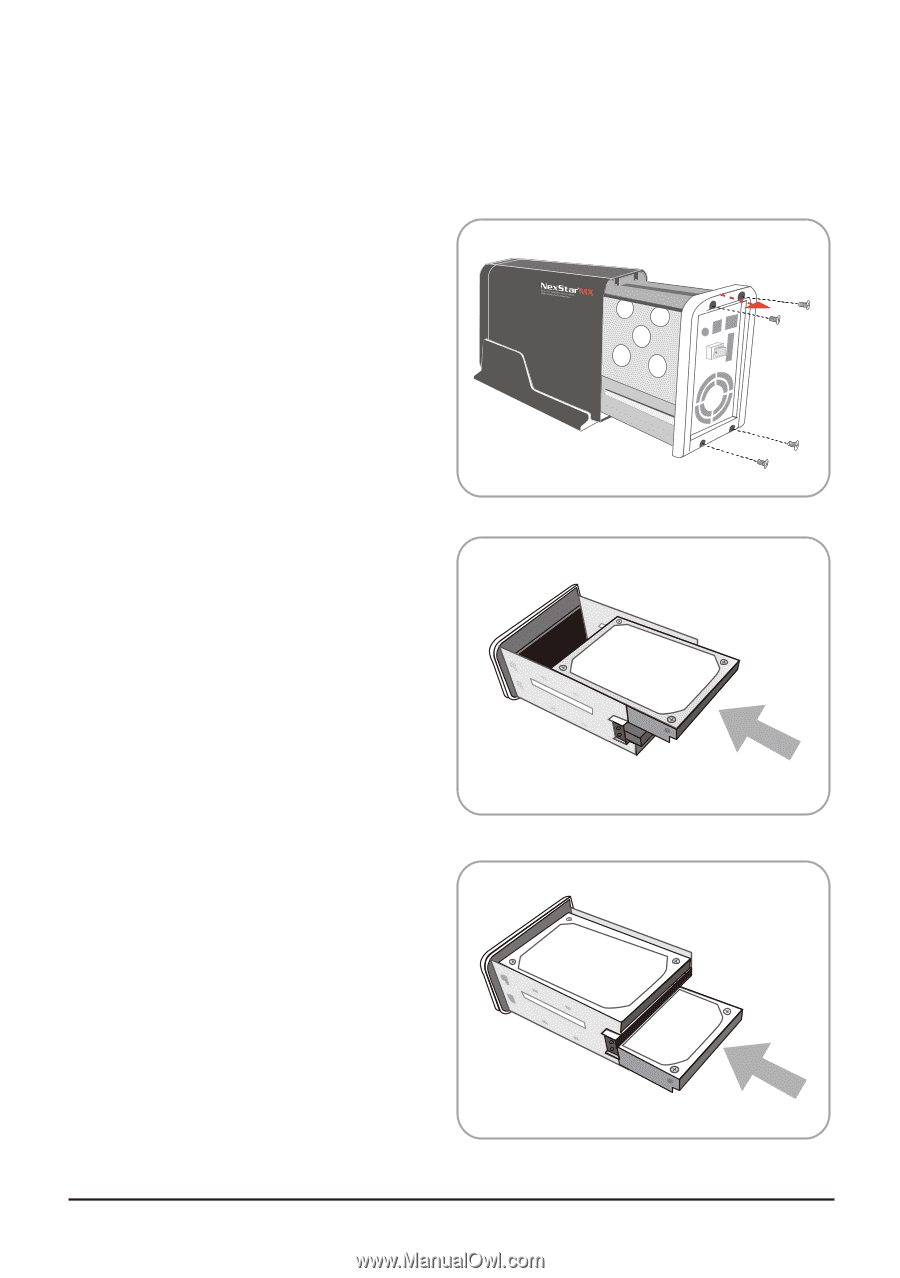
(3)
Place the second HDD onto the
drive caddy then insert the HDD
into the SATA connector.
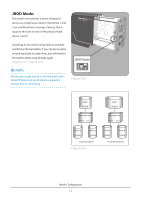
(2)
Place the first HDD onto the
drive caddy then insert the HDD
into the SATA connector.
( figure 5.1-A )
( figure 5.1-C )
( figure 5.1-B )
( figure 5.1-A )
( figure 5.1-C )
( figure 5.1-B )