ViewSonic PJ658 PJ658 User Guide - Page 25
Using the magnify feature, Correcting the keystone distortions
 |
UPC - 766907222210
View all ViewSonic PJ658 manuals
Add to My Manuals
Save this manual to your list of manuals |
Page 25 highlights
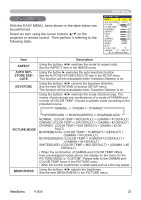
Operating VIDEO RGB SEARCH Correcting the keystone distortions 1. Press the KEYSTONE button on the remote control. A dialog will appear on the screen to aid you in cor recting the distortion. �� 2. Use the cursor buttons ▲/▼ to select AUTO or MANUAL operation, and press the button ► to perform the following. ASPECT AUTO BLANK MAGNIFY ON HOME PAGE UP VOLUME OFF END PAGE DOWN MUTE FREEZE MY BUTTON KEYSTONE 1 2 POSITION MENU 1) AUTO executes automatic vertical keystone correction. 2) MANUAL displays a dialog for vertical keystone correction. Use the buttons ▲/▼ for adjustment. ESC ENTER RESET To close the dialog and complete this operation, press the KEYSTONE button again. Even if you don't do anything, the dialog will automatically disappear after a few seconds. �� ● The adjustable range for correction will vary among inputs. For some input, this function may not work well. ● When V:INVERT or H&V:INVERT is selected to the MIRROR item in the SETUP menu, if the projector screen is inclined or angled downward, the Auto Keystone function may not work correctly. ● When the zoom adjustment is set to the TELE (telephoto focus), this correction may be excessive. This function should be used when the zoom adjustment is set to the WIDE (wide-angle focus) whenever possible. ● When vertical degree is almost 0 degree, the automatic keystone distortion cor- rection may not work. ● When vertical degree is almost ±30 degree, the automatic keystone distortion correction may not work well. ● This function wil be unavailable when Transition Detector is on. Using the magnify feature 1. Press the ON button of MAGNIFY on the remote control. The "MAGNIFY" indication will appear on the screen (al- VIDEO RGB SEARCH ASPECT AUTO BLANK though the indication will disappear in several seconds with no MAGNIFY ON HOME PAGE UP VOLUME operation), and the projector will enter the MAGNIFY mode. OFF END PAGE DOWN MUTE 2. Use the cursor buttons ▲/▼ to adjust the zoom level. FREEZE MY BUTTON KEYSTONE 1 2 To move the zoom area, press the POSITION button in the MAGNIFY mode, then use the cursor buttons to move the area. And to finalize POSITION theMENU zoom area, press the POSITION button again. ENTER To exit the MAGNIFY mode and restore the screen to normal, press the OFF button of MAGNIFY on the remote control. ESC RESET ● The projector automatically exits the MAGNIFY mode when the input signal is changed, or when the display condition is changed. ● Although in the MAGNIFY mode, the keystone distortion condition may vary, it will be restored when the projector exits the MAGNIFY mode. ViewSonic PJ658 21
-
 1
1 -
2
-
3
-
4
-
5
-
6
-
7
-
8
-
9
-
10
-
11
-
12
-
13
-
14
-
15
-
16
-
17
-
18
-
19
-
 20
20 -
 21
21 -
 22
22 -
 23
23 -
 24
24 -
 25
25 -
 26
26 -
 27
27 -
 28
28 -
 29
29 -
 30
30 -
31
-
32
-
33
-
34
-
35
-
36
-
37
-
38
-
39
-
40
-
41
-
42
-
43
-
44
-
45
-
46
-
47
-
48
-
49
-
50
-
51
-
52
-
53
-
54
-
55
-
56
-
57
-
58
-
59
-
60
-
61
-
62
-
63
-
64
-
65
-
66
-
67
-
68
-
69
 |
 |
