ViewSonic PX747-4K PX727-4K User Guide English - Page 26
Auto-adjusting the image, Fine-tuning the image clarity, Selecting the aspect ratio
 |
View all ViewSonic PX747-4K manuals
Add to My Manuals
Save this manual to your list of manuals |
Page 26 highlights
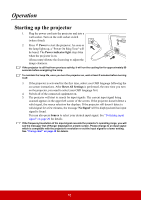
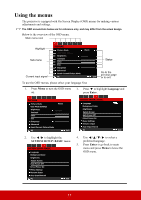
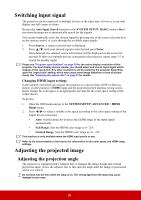
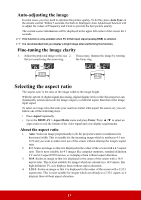
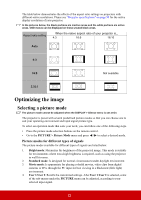
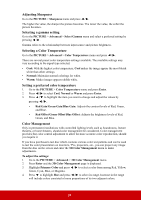
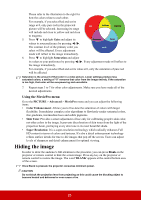
Auto-adjusting the image In some cases, you may need to optimize the picture quality. To do this, press Auto Sync on the remote control. Within 5 seconds, the built-in Intelligent Auto Adjustment function will re-adjust the values of Frequency and Clock to provide the best picture quality. The current source information will be displayed in the upper left corner of the screen for 3 seconds. This function is only available when PC D-Sub input signal (analog RGB) is selected. It is recommended that you display a bright image when performing this function. Fine-tuning the image clarity 1. Adjust the projected image to the size 2. If necessary, sharpen the image by rotating that you need using the zoom ring. the focus ring. Selecting the aspect ratio The 'aspect ratio' is the ratio of the image width to the image height. With the advent of digital signal processing, digital display devices like this projector can dynamically stretch and scale the image output to a different aspect than that of the image input signal. To select an image ratio that suits your need (no matter what aspect the source is), you can follow one of the following steps. • Press Aspect repeatedly. • Go to the DISPLAY > Aspect Ratio menu and press Enter. Press / to select an aspect ratio to suit the format of the video signal and your display requirements. About the aspect ratio 1. Auto: Scales an image proportionally to fit the projector's native resolution in its horizontal width. This is suitable for the incoming image which is neither in 4:3 nor 16:9 and you want to make most use of the screen without altering the image's aspect ratio. 2. 4:3: Scales an image so that it is displayed in the center of the screen with a 4:3 aspect ratio. This is most suitable for 4:3 images like computer monitors, standard definition TV and 4:3 aspect DVD movies, as it displays them without aspect alteration. 3. 16:9: Scales an image so that it is displayed in the center of the screen with a 16:9 aspect ratio. This is most suitable for images which are already in a 16:9 aspect, like high definition TV, as it displays them without aspect alteration. 4. 2.35:1: Scales an image so that it is displayed in the center of the screen with a 2.35:1 aspect ratio. This is most suitable for images which are already in a 2.35:1 aspect, as it displays them without aspect alteration. 21
-
 1
1 -
2
-
3
-
4
-
5
-
6
-
7
-
8
-
9
-
10
-
11
-
12
-
13
-
14
-
15
-
16
-
17
-
18
-
19
-
20
-
 21
21 -
 22
22 -
 23
23 -
 24
24 -
 25
25 -
 26
26 -
 27
27 -
 28
28 -
 29
29 -
 30
30 -
 31
31 -
32
-
33
-
34
-
35
-
36
-
37
-
38
-
39
-
40
-
41
-
42
-
43
-
44
-
45
-
46
-
47
-
48
-
49
-
50
-
51
-
52
-
53
-
54
-
55
-
56
-
57
-
58
-
59
-
60
-
61
-
62
 |
 |
