ViewSonic PX747-4K PX727-4K User Guide English - Page 27
Optimizing the image, Selecting a picture mode
 |
View all ViewSonic PX747-4K manuals
Add to My Manuals
Save this manual to your list of manuals |
Page 27 highlights
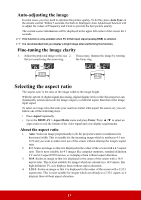
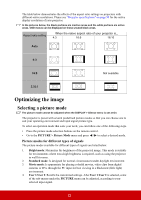
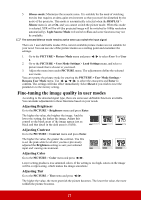
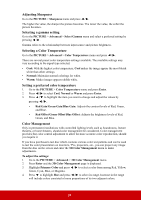
The table below demonstrates the effects of the aspect ratio settings on projectors with different native resolutions. Please see "Projector specifications" on page 50 for the native display resolution of your projector. In the pictures below, the black portions are inactive areas and the white portions are active areas. OSD menus can be displayed on those unused black areas. Aspect ratio setting When the native aspect ratio of your projector is... 4:3 16:9 16:10 Auto 4:3 16:9 Not available 2.35:1 Optimizing the image Selecting a picture mode The picture mode cannot be adjusted when the DISPLAY > Silence menu is set at On. The projector is preset with several predefined picture modes so that you can choose one to suit your operating environment and input signal picture type. To select an operation mode that suits your need, you can follow one of the following steps. • Press the picture mode selection buttons on the remote control. • Go to the PICTURE > Picture Mode menu and press / to select a desired mode. Picture modes for different types of signals The picture modes available for different types of signals are listed below. 1. Bright mode: Maximizes the brightness of the projected image. This mode is suitable for environments where extra-high brightness is required, such as using the projector in well lit rooms. 2. Standard mode: Is designed for normal circumstances under daylight environment. 3. Movie mode: Is appropriate for playing colorful movies, video clips from digital cameras or DVs through the PC input for best viewing in a blackened (little light) environment. 4. User 1/User 2: Recalls the customized settings. After User 1/User 2 is selected, some of the sub-menus under the PICTURE menu can be adjusted, according to your selected input signal. 22
-
 1
1 -
2
-
3
-
4
-
5
-
6
-
7
-
8
-
9
-
10
-
11
-
12
-
13
-
14
-
15
-
16
-
17
-
18
-
19
-
20
-
21
-
 22
22 -
 23
23 -
 24
24 -
 25
25 -
 26
26 -
 27
27 -
 28
28 -
 29
29 -
 30
30 -
 31
31 -
 32
32 -
33
-
34
-
35
-
36
-
37
-
38
-
39
-
40
-
41
-
42
-
43
-
44
-
45
-
46
-
47
-
48
-
49
-
50
-
51
-
52
-
53
-
54
-
55
-
56
-
57
-
58
-
59
-
60
-
61
-
62
 |
 |
