ViewSonic PX747-4K PX727-4K User Guide English - Page 30
Hiding the image
 |
View all ViewSonic PX747-4K manuals
Add to My Manuals
Save this manual to your list of manuals |
Page 30 highlights
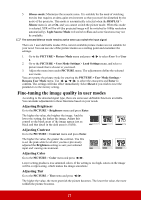
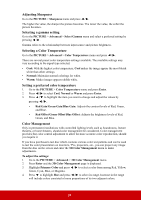
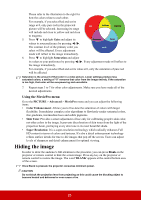
Please refer to the illustration to the right for how the colors relate to each other. For example, if you select Red and set its range at 0, only pure red in the projected RED Yellow GREEN picture will be selected. Increasing its range will include red close to yellow and red close to magenta. 5. Press to highlight Gain and adjust its Magenta Cyan values to your preference by pressing / . The contrast level of the primary color you BLUE select will be affected. Every adjustment made will reflect to the image immediately. 6. Press to highlight Saturation and adjust its values to your preference by pressing / . Every adjustment made will reflect to the image immediately. For example, if you select Red and set its value at 0, only the saturation of pure red will be affected. Saturation is the amount of that color in a video picture. Lower settings produce less saturated colors; a setting of "0" removes that color from the image entirely. If the saturation is too high, that color will be overpowering and unrealistic. 7. Repeat steps 3 to 7 for other color adjustments. Make sure you have made all of the desired adjustments. Using the MoviePro menu Go to the PICTURE > Advanced > MoviePro menu and you can adjust the following items. • Color Enhancement: Allows you to fine-tune the saturation of colors with larger flexibility. It modulates complex color algorithms to flawlessly render saturated colors, fine gradients, intermediate hues and subtle pigments. • Skin Tone: Provides a smart adjustment of hue only for calibrating people's skin color, not other colors in the image. It prevents discoloration of skin tones from the light of the projection beam, portraying every skin tone in its most beautiful shade. • Super Resolution: It is a super-resolution technology which radically enhances Full HD content in terms of colors and textures. It's also a detail enhancement technology refines surface details for true-to-life images that pop off the screen. Users can adjust levels of sharpness and detail enhancement for optimal viewing. Hiding the image In order to draw the audience's full attention to the presenter, you can press Blank on the projector or remote control to hide the screen image. Press any key on the projector or remote control to restore the image. The word 'BLANK' appears at the central bottom area of the screen. Once Blank is pressed, the projector consumes minimum power. CAUTION Do not block the projection lens from projecting as this could cause the blocking object to become heated and deformed or even cause a fire. 25
-
 1
1 -
2
-
3
-
4
-
5
-
6
-
7
-
8
-
9
-
10
-
11
-
12
-
13
-
14
-
15
-
16
-
17
-
18
-
19
-
20
-
21
-
22
-
23
-
24
-
 25
25 -
 26
26 -
 27
27 -
 28
28 -
 29
29 -
 30
30 -
 31
31 -
 32
32 -
 33
33 -
 34
34 -
 35
35 -
36
-
37
-
38
-
39
-
40
-
41
-
42
-
43
-
44
-
45
-
46
-
47
-
48
-
49
-
50
-
51
-
52
-
53
-
54
-
55
-
56
-
57
-
58
-
59
-
60
-
61
-
62
 |
 |
